
If you ever decide to host your own website you’ll immediately get hit with the very steep learning curve of network security and becoming your own system admin. Here is one small part of my self hosted journey: My firewall.
This all started about 6 months ago when my brother text me saying his work had a couple of old servers laying around. He and I are a bit of hardware hoarders when it comes to tools, technology and “Usable” scraps. Before even having a plan on how to get the server from California to Pennsylvania I became incredibly excited at the idea of having my own server in my apartment. I quickly bought this website name and set up an email hosting service, later I’ll create a post dedicated to the website itself. After buying the domain and creating this website I quickly discovered that its dangerous self hosting a website. Every day Kari got multiple notification from Xfinity that malicious addresses were trying to reach our network, and that they had blocked them. It was nice that Xfinity blocked some amount but I wasn’t just going to trust them to protect my site. The first thing I did was setup Cloudflare as my DNS registrar. Now when you want to access this site you type in the site name, Cloudflare then gets that request, requests a copy of the site from my server and relays it to your computer. You never directly reach my server, and I have rules in place on my firewall so that the only IP addresses that can access my server are Cloudflare’s. This alone is a significant step forwards but Cloudflare alone isn’t enough, you need to have a firewall on your network.
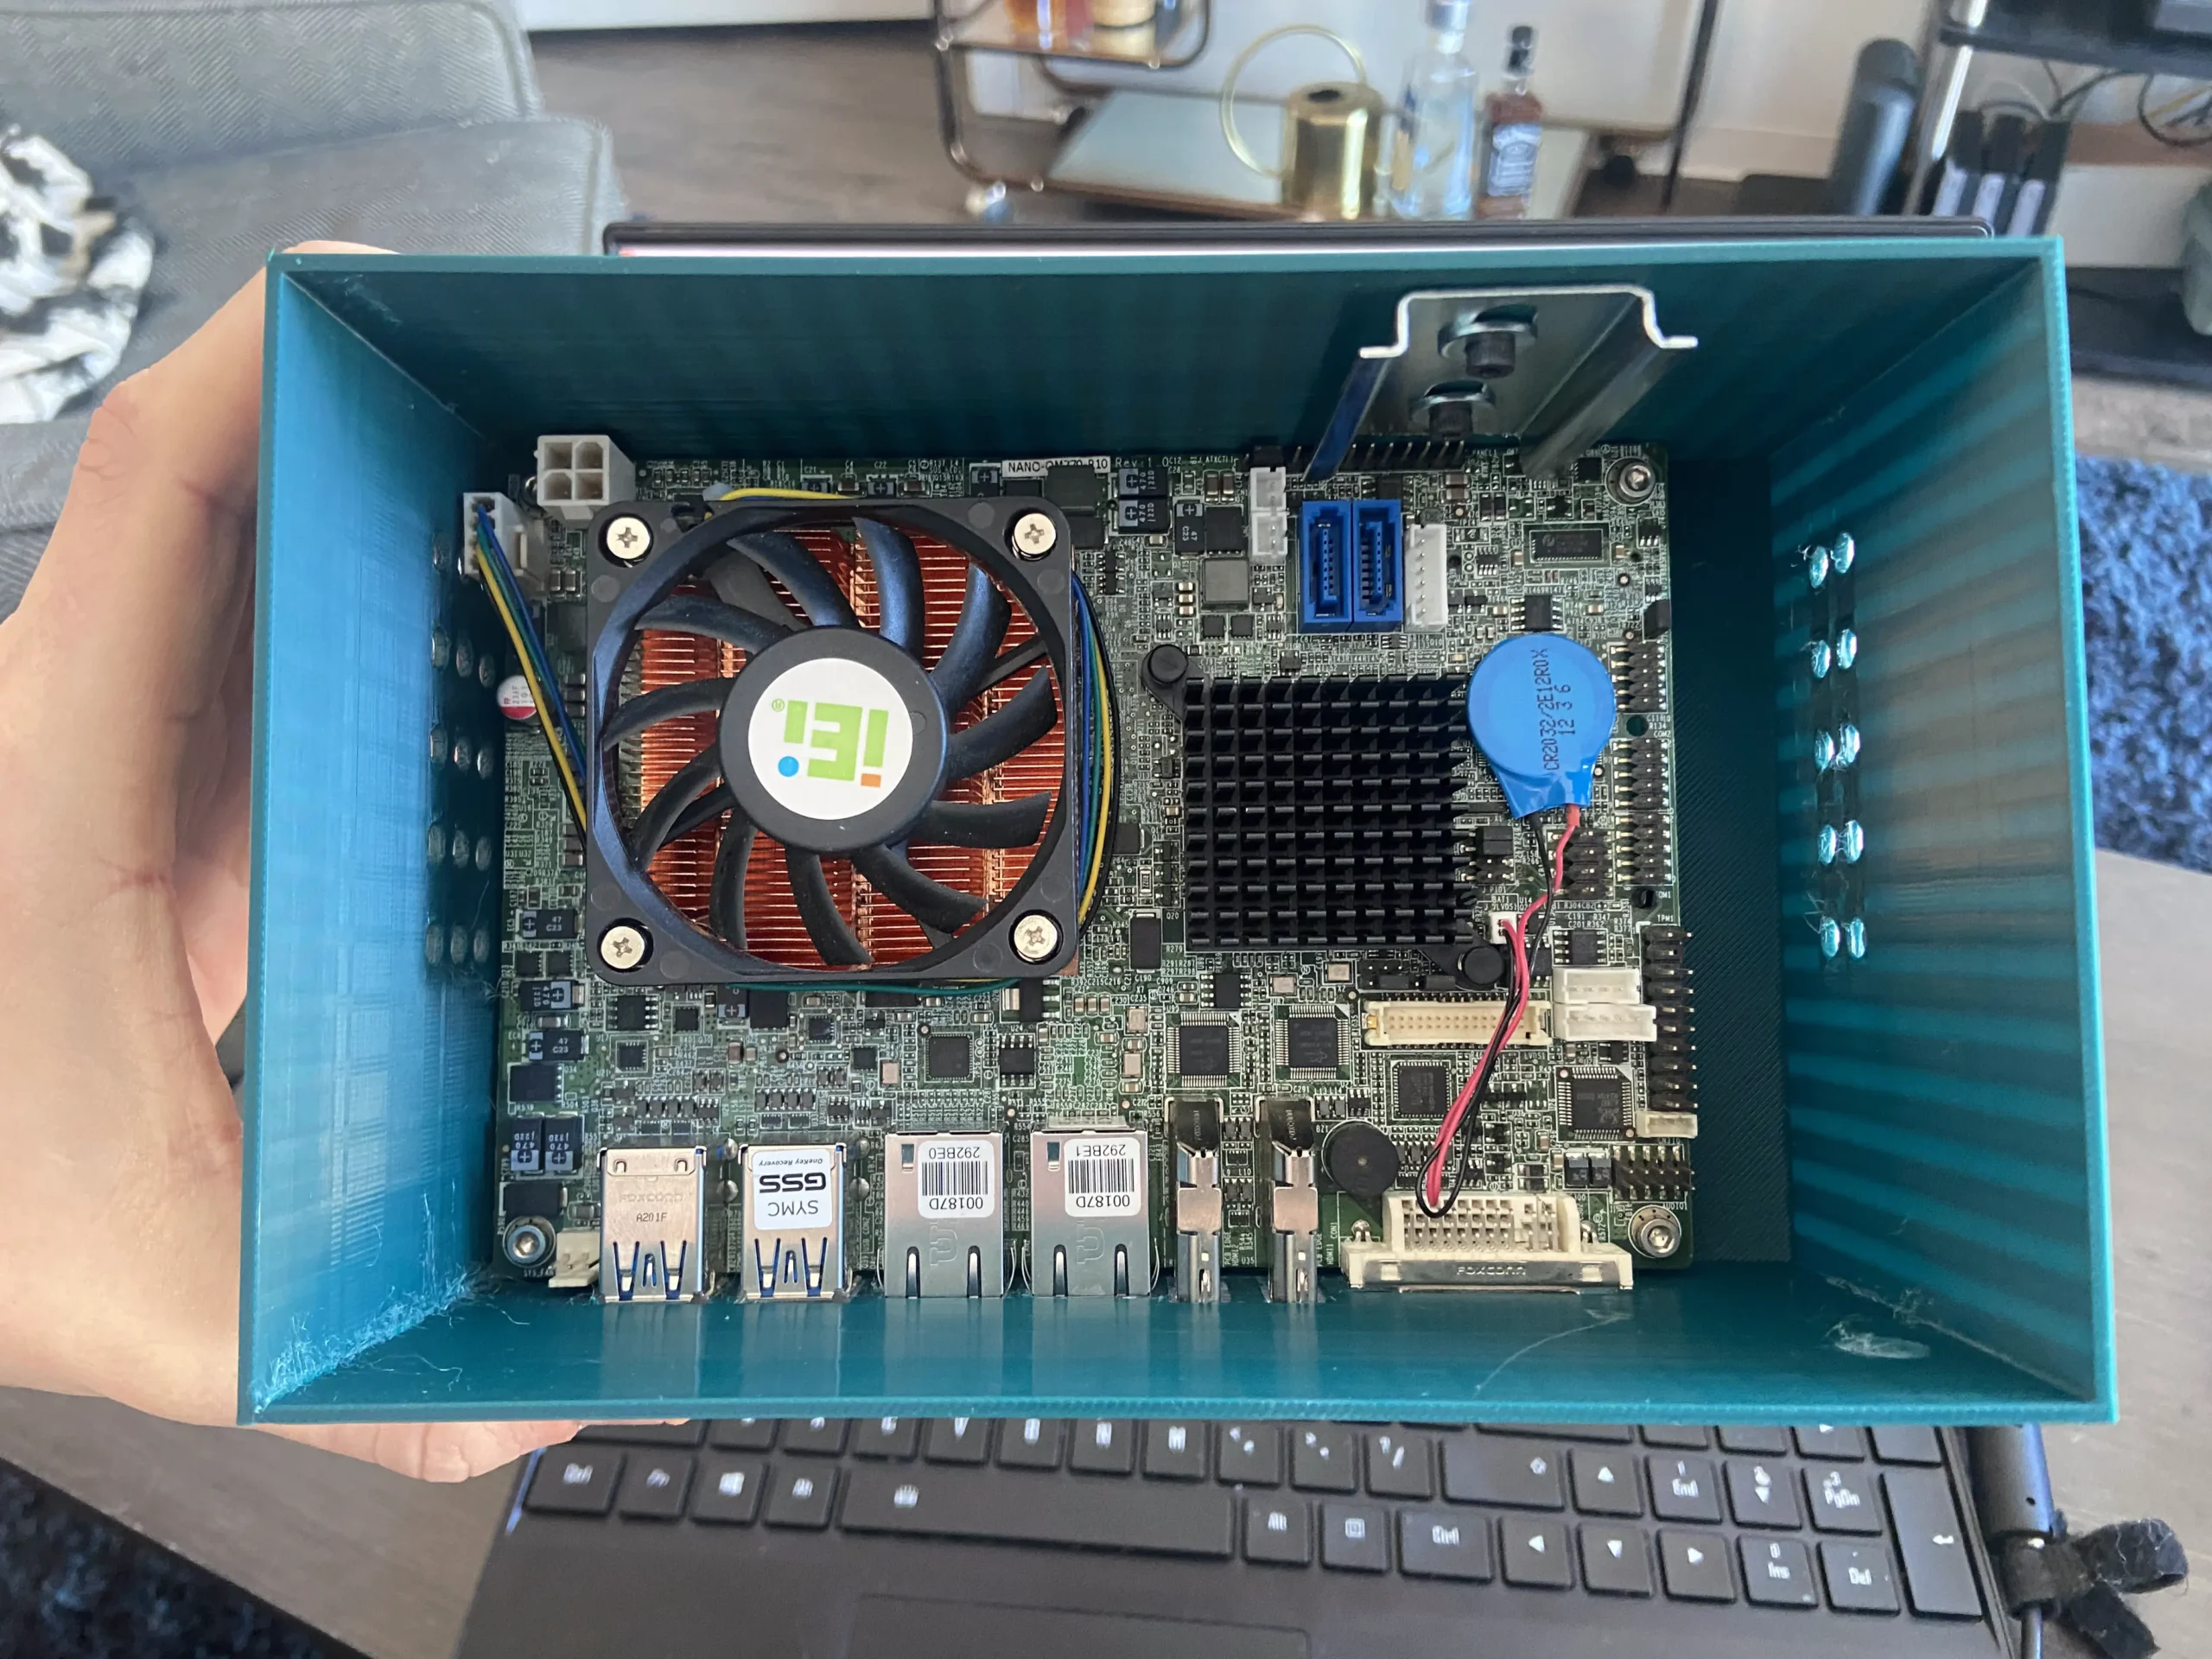
This is where my brother came in handy again(Thanks Chris). From a previous job of his he had this tiny motherboard with an integrated Intel Core i7-3820QM. This is a quad core, eight thread mobile CPO from 2014. It came with 8gb ram and a 1tb ssd. I originally wanted to use it as my NAS server but the 2014 CPU was far too old and due to its size it had far too few ports to connect all my hard drives. Due to its dual ethernet ports I managed to find it a perfect home as my firewall. But the first thing I had to do was make a case and power supply for it.
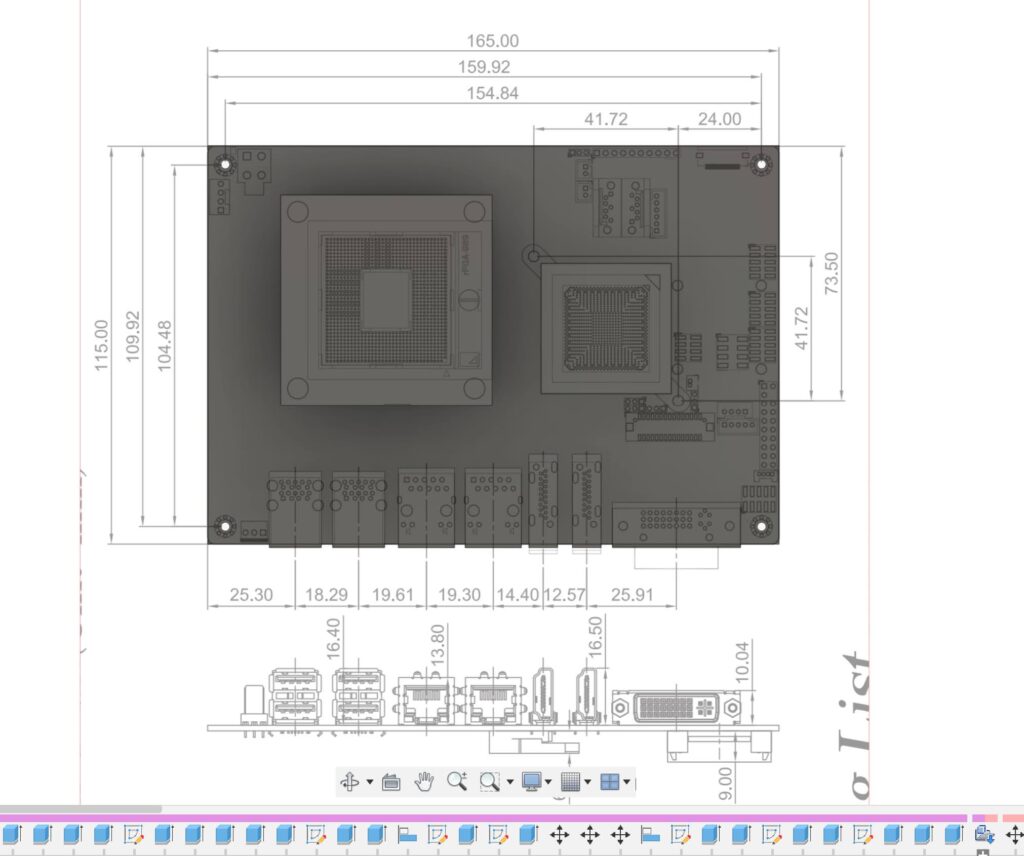
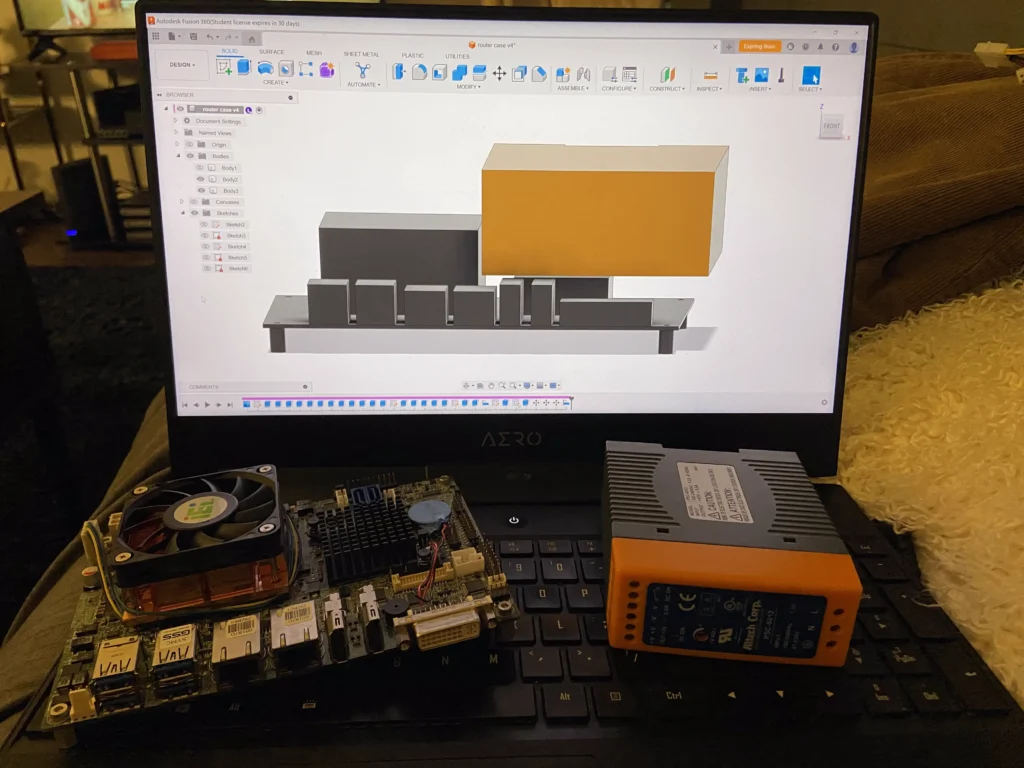
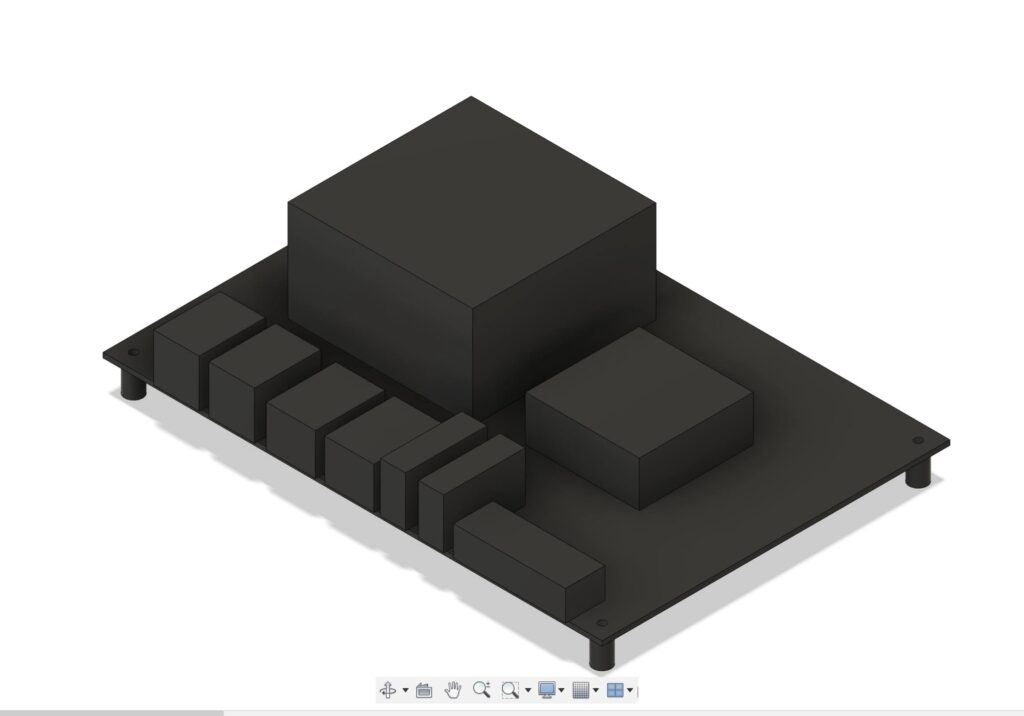
From a service manual for this motherboard I found these schematics and began tracing them in Fusion 360. Very quickly I had a decent sketch of the motherboard, I added my thread on standoffs and extruded each shape leaving me with this.
Now I had to model my power supply. This motherboard only requires 12V power unlike most computers which require 12, 5 and 1.5. This means that I can use almost any off the shelf 12v Power supply. I managed to snag this DIN rail mount power supply out of some old equiptment tester that was in the garbage at my work, and a friend of mine gave me a 2 inch piece of DIN rail. I made a quick and dirty copy of the power supply in Fusion, imported a DIN rail model from McMaster Carr and began figuring out how to fit it all together.
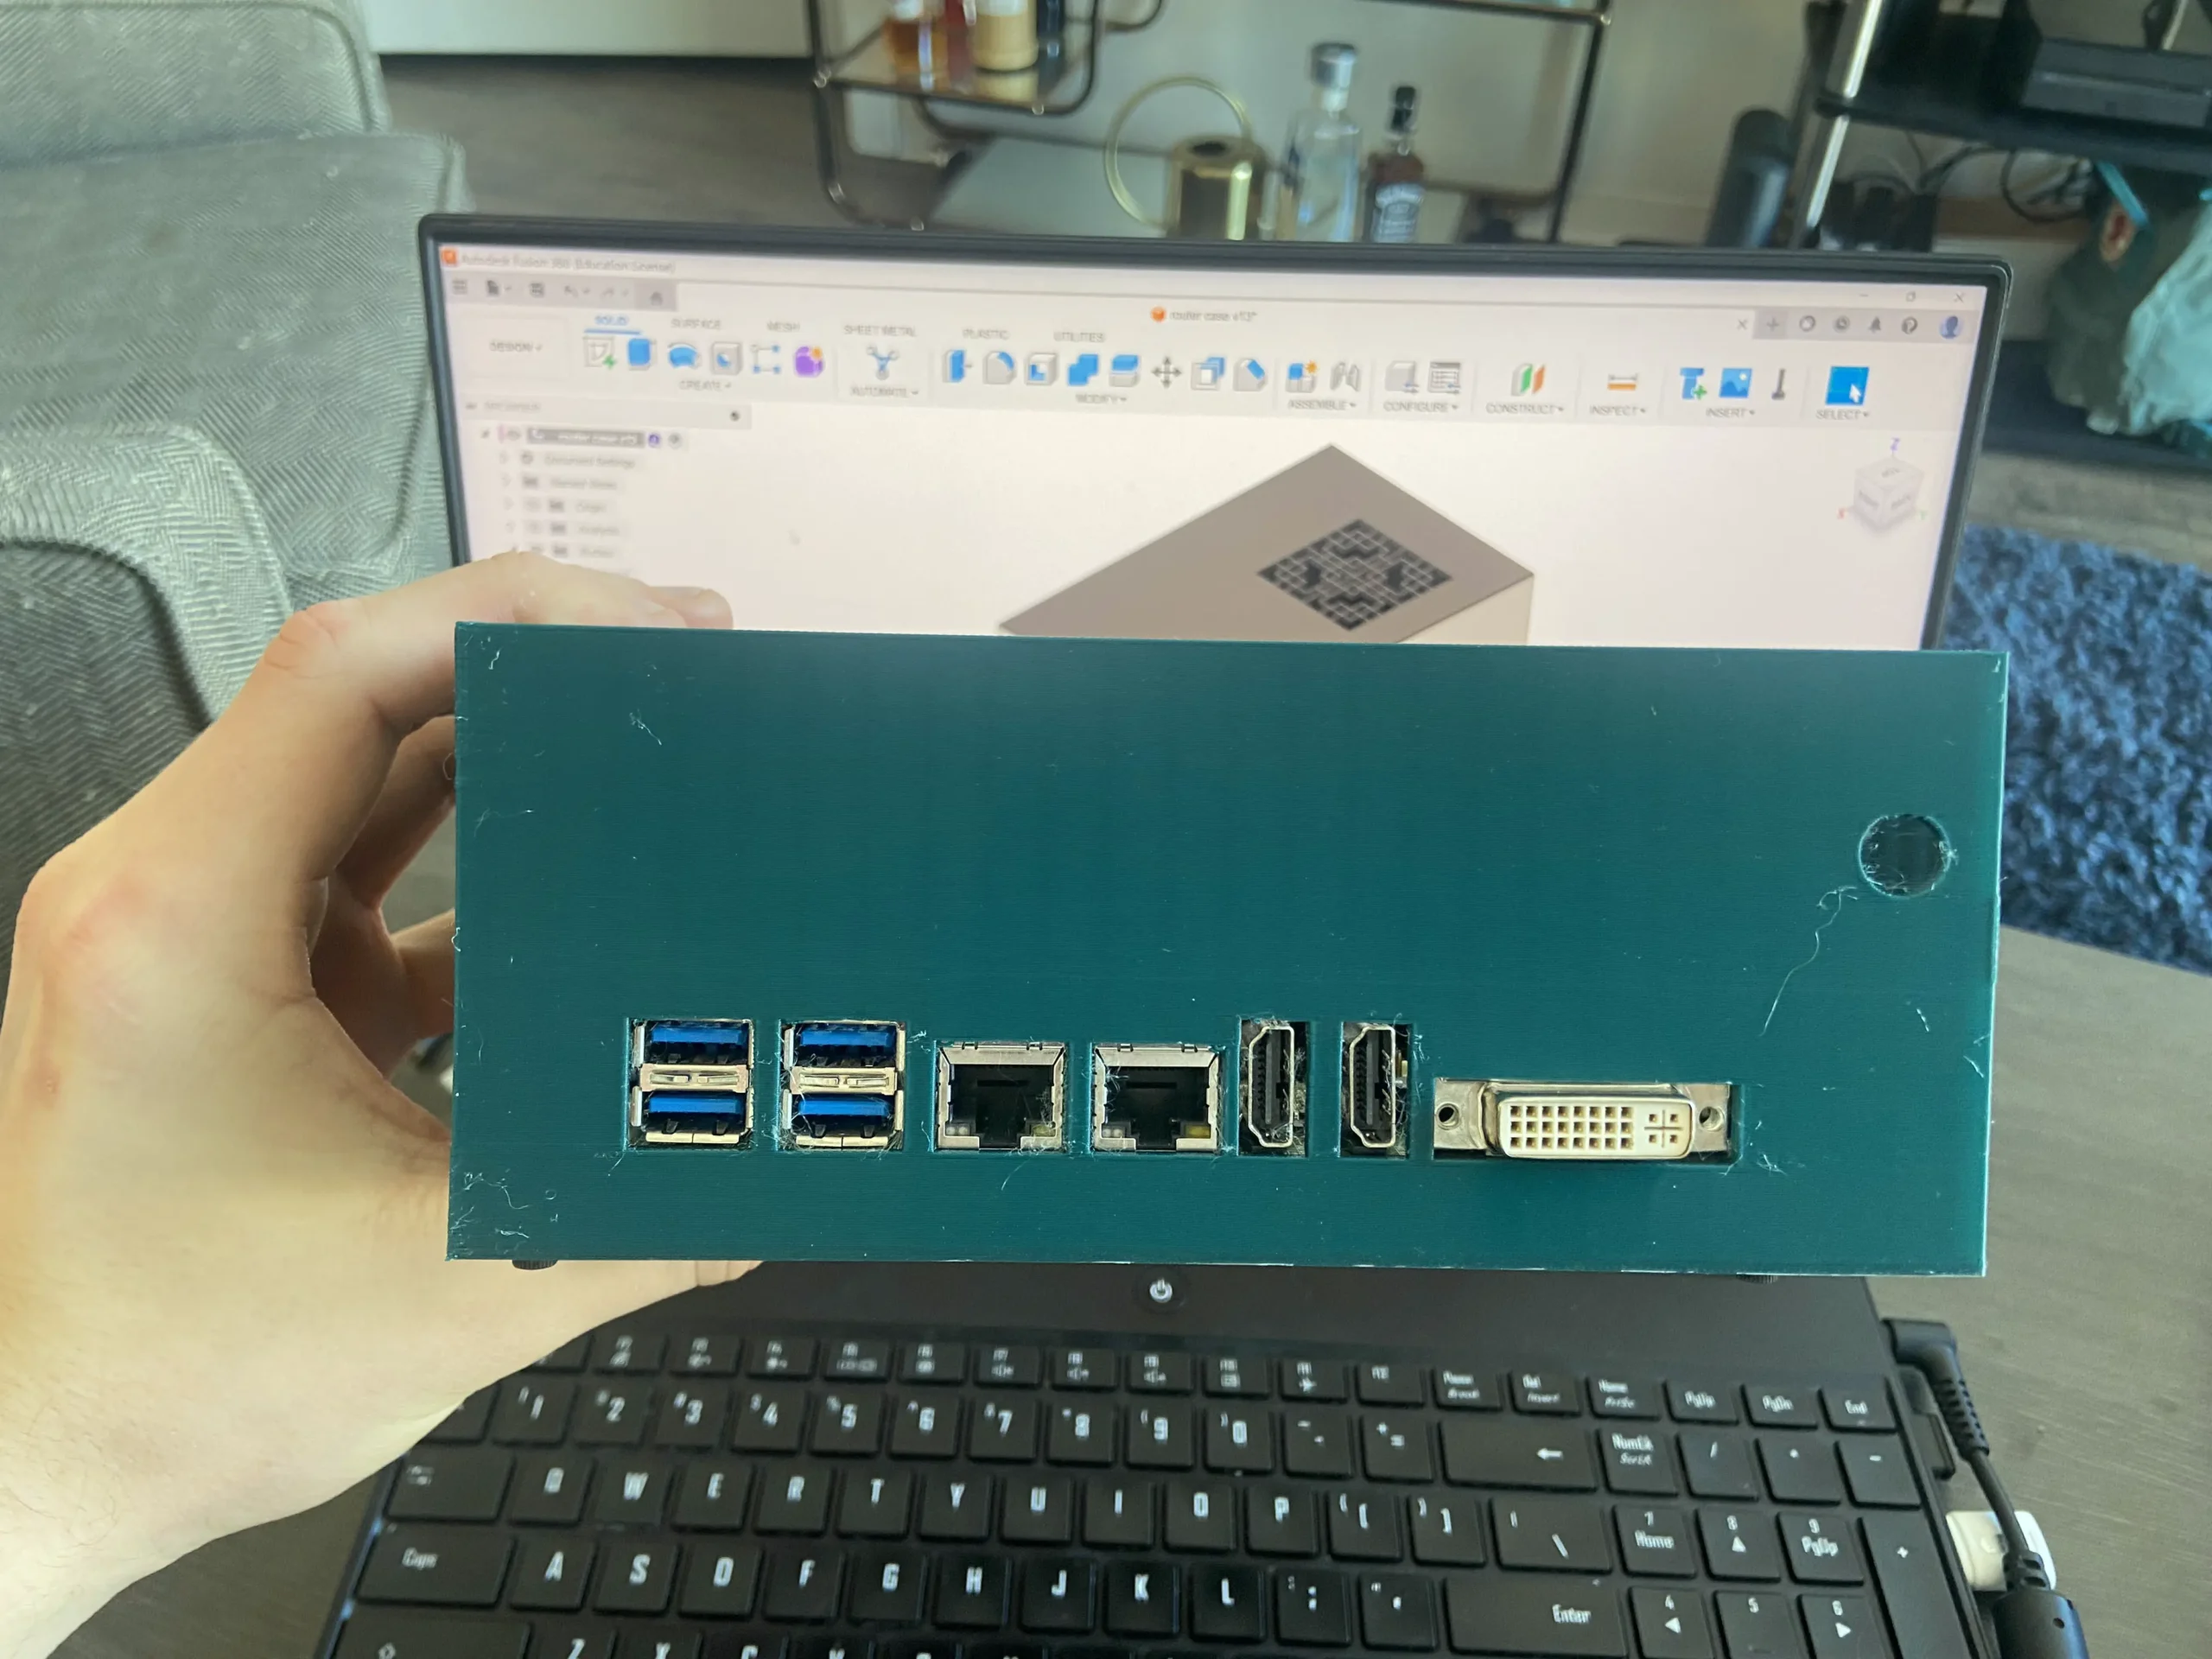
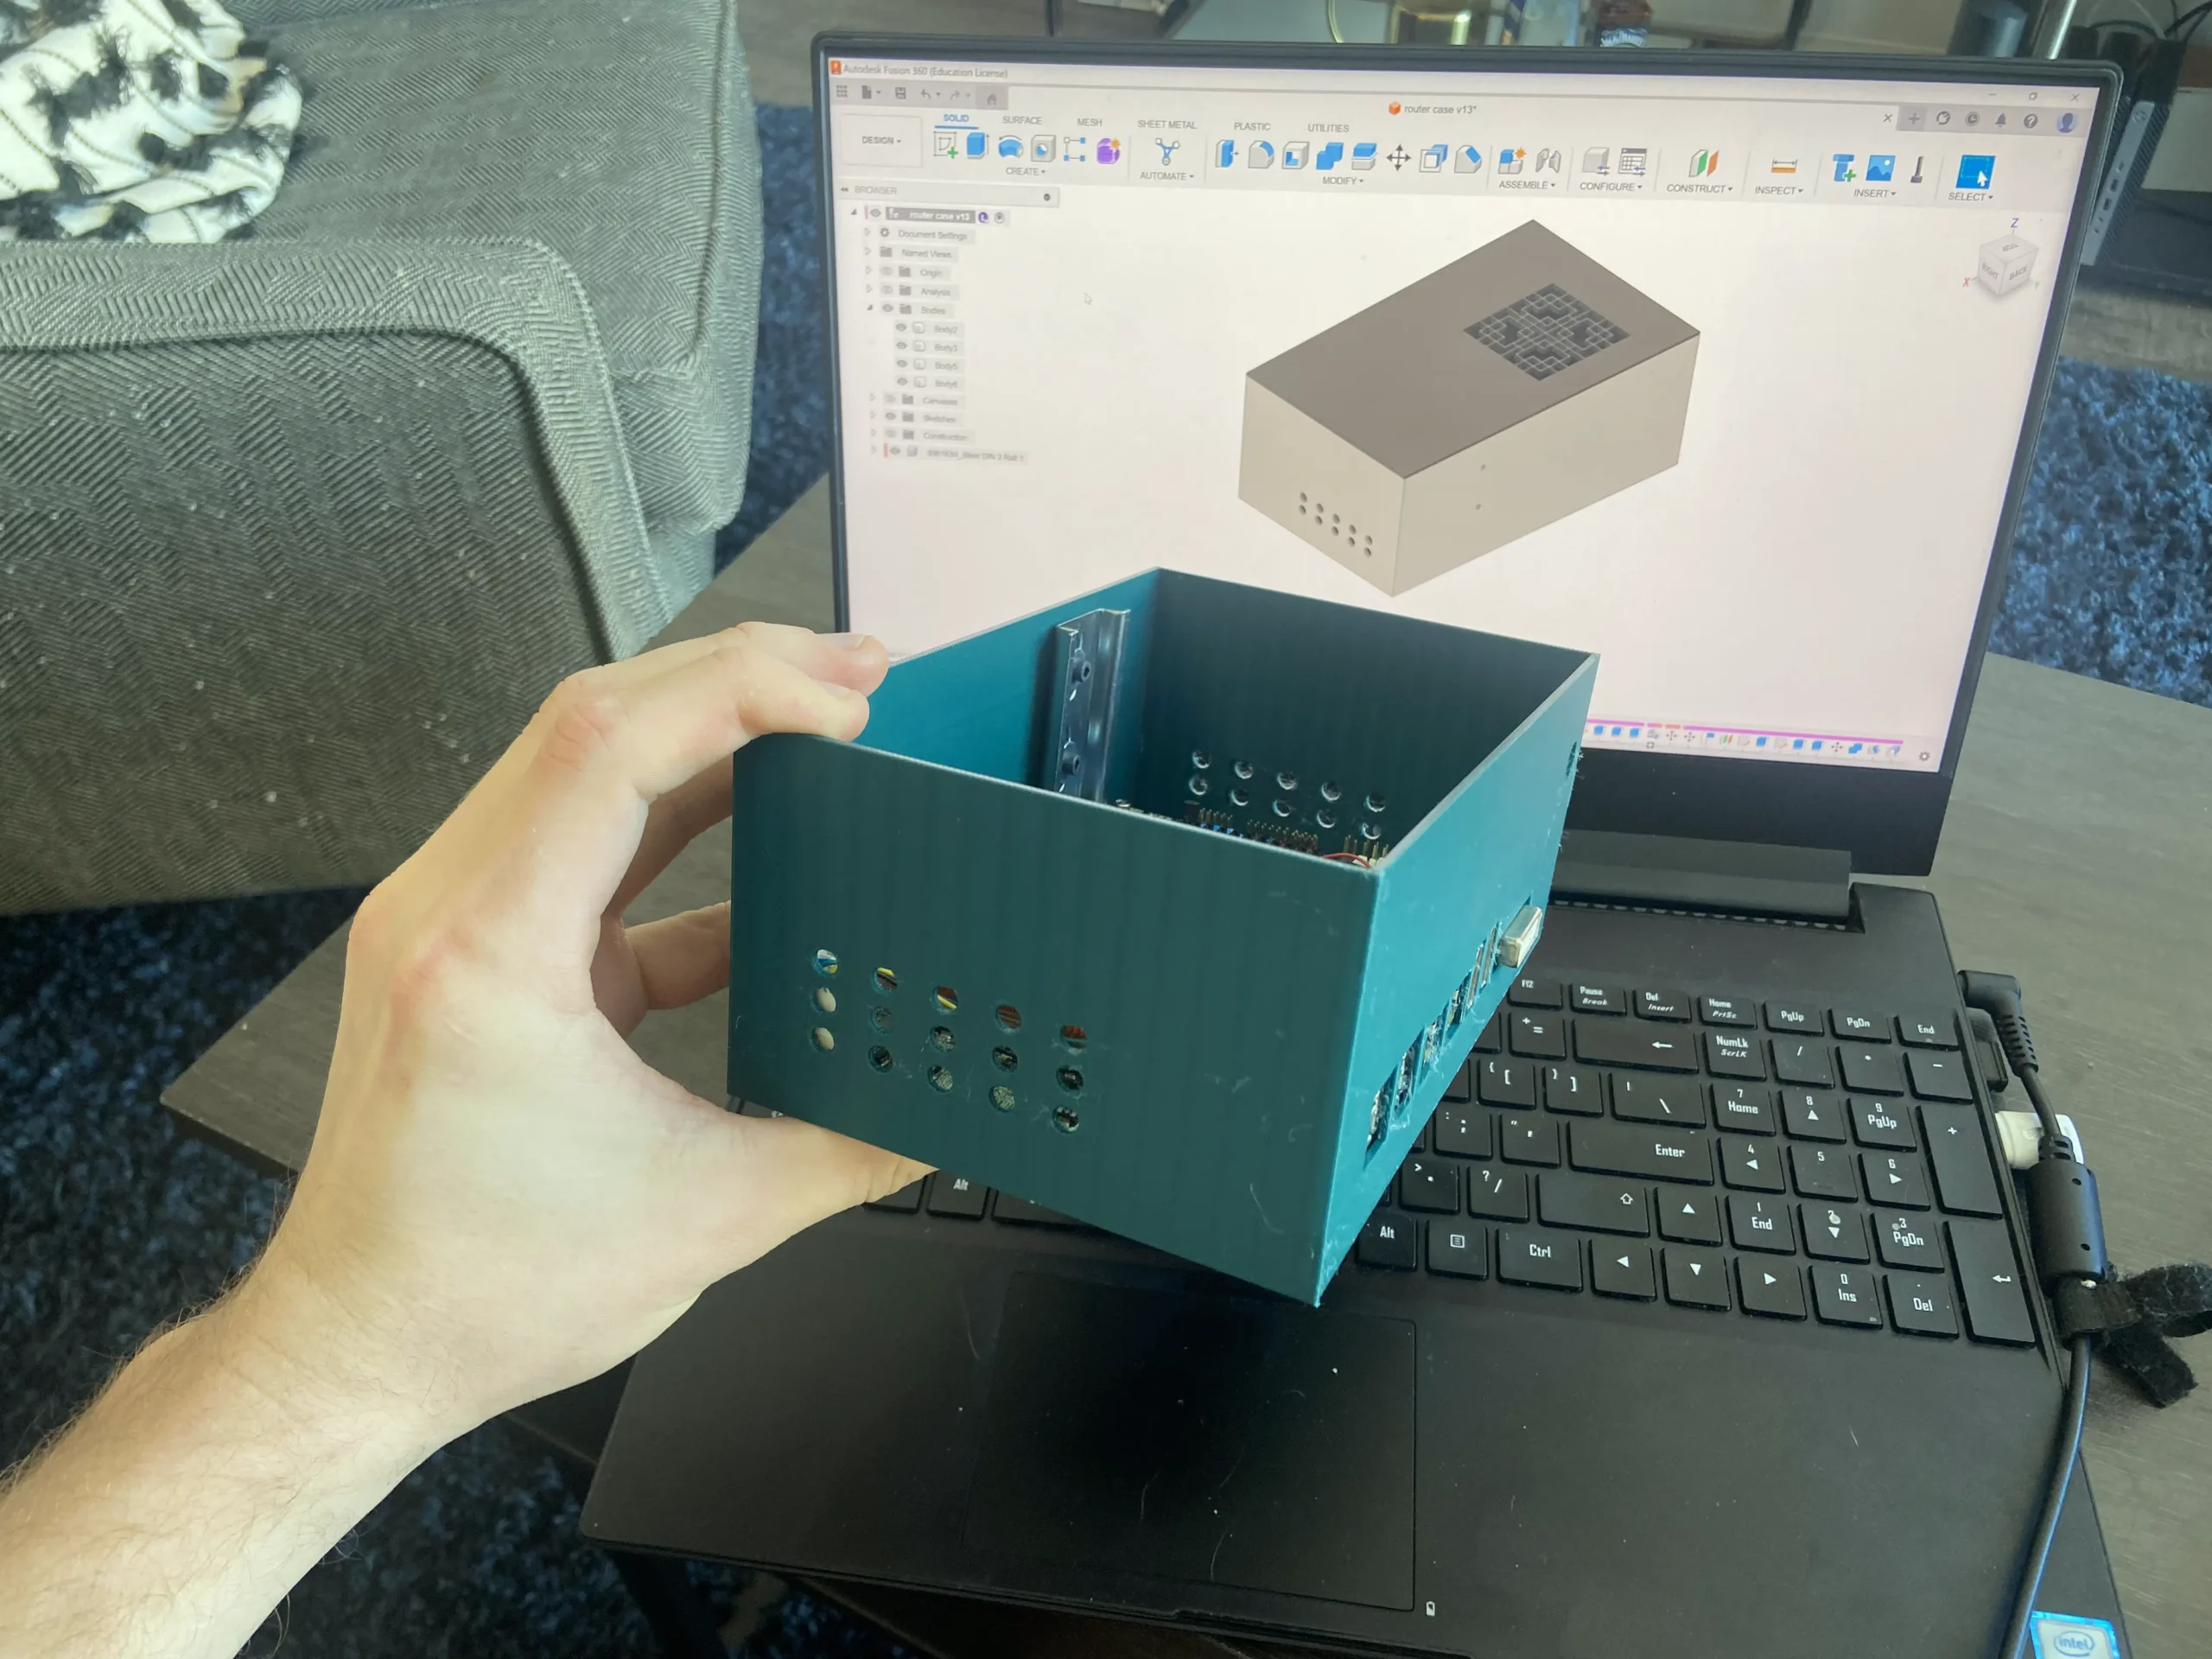
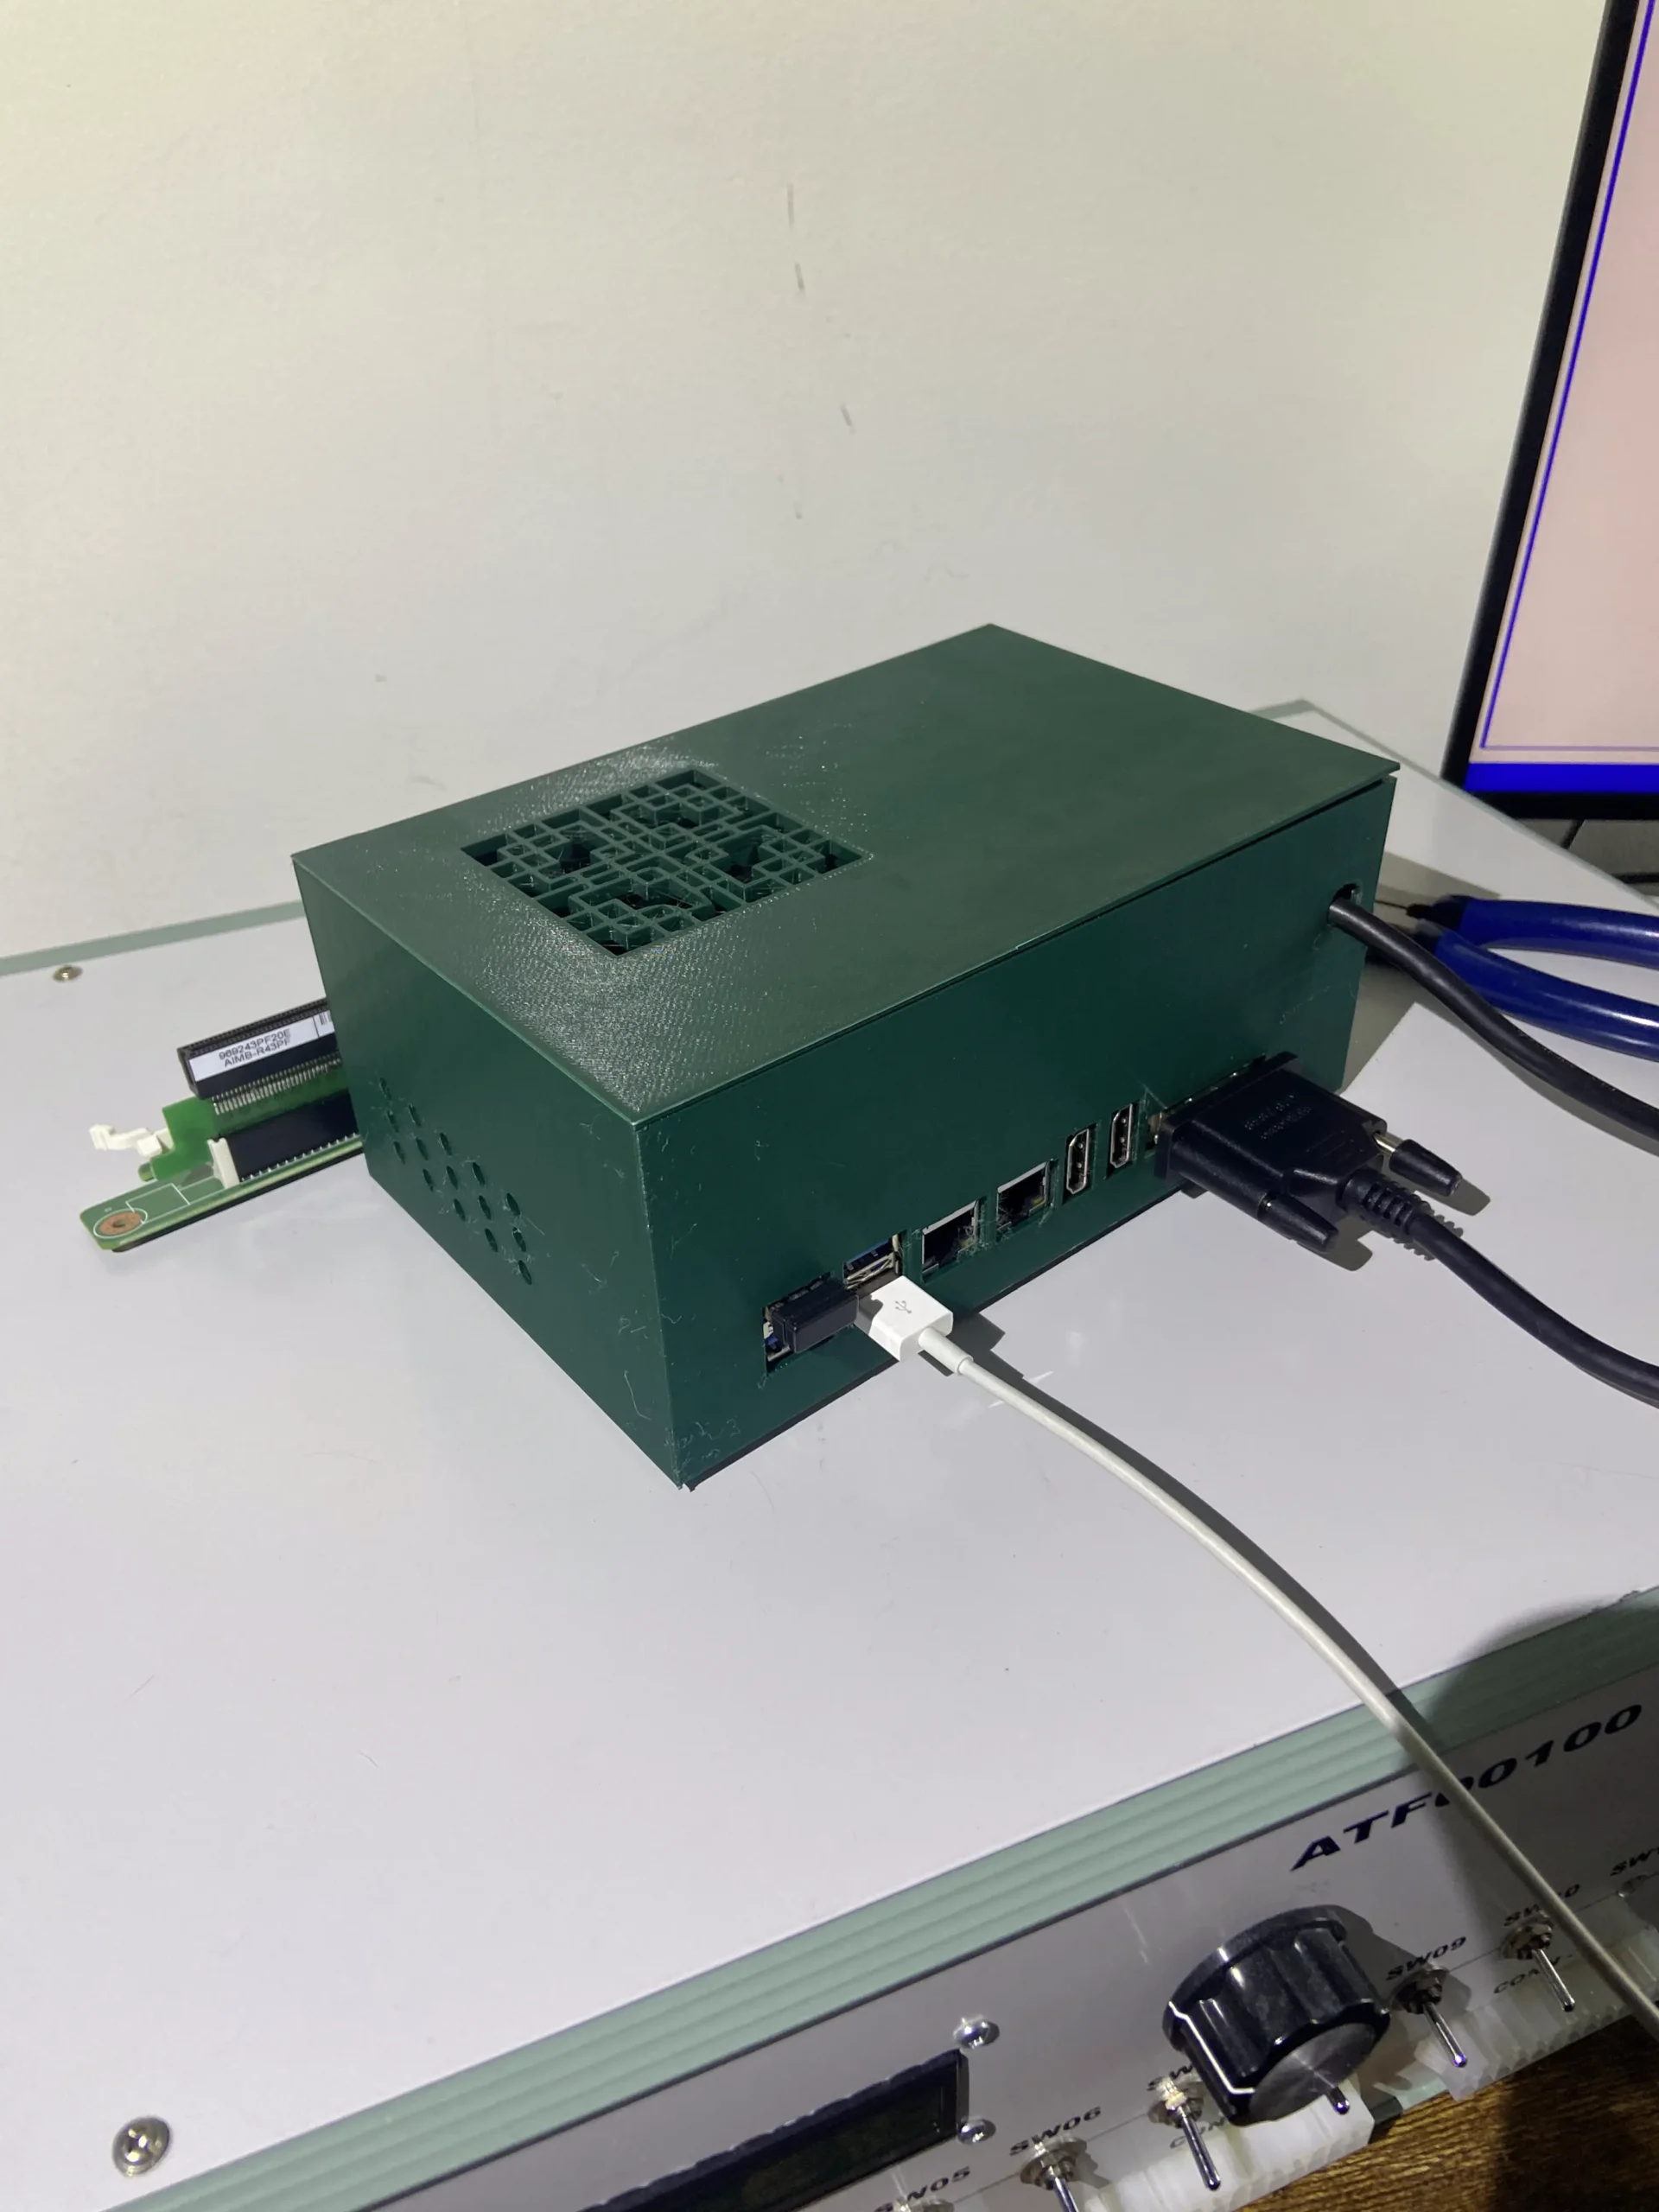
In the video you can see the case that I came up with. I used the CAD model of the motherboard to cut out the ports on the back of the case, extruded the walls up and placed the power supply as tight as I could. I was worried about cooling so on the lid I added a duct to guide fresh air to the CPU fan, and I added vents onto the sides of the case to help guide the air over the motherboard and out.
The case came out really well. I’m still using my ender3 V2 printer and run my printer very conservatively for speed so in total it took 16 hours to print.
Once the case was finished I had to install OPNSense. I downloaded the latest release from the OPNSense website, opened the Rufus tool on my windows laptop in order to create a bootable USB stick and procceded to do an initial installation
Once I followed this initial setup guide I was able to plug my laptop into the secondary ethernet port and enter 192.168.1.1 into my browser to go to the OPNSense web dashboard. Server programs often have little to no video output on their own machine but rather host a server that you can access to change all the settings, these servers are only available on your local network. In fact this website was only visible from downstream after the firewall. Since I use my laptop to do all my editing I didn’t want to be physically plugged into the ethernet downstream of the firewall to edit its settings. The first settings I changed were to allow me to access the web dashboard (GUI) from my wifi upstream.
At this point this is as far as I have gotten. My next steps are to build the high availability proxmox cluster, move the website to the cluster behind the firewall, add a port forward rule to the firewall and install some packages. Packages are a way to add features to OPNSense without adding potential security vulnerabilities or bloat. Package options include diagnostics, network management, security, services and statistical information

