OpenPhones, the first open source headphone portable speaker combo
The idea all started when I was browsing Aliexpress and came across a listing for replacement Iphone speakers for dirt cheap. I love cheap tech, so when I saw it I immediatly started thinking about uses for it. I thought about how my girlfriend Kari uses her phones loudspeaker every morning to play music while shes getting ready for her day. The music audio quality is surprisingly good for such a tiny speaker, considering how loud it is and how large of a room that single speaker can fill. Its no Bose speaker, but for a $5 speaker how can you complain.
So I decided I wanted to use these cheap replacement Iphone loudspeakers in a DIY headphone. The idea of making a completely DIY bluetooth set of headphones, and on a budget seemed really interesting to me. Especially when you add in the weird factor of using Iphone parts. But as Will and I began to plan out the circuits and how we would tune the audio we realized we were missing something that could really make this project great, a way to properly tune the audio for any speaker you decide to put in there.
Our circuit board consists of an ESP-32 c3 microcontroller for audio input. This outputs I2S audio signal to the ADAU1701 digital signal processor. A digital signal processor (DSP) is a specialized microprocessor that performs mathematical operations on digitized signals like audio. They allow equalization, crossover, bass enhancement, multiband dynamics processing, delay compensation, speaker compensation, and stereo image widening. The ADAU is also incredibly easy to program via this tool from the manufacturer called Sigma Studio. It allows visual coding of the DSP chip which should make it user friendly for everyone to tune themselves.
To start designing the headphones I first had to get my hands on a CAD model of the speaker. Unsurprisingly Apple doesn’t hand out CAD models of their stuff, so I had a worker throw my speaker into a digital optical comparator. These machines are able to take crazy accurate images which are used in metrology, the science of measurements. I used the photos above along with manual measurements from my calipers to create a CAD model. The complete model is downloadable at the bottom of this page
With the model of the speakers complete, I had to start making some parts decisions. Since I wanted these headphones to feel high end while staying on a budget I decided to purchase some Senheiser HD650 replacement earmuffs. The Senheiser headphones are well over $500, but their replacement headphones range from $10 to $35, making them a great option for cheap, easily accessible, premium ear muffs. I quickly mocked up a test jig to see if I could print a headphone body which would hold them.
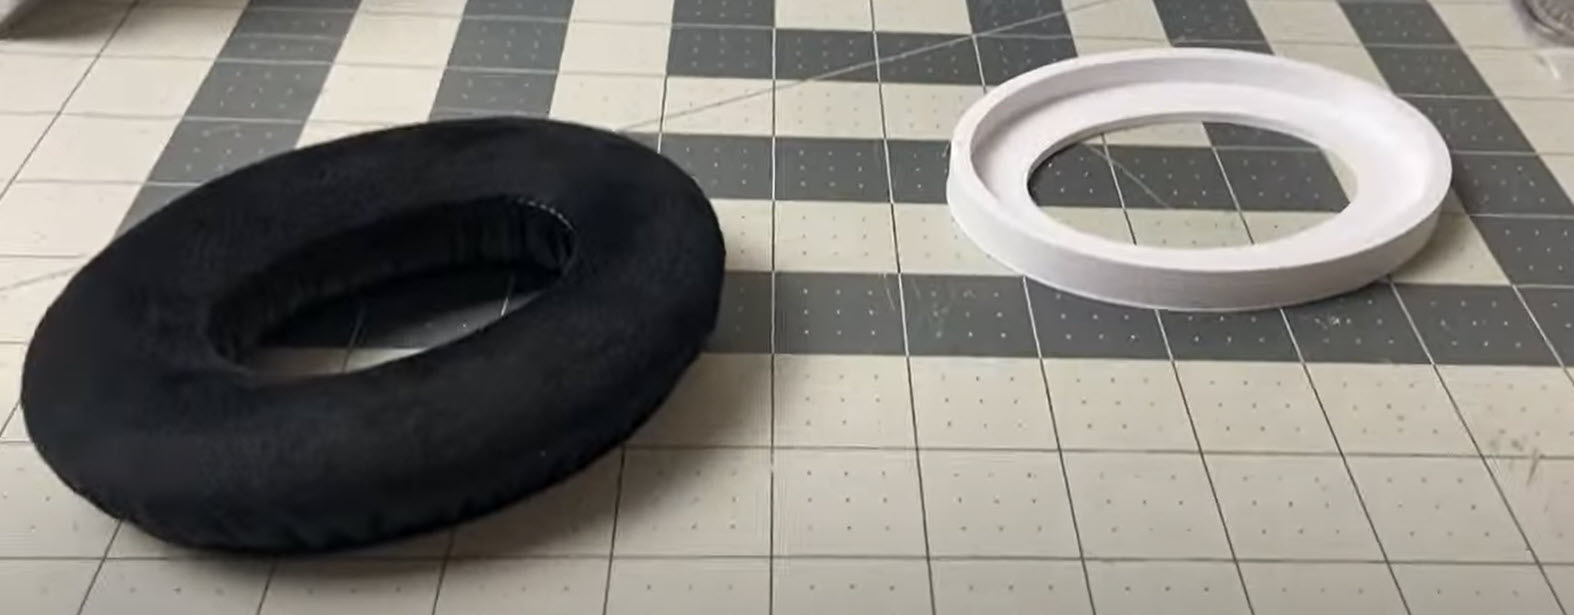
The earmuffs fit the test print perfectly. This test print became the basis of my design.
From here I started planning the location of all my components. I had to find a way to place my speaker on the headphone and go from the tiny speaker outlet to the large area of the ear cup. I was inspired by the horn of a trombone and the design of antique record players. This took a ton of work in Fusion to design but I came up with this beautiful looking loft leading from the speaker to the inside of the ear cup.
This stage always takes the most time. Every component requires a large amount of consideration for where it goes, how it interacts with the components around it and how it will all look assembled. Its taken me days of work to properly design the housing, the head strap, mounting features to make it easy to assemble etc. But this is how it turned out.
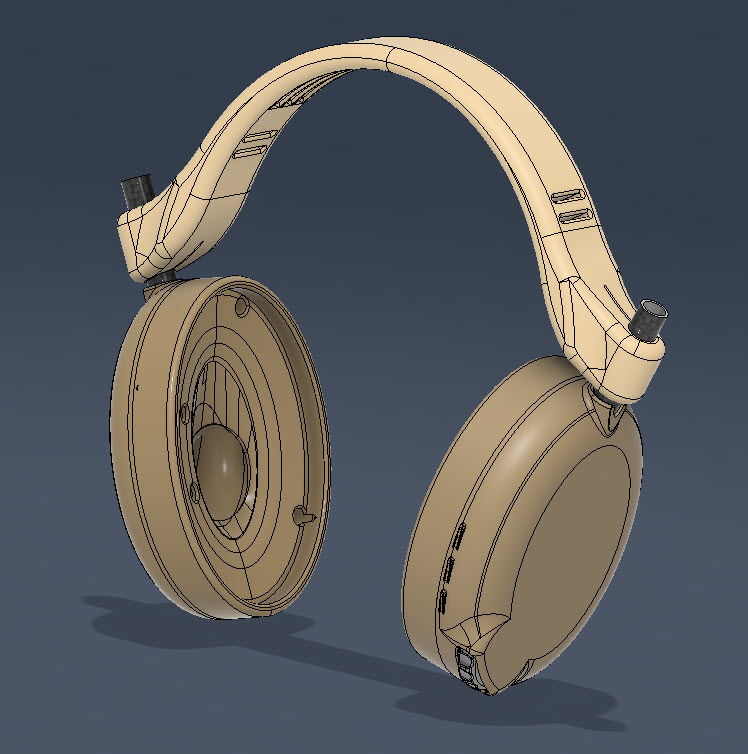
The right side headphone has a scroll wheel on a rotary encoder, three buttons and a 3.5mm headphone jack, along with the USB-C port of the ESP32
