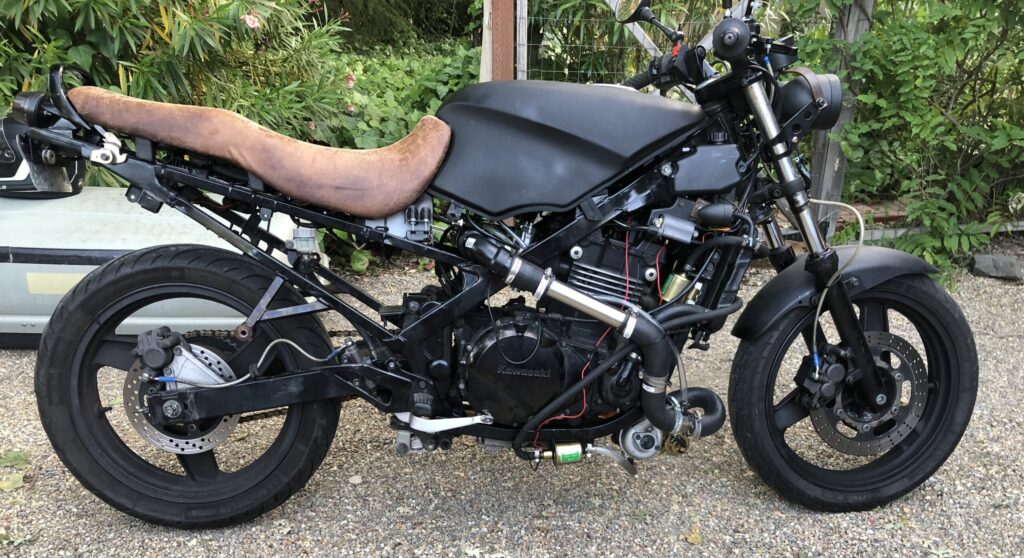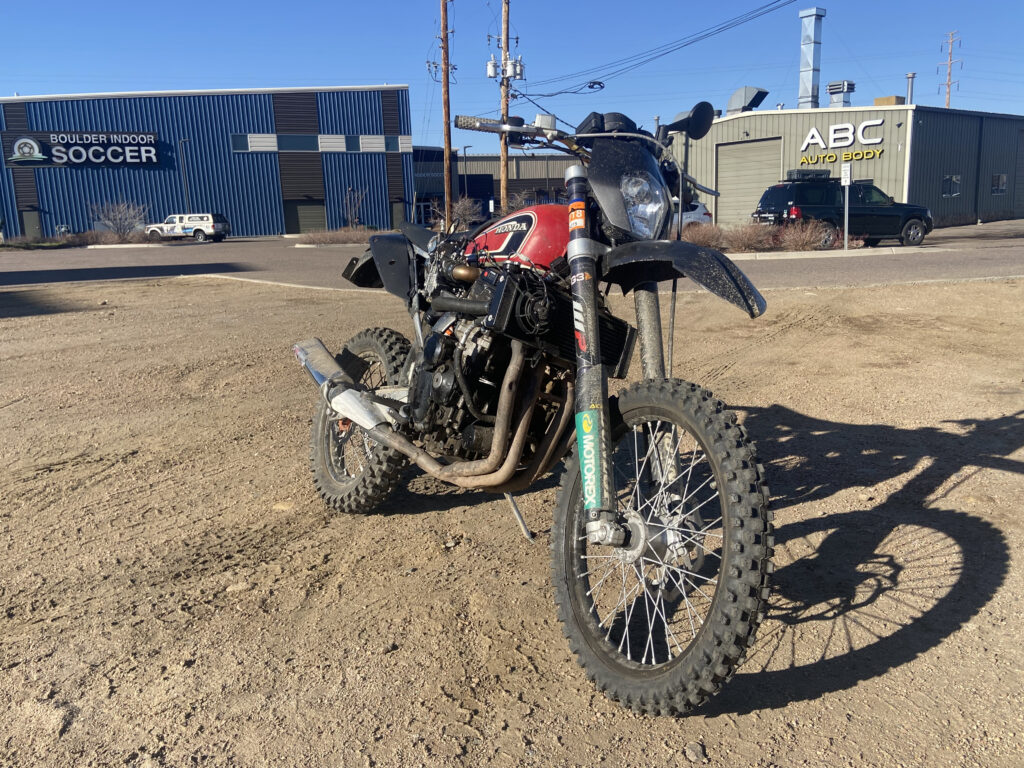
The Ultimate Adventure Bike
This is actually my second time writing this post because after changing my modem I had to reinstall the hypervisor on my server and my website backup wasn’t as recent as it should have been.
Anyways, I built The Ultimate Adventure Bike.
Like most engineering students finishing their degree I had to go through the dreaded “Final Project.” Except I got lucky. I was in a relatively new major called Creative Technology and Design, and the admin were still fleshing out what they wanted this major to be. This meant that there was no set final project. Instead they allowed students to offer project ideas that they came up with, along with a few options that admin came up with. I immediately knew what I wanted to do.
While working as a motorcycle mechanic in Boulder you tend to ride a lot of different bikes, and pretty quick into working at House of Motorrad I discovered my love for enduro, or long dirt biking rides with sections on road and off trail. I even bought two dirt bikes just so I could ride with friends who didn’t own a bike. But the biggest issue with putting a lot of hours on two dirt bikes is the constant maintenance. Dirt bike manufacturers recommend oil and filter changed every 600 miles, and valves adjusted every 1500 miles. Of course this is overly frequent and a bit unnecessary if you aren’t racing it, but the issue still stands; service was constant. Since I worked as a mechanic, the last thing I wanted to do when getting back from a long ride was tear the bike apart and start checking valve clearances, but luckily there is a type of off-road motorcycle that solves this issue. Adventure bikes are often twice the weight of a standard dirt bike, but they are meant to be very capable at putting down hours of highway riding just to get to your hours of trail riding. I was fortunate that we had a rental fleet of adventure bikes to test out and see what I liked or didn’t like, and it was easy for me to tell that I did not like the weight or handling, but I really liked the power and service intervals.
So the only logical solution to my wants was to build a dirt bike with a high horsepower, high interval engine. More specifically, a sportbike engine.
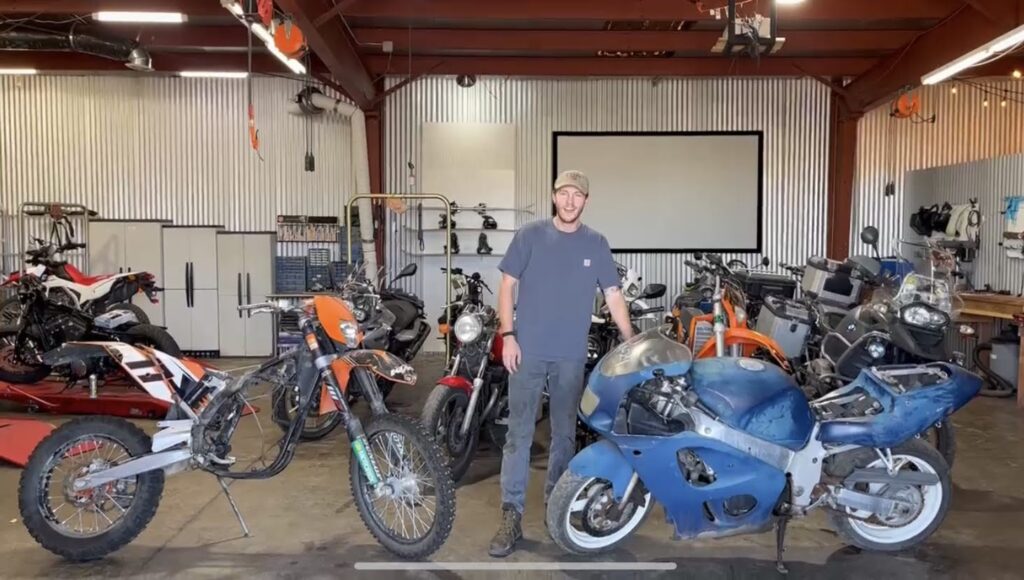
Since I was still a student I did not have a large budget to throw at this project, leading me to buying a 1999 Suzuki GSXR-600 for $800 and a 2011 KTM 450 xc-w off a coworker for a six pack. The donor bike was not my first choice, and looking back today I really wish I had splurged and gotten something with a fuel injected engine as it would have saved me weeks of frustration. This was the cheapest sportbike I could find on Facebook marketplace and it was exactly what I was looking for at the time. When I bought it, it did not run but I was able to spray starter fluid in the engine and use jump starter to get it to kick over just enough to know that the engine could run again.
I knew this was going to be a big project, so at the time of buying the donor bikes I wasn’t even approved by my school to use this as my final project. I rolled the dice and pleaded my case to the board of engineers. Somehow I got approved but with one caveat, I had to film every step of the build, edit and post the videos online as proof that work was getting done. This rule was set because unlike the majority of other students, all my work would be completed at the shop from 6-12pm. This is how the youtube channel WilsonFabrication came to be.
I should explain my motor choice a bit before diving into the build. Generally offroad vehicles prefer punchy torque over high horsepower. This allows them to have great throttle response at all engine rpm, tractor up a hill with little effort, and easily pick up the front tire with a wheelie to get over a bump. A sportbike engine is the complete opposite. Even though my Suzuki engine had more horsepower and more torque than the original 450cc single cylinder, the 600cc inline four cylinder made that hp and torque up at 10-12 thousand rpm. This means that to get the same amount of horsepower out of both engines, the Suzuki would have to be nearly double the engine rpm. This is fine on a race track where you only care about maximum horsepower at because you’re always at high rpm, but on a trail where you climb hills then scramble over rocks it adds some extra challenges and thought to your riding technique. What i’m trying to get at is that you can’t ride this bike slow, if you want to climb a hill you have to rip up it at ten thousand rpm spinning tire and throwing rocks the whole way up, it’s not for everyone but it sure is for me.
So how do you fit an engine with four times the cylinders into a dirtbike frame? You don’t really
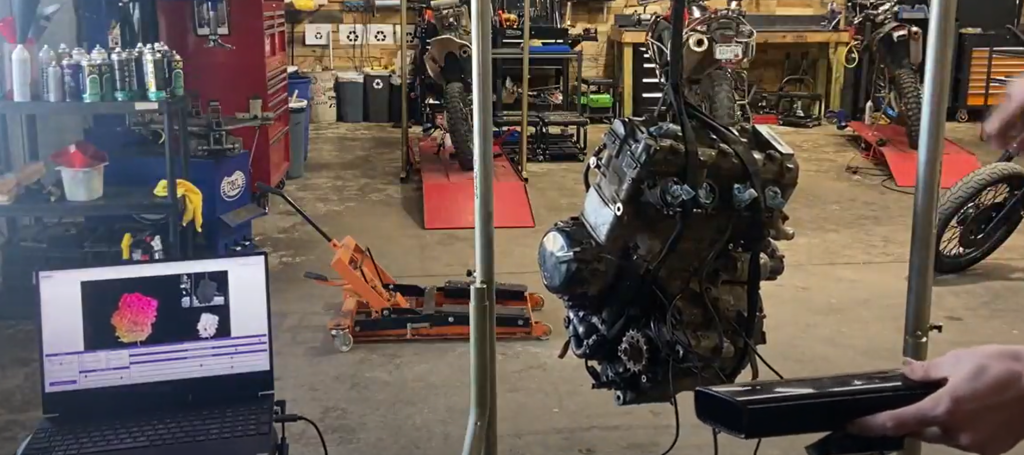
Instead of cutting at the frame with a rough idea of where I wanted the engine, I 3D scanned both the engine and the dirtbike frame with a Xbox 360 Kinect camera and overlaid the scans in Fusion 360. Xbox used the Kinect as a motion tracking and voice recognition tool for their competition against the Nintendo Wii, unfortunately the Kinect never really took off but fortunately it is an incredibly cheap 3D scanner at about $35. Once both scans were brought into my CAD software of choice I could position the engine exactly where I wanted it and see exactly where I would need to cut the dirtbike frame to make it fit.
The dirtbike and sportbike frame had a significant difference in design. The dirtbike was a cradle frame, where the frame wrapped underneath the engine like a cradle. The sportbike on the other hand was a twin spar frame. This uses an extruded aluminum frame on the left and right sides of the engine, utilizing the engine as a structural stressed member of the frame. Since the engine was so large that I had to remove the entire cradle portion of the dirt bike frame, I decided to design new engine mounts that would use the engine as a stressed member just like it was in the sportbike frame.
I always expected that mounting the engine would be one of the most difficult parts of the built, but because of my planning it was surprisingly easy. With the engine in place I now had to focus on wiring harness and fuel. Luckily I was able to take the entire wiring harness from the suzuki and fit it to the ktm. No major custom wiring was required and I was able to hide all the excess length of wire under the gas tank.
Speaking of gas tank. I would have loved to keep the original KTM gas tank and seat, keeping the bike at “dirt bike” as possible but the gas tank interfered with the engine. Mike, one of my coworkers and a close friend, had this beautiful Honda CB360 gas tank laying around that just happened to fit perfectly onto the frame. Once we saw how well it fit and the beautiful patina we didn’t bother trying to modify the KTM gas tank to fit.
The next big issue was fuel delivery, and this is where I spent most of my time banging my head against a wall. Originally the Suzuki had 4 carburetors (mechanical throttle body and fuel delivery device), one per cylinder. It would have been nice to use the stock carbs because they were already tuned for this engine and exhaust, they were literally built for this bike. But they did not fit inside the frame. I was able to get them shoved in there but I would not have been able to fit air filters or the gas tank.
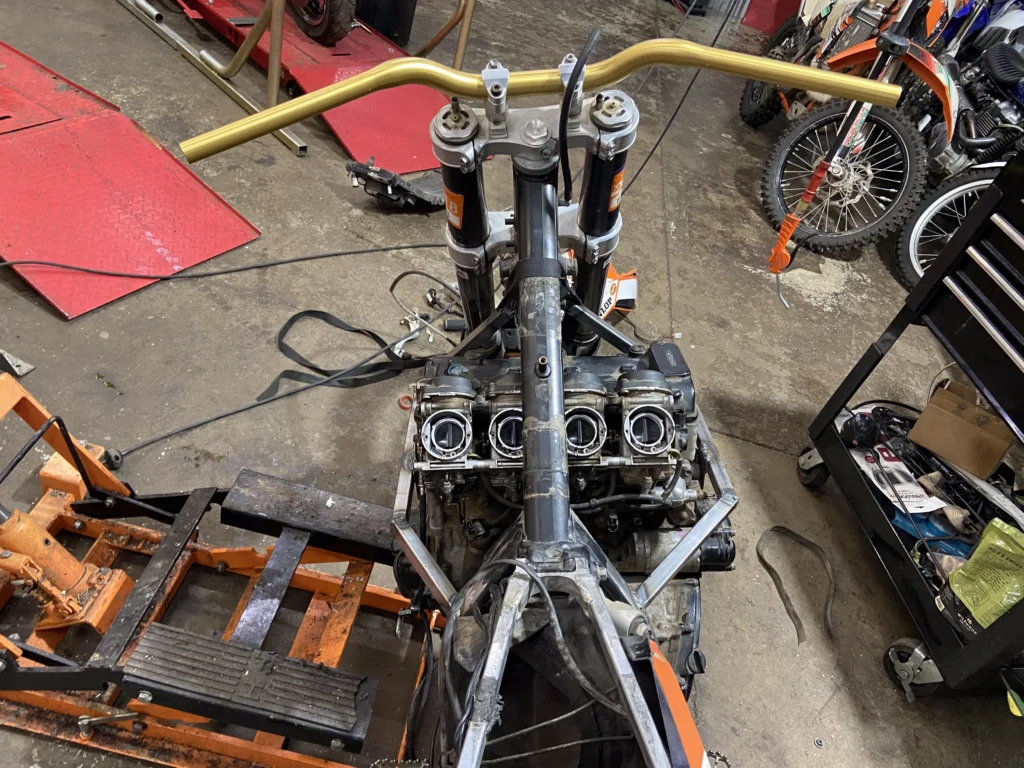
With the sportbike carburetor out of the question, I turned my attention to the original dirt bike carb. Street legal carbureted motorcycles use what’s called a CV or constant velocity carb. To be brief, you open an air passageway, which allows air to flow and this flowing air is what actually opens the throttle. This makes your throttle really smooth and eliminates rapid opening or closing which causes poor emissions due to lean and rich air fuel mixtures. This all is great for riding on the road but it is not what you want on a dirtbike. You want as angry and responsive of a throttle as you can get, which is where the Keihin FCR41 come into play. These carbs come stock on most (carbureted) dirtbikes and some factory race ready sportbikes, when you twist the throttle the throttle opens wide and squirts fuel straight into the engine to give it the punch it needs. So my first attempt at fueling the engine after ruling out the stock carbs was to use a single dirt bike carb.
I fabricated a 4 into 1 log style manifold to connect all four cylinders to the single carburetor. What I really liked about this design is that it kept the carb and air filter in the stock location on the dirtbike frame. This meant that I could use the really nice dirt bike air filters and keep the bike looking very sleek. Unfortunately this design did not work. I was able to get the bike to run but it would only run above 3500 rpm. If the rpm dropped below that the engine would stall. I believe that at lower engine rpm there was not enough air velocity to carry the fuel up and distribute it across the cylinders, I never tried to ride it in this configuration. I really wanted to keep tuning and make this design work, I even had plans and ordered parts to essentially turn the whole manifold into the idle jet circuit of a carburetor but I eventually decided it was best to give up on this slic design and move to something more goofy but would definitely work. Intake manifold #2 had to be a complete redesign, with the carburetor mounted as close to the intakes as I could get it. Luckily I had a second FCR carb laying around and here is what I came up with.
As you can see I went with a dual carb setup. This way one carburetor feeds two cylinders. This significantly reduced the internal volume of the intake manifold and the distance the air and fuel had to travel. The only downside was that the carbs are now right where your knees want to go, so you had to Cowboy it while riding this bike. Along with the dual carb I also added an air fuel ratio gauge which you can see in the center of the dash, this made adjusting the fuel for each throttle position significantly easier and I really recommend anyone wanting to tune their own carbs to use one of these.
I was finally able to test ride. And it was terrifying. It still had very little power below 3000 rpm which made taking off from stop lights difficult, but once you got up in the rpm range it was a rocketship. Literally. The final drive gear ratio was set up like this was a land speed record bike, it had very little torque but first gear got you up to about 75mph maxxed out. I tried replacing the sprockets with the smallest front suzuki and largest rear KTM sprockets I could find and it was still too fast. Since it was an offroad vehicle I really needed as much torque as I could get and with off the shelf sprockets I couldn’t get much. I ended up calling a custom sprocket shop and had this massive rear sprocket made for me, here you can see it overlaid on top of the largest sprocket KTM made for this bike.
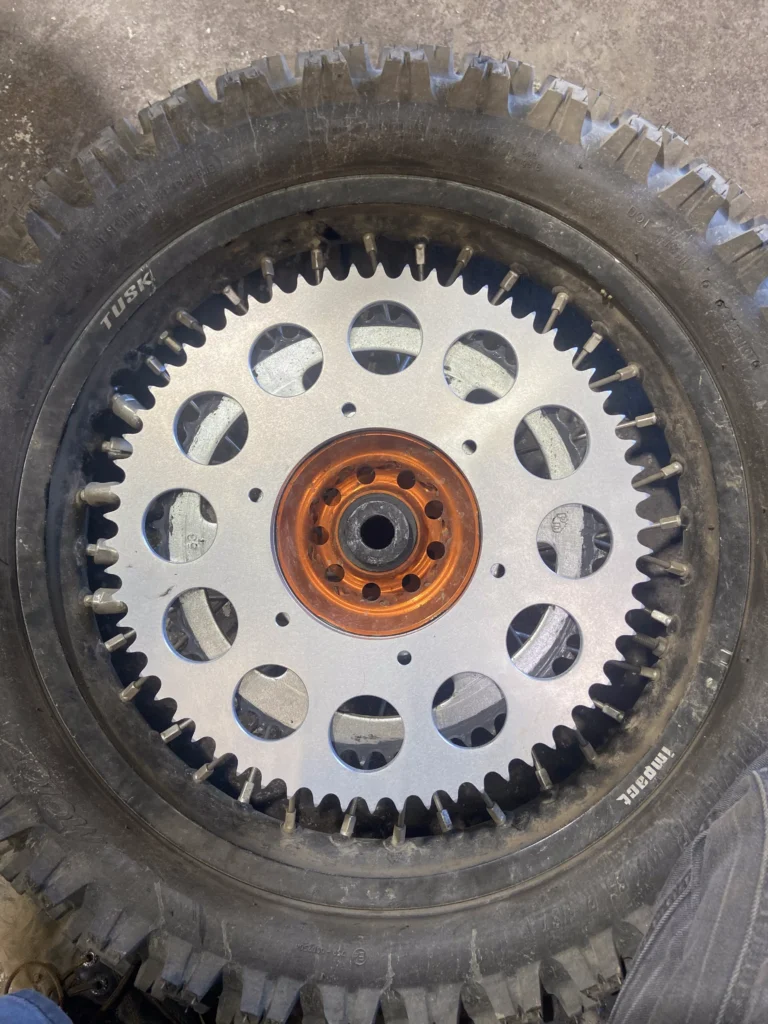
This almost solved all my issues, if I hadn’t gone too far. The gear sized that the company and I picked ended up to be too large, I had amazing first gear performance for the trails but I traded out my highway performance. I was now only able to go about 80mph in top gear at about 8k rpm. Sure that sounds like enough but you don’t want to sit at such a high rpm for extended periods of time, and you want some speed headroom if you had to avoid a car on the highway. I would have loved to order another sprocket and really dial it in but I had a timeline and a budget and I was coming up on both.
While fixing these rideability issues I was also working on coolant, plastics, finish welding, seat and tank mounts, headlight, blinkers, flat tires and an incredibly annoying charging issue. During one ride with my coworker Santino I ripped ahead of him to blast through a canyon tunnel, I dropped a gear and ripped the throttle wide open just in time for the engine to die and pieces of my battery to go flying out the side of the bike.
In a car your battery charging system consists of an alternator. This device takes the rotational energy of the engine, converts it to 3 phase AC, and then converts that to nicely regulated DC to power your lights, spark and everything else. On a motorcycle the 3 phase generator and the DC regulator rectifier are split apart as two separate components. On my bike the generator was working fine, but the regrec (as we call it) was allowing the angry alternating current straight to my very nice lipo battery.
A new regrec arrived a little over a week before my final presentation, and within an hour of it arriving I had it installed and rode to class. As far as I was concerned I was finished. I really do love this bike and I am incredibly proud of it but at some point I realized that it will never be perfect. The engine was too wide, too carbureted and the whole build was too rushed. Someday I do plan on rebuilding it properly, likely with a Triumph Street Triple or Suzuki gsxr750 engine in it. Overall the suspension was incredible and ate up the trails like no ones business, I would absolutely use a ktm frame again, but it deserved a better engine.
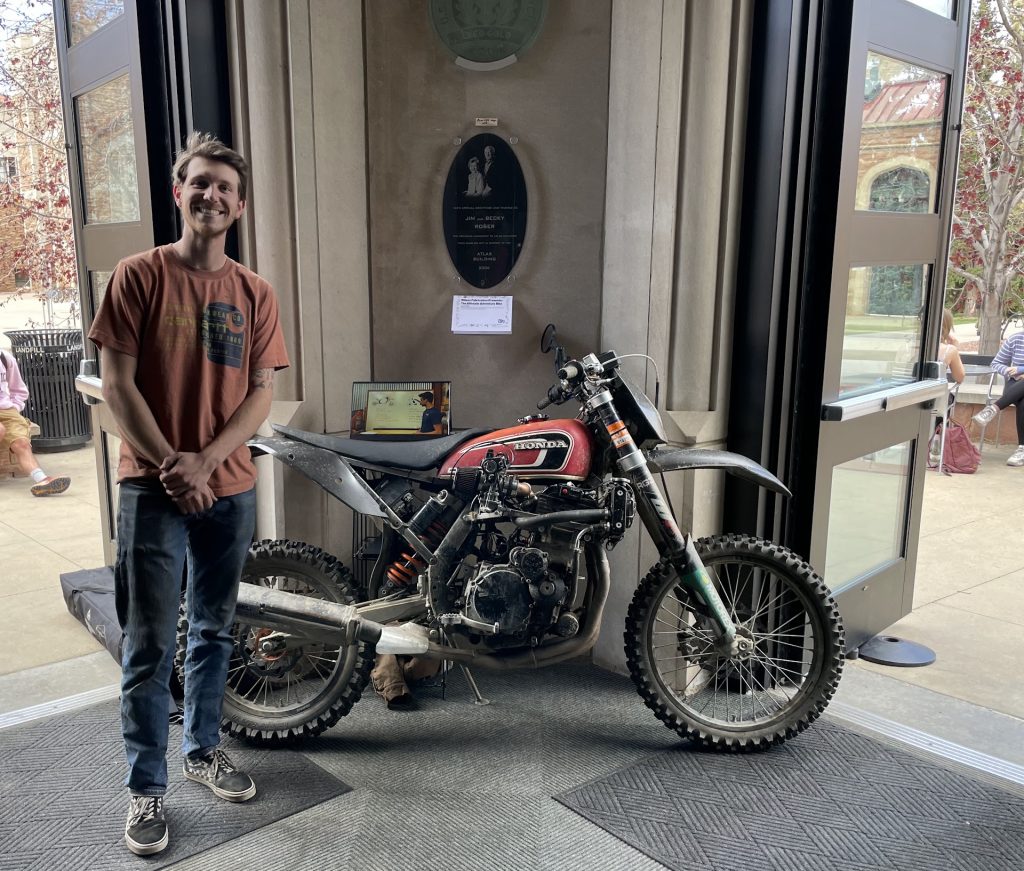
My final presentation went very well. I rode the bike to school and straight up to the building, set up my bike and laptop displaying the youtube series I made for it and talked to people for hours. Before graduation I received a job offer as an automotive engineer in Philadelphia and took it, so as soon as school finished I had to sell my fleet. I had a 1977 Fiat spider, Yamaha WR450F, Honda CRF450R and a Honda Superhawk which was also Keihin FCR swapped. Along with the normal vehicles I also sold the KTM600. This was quite sad for me but it went to a very good home. The guy who bought it had been riding a Triumph 600 with dirt tires for a while and when he saw my listing he knew that it was the perfect next step in his dirt bike sportbike adventure. I no longer have his contact information so Guy, if you’re out there please let me know how the KTM600 is.
I hope you enjoyed reading this post. If you want to learn more please check out my youtube build series or feel free to contact me.
