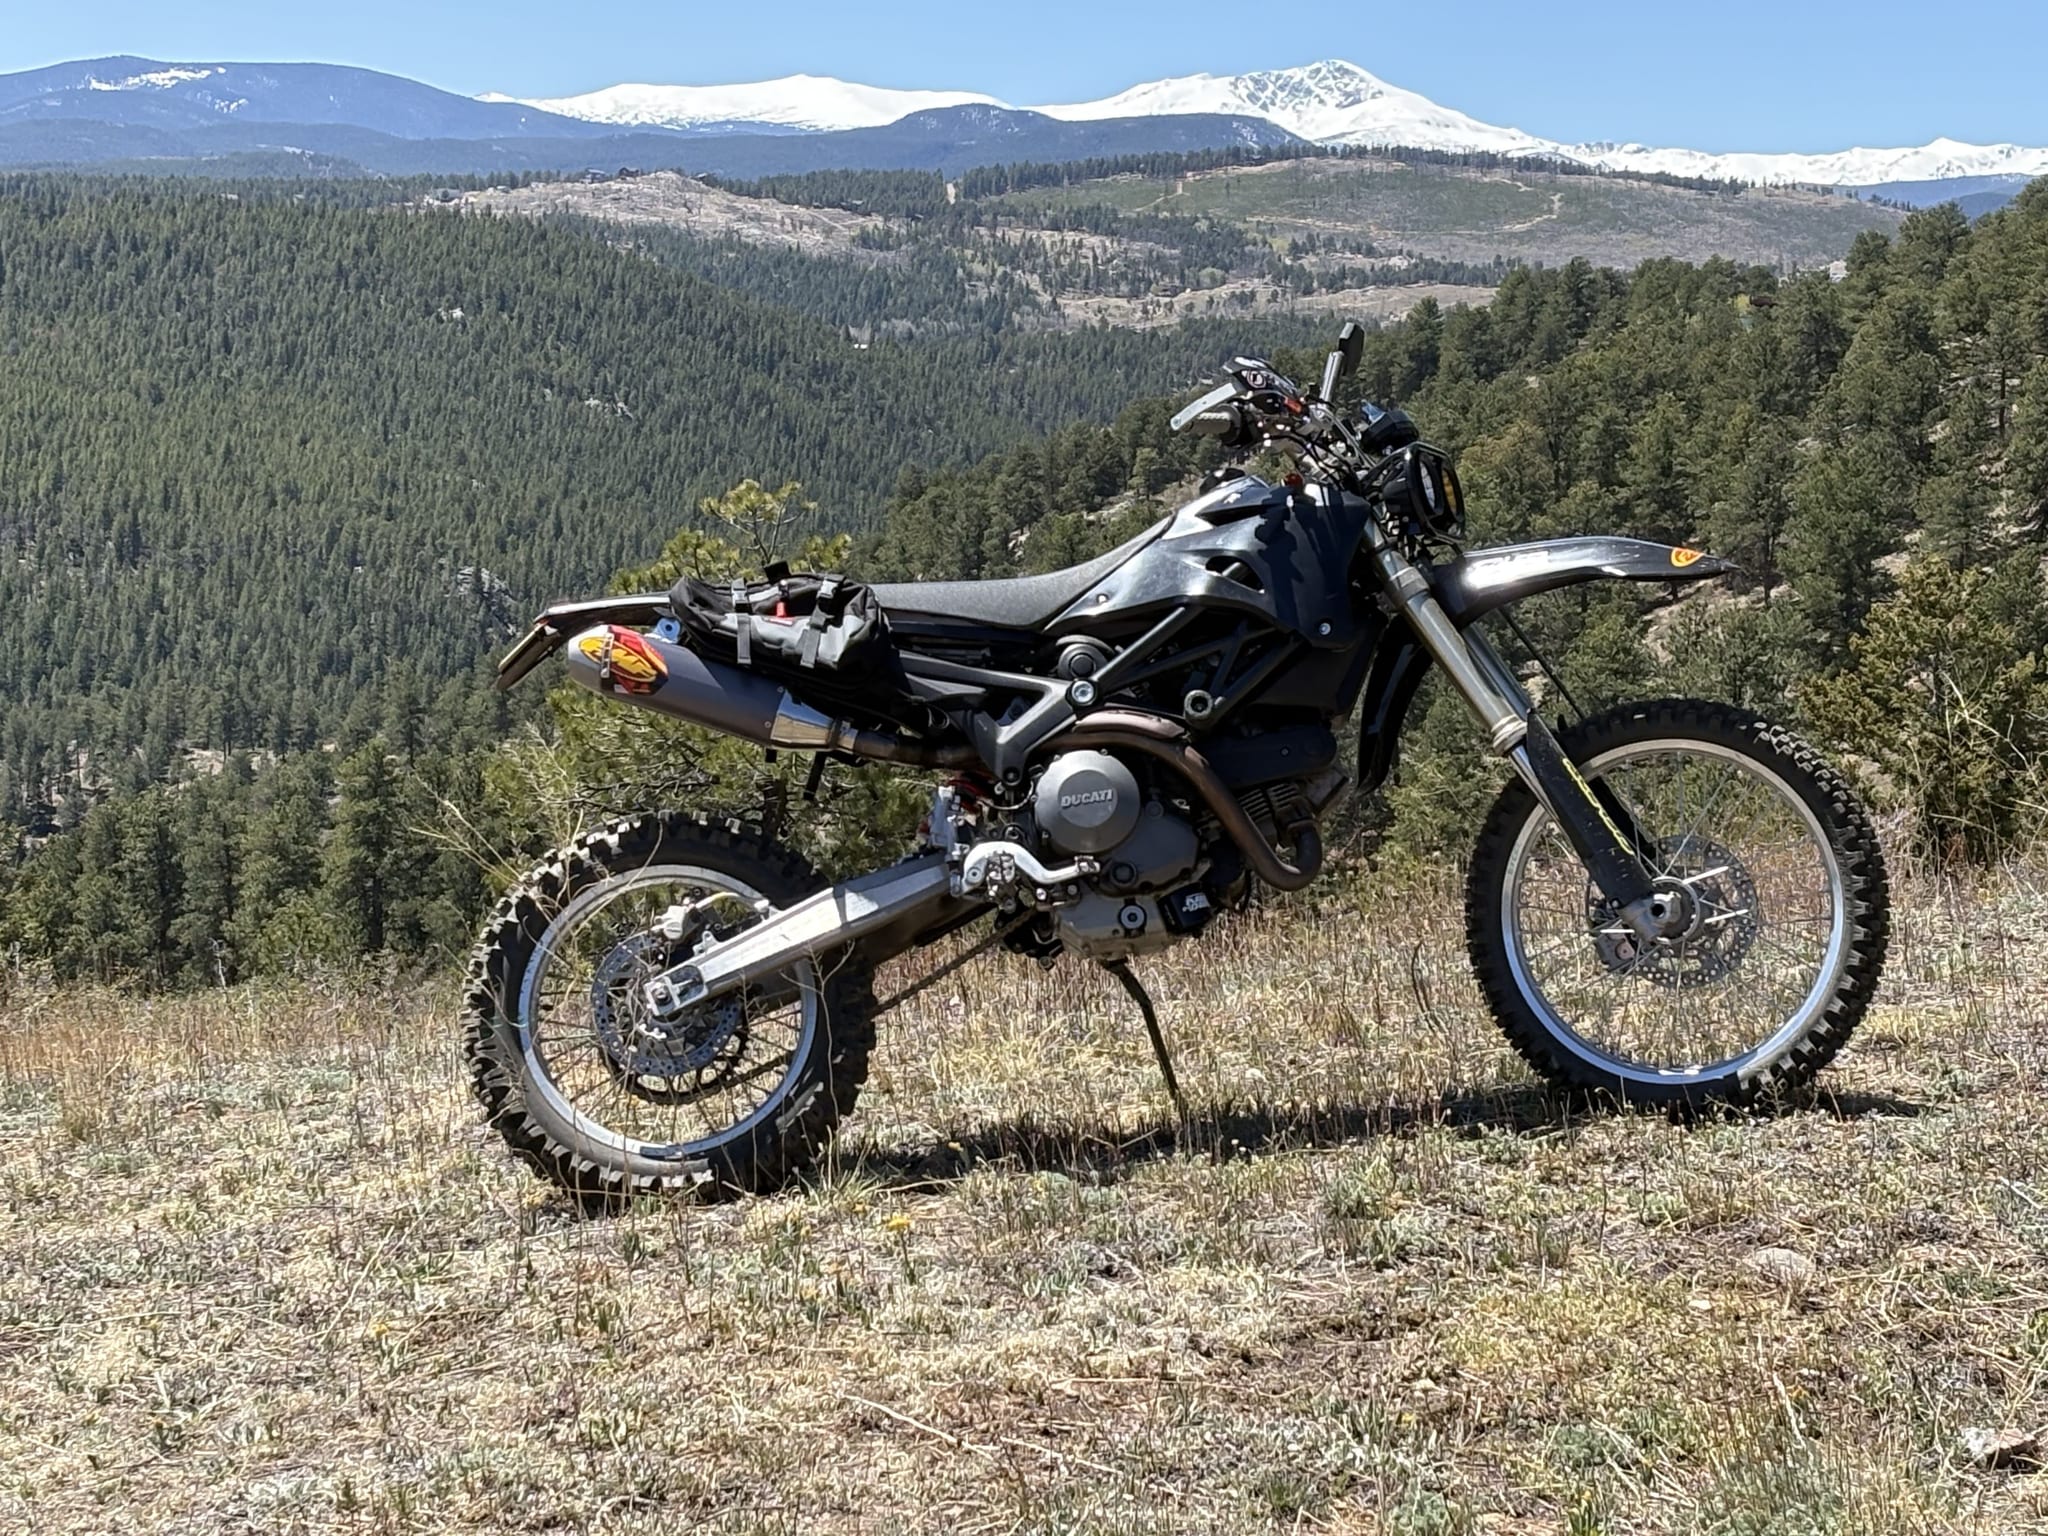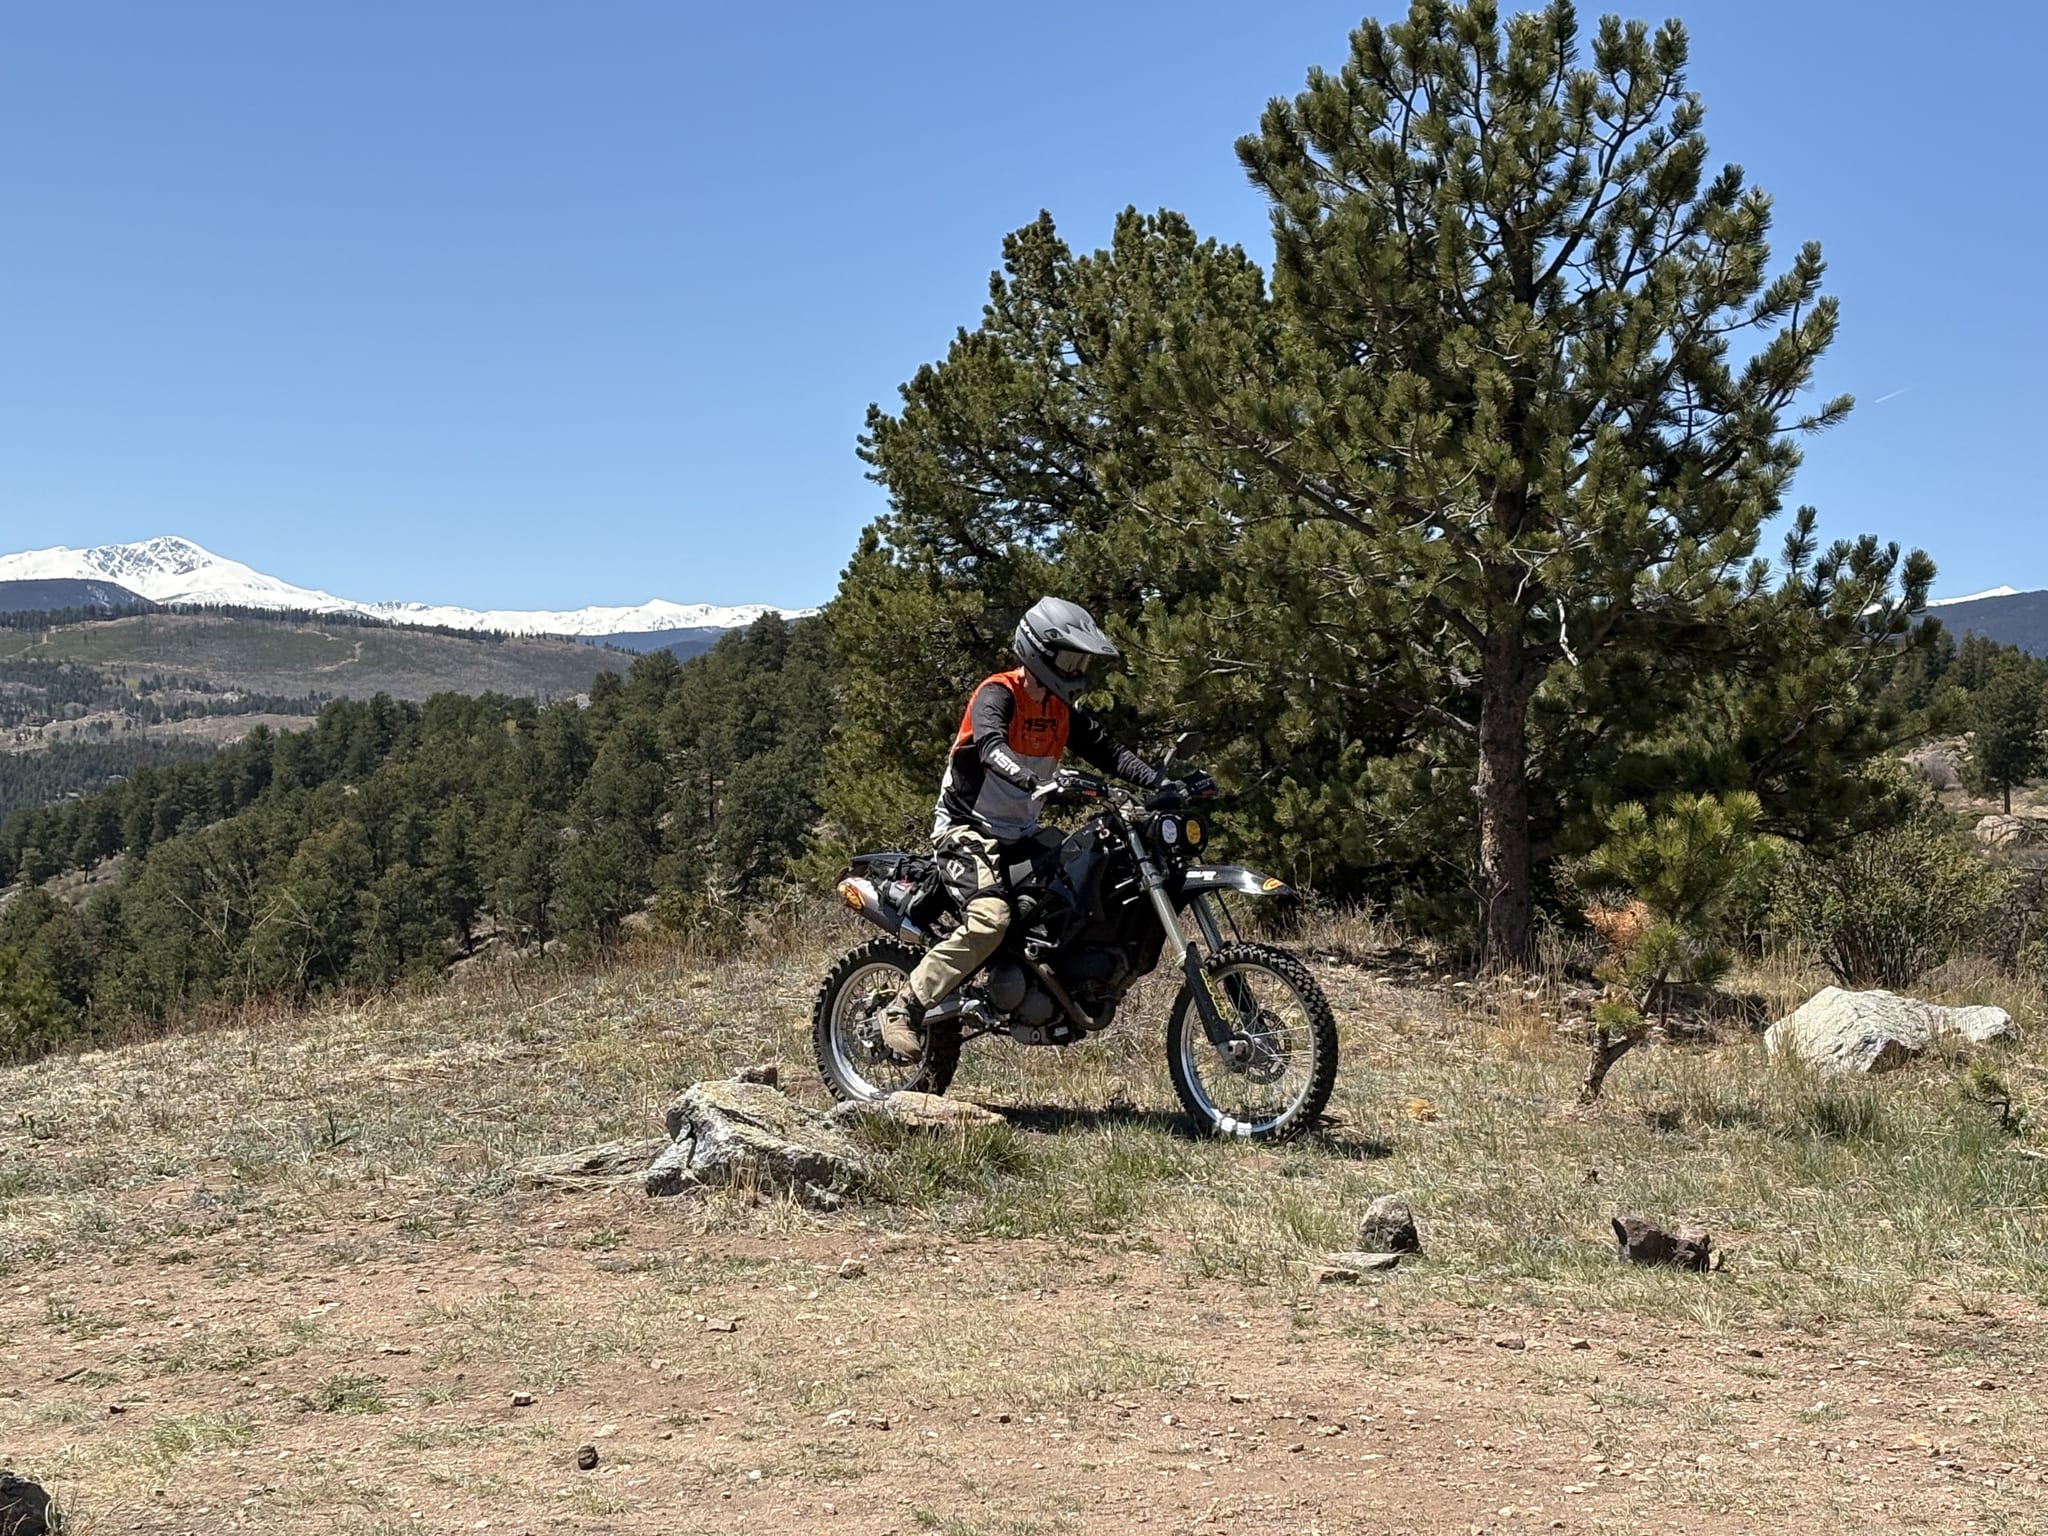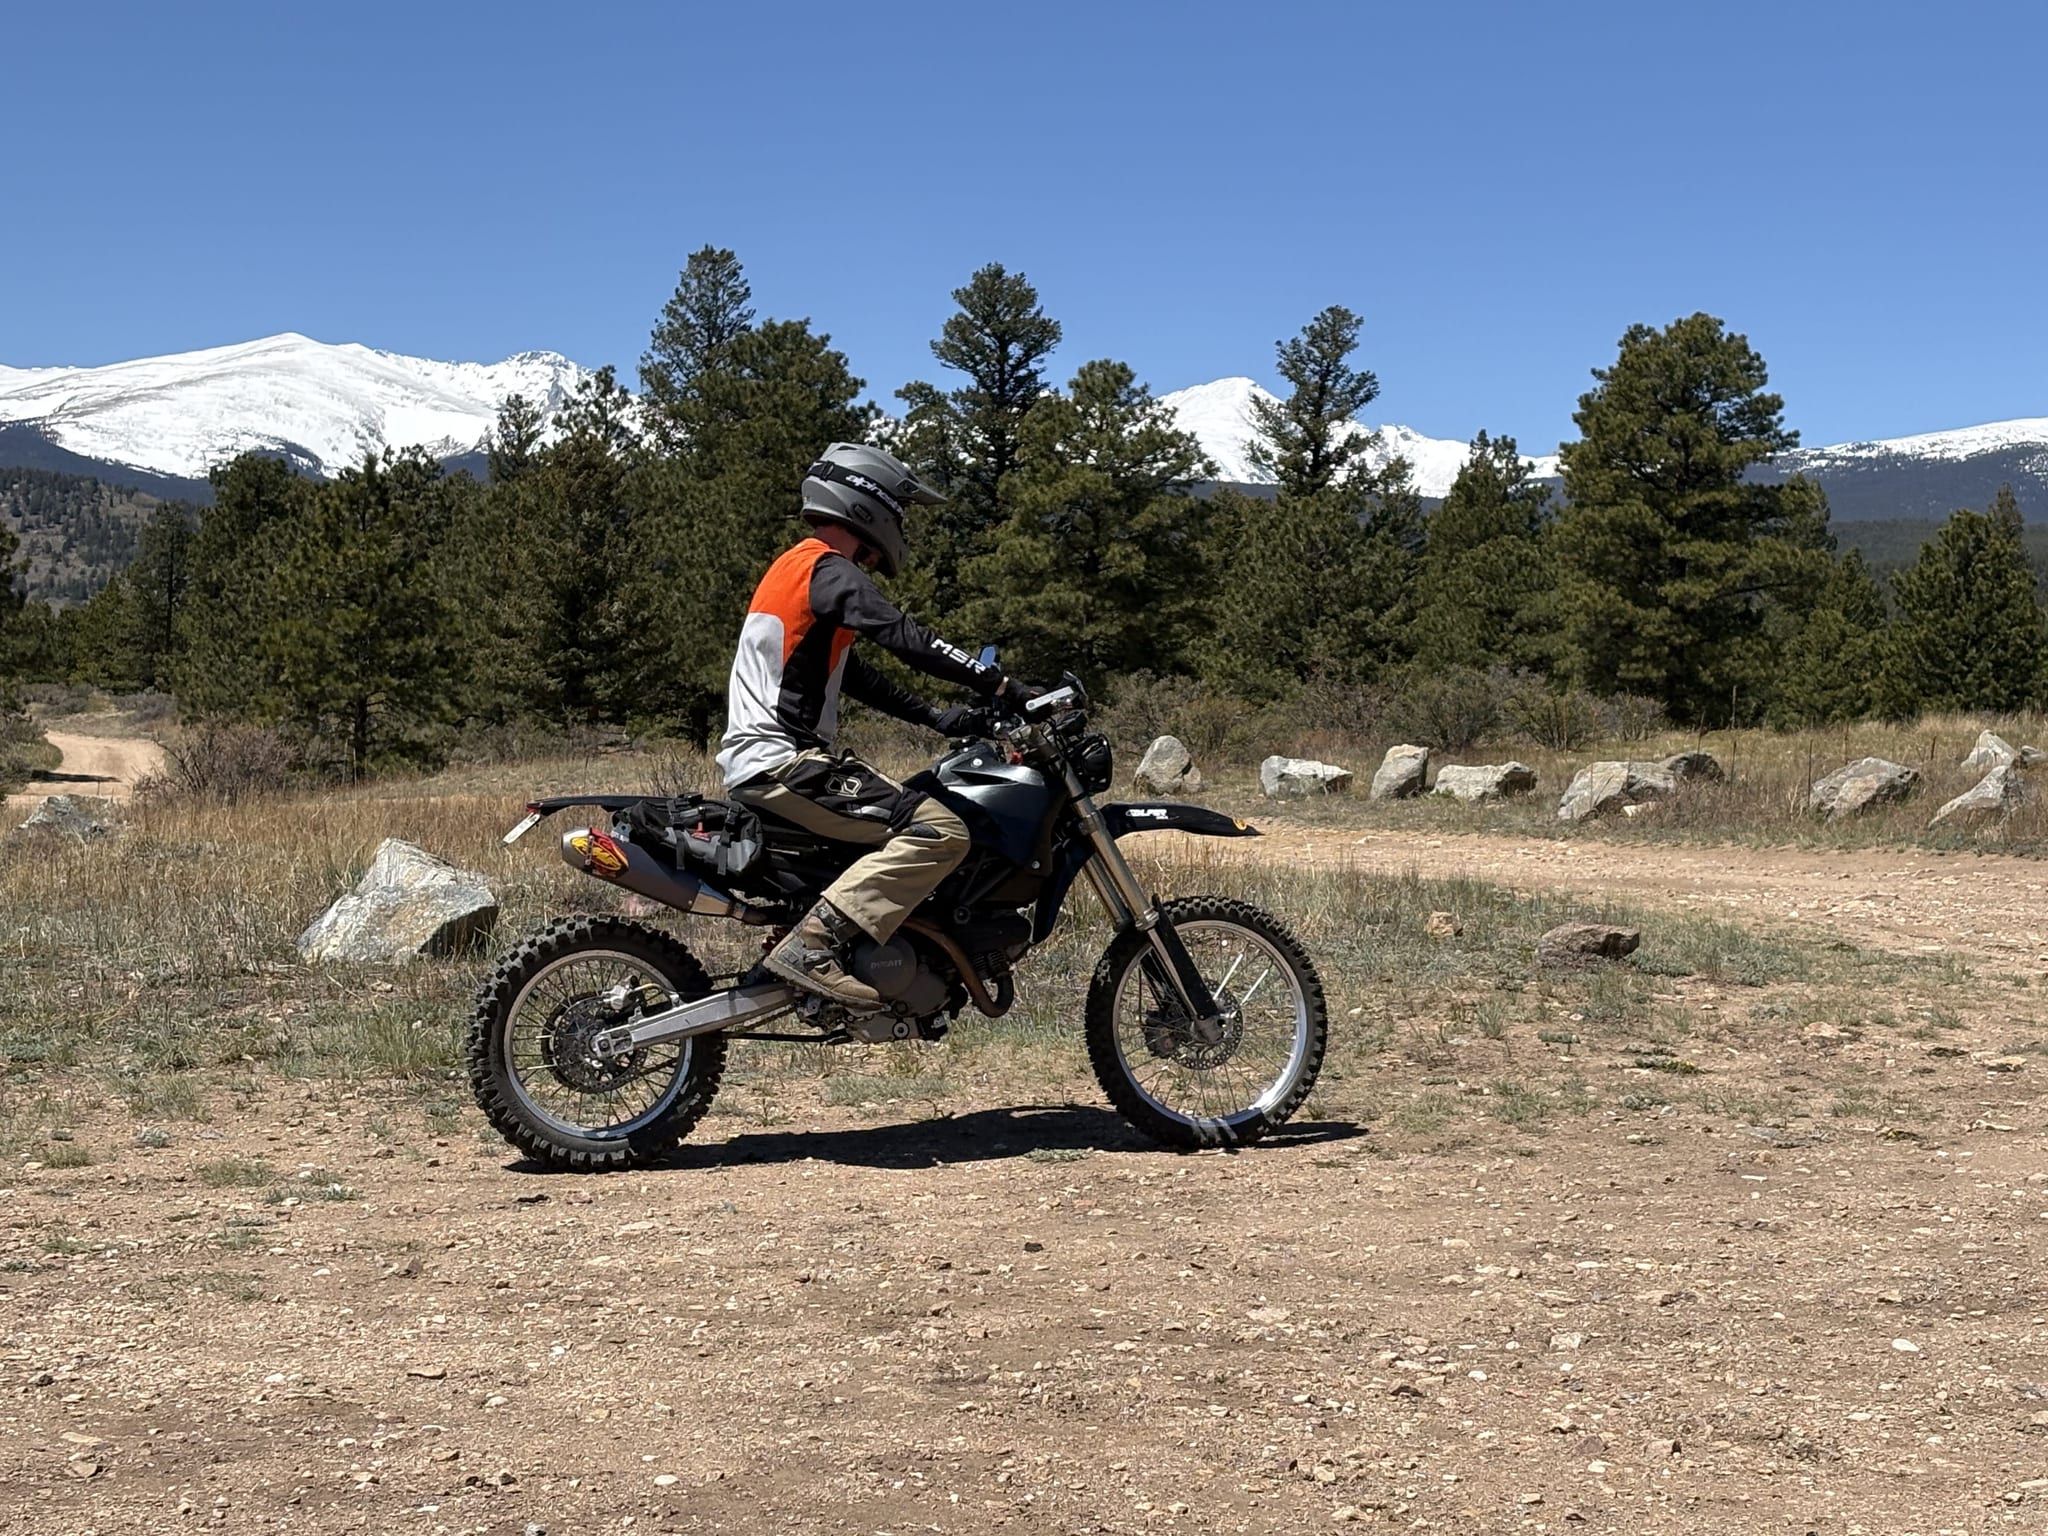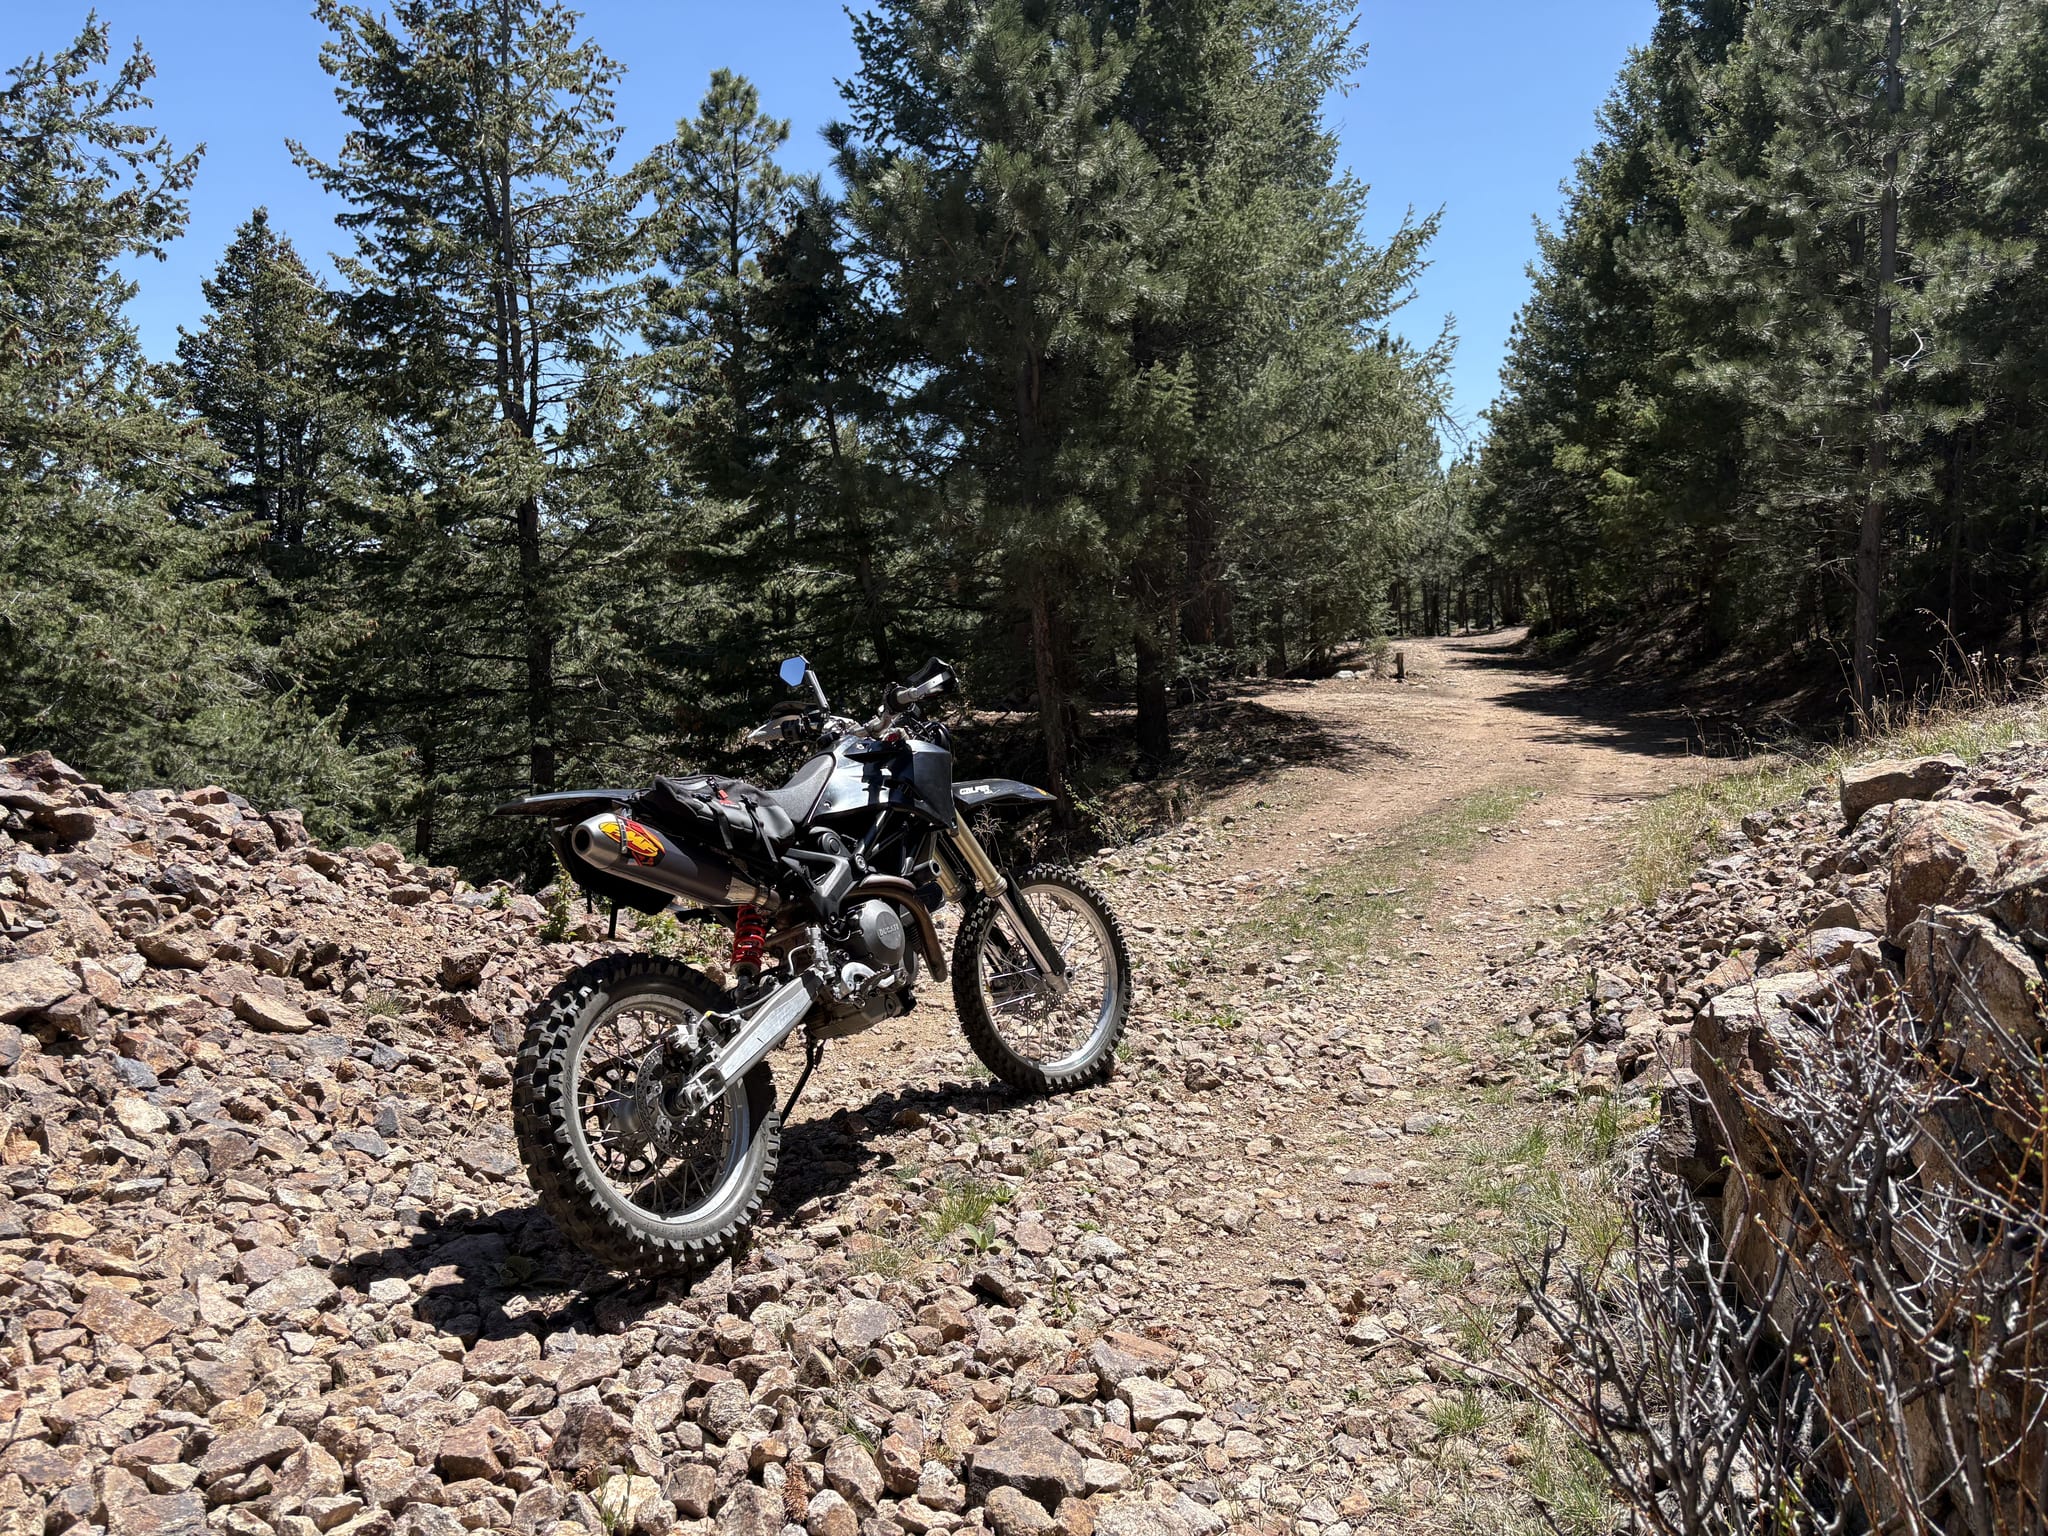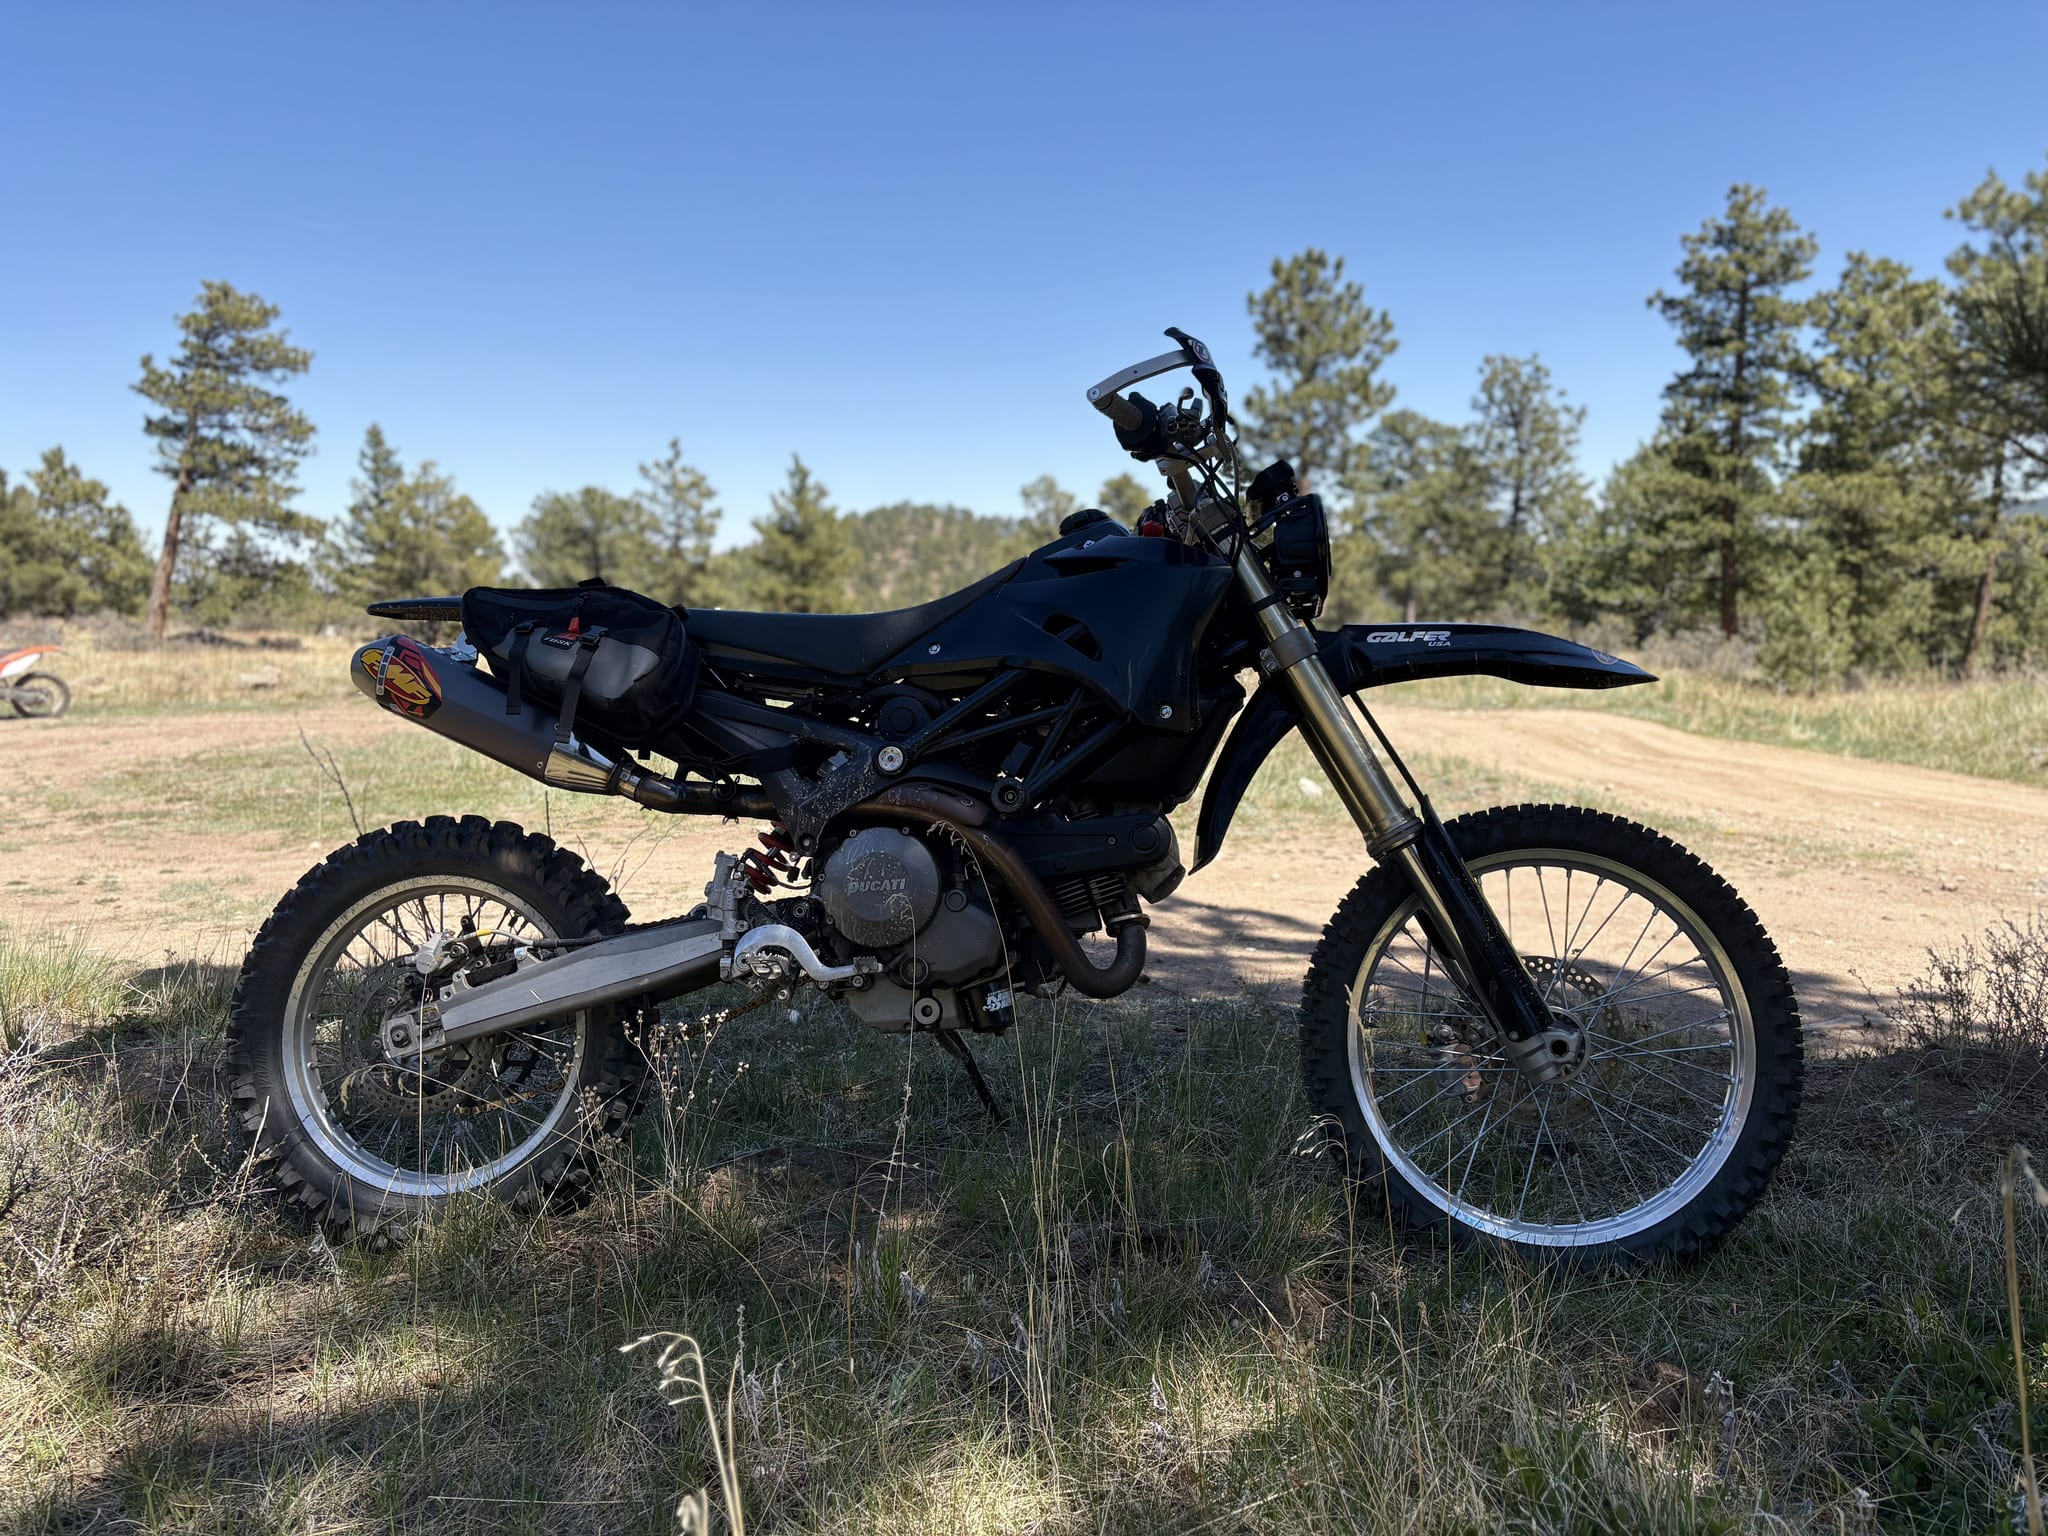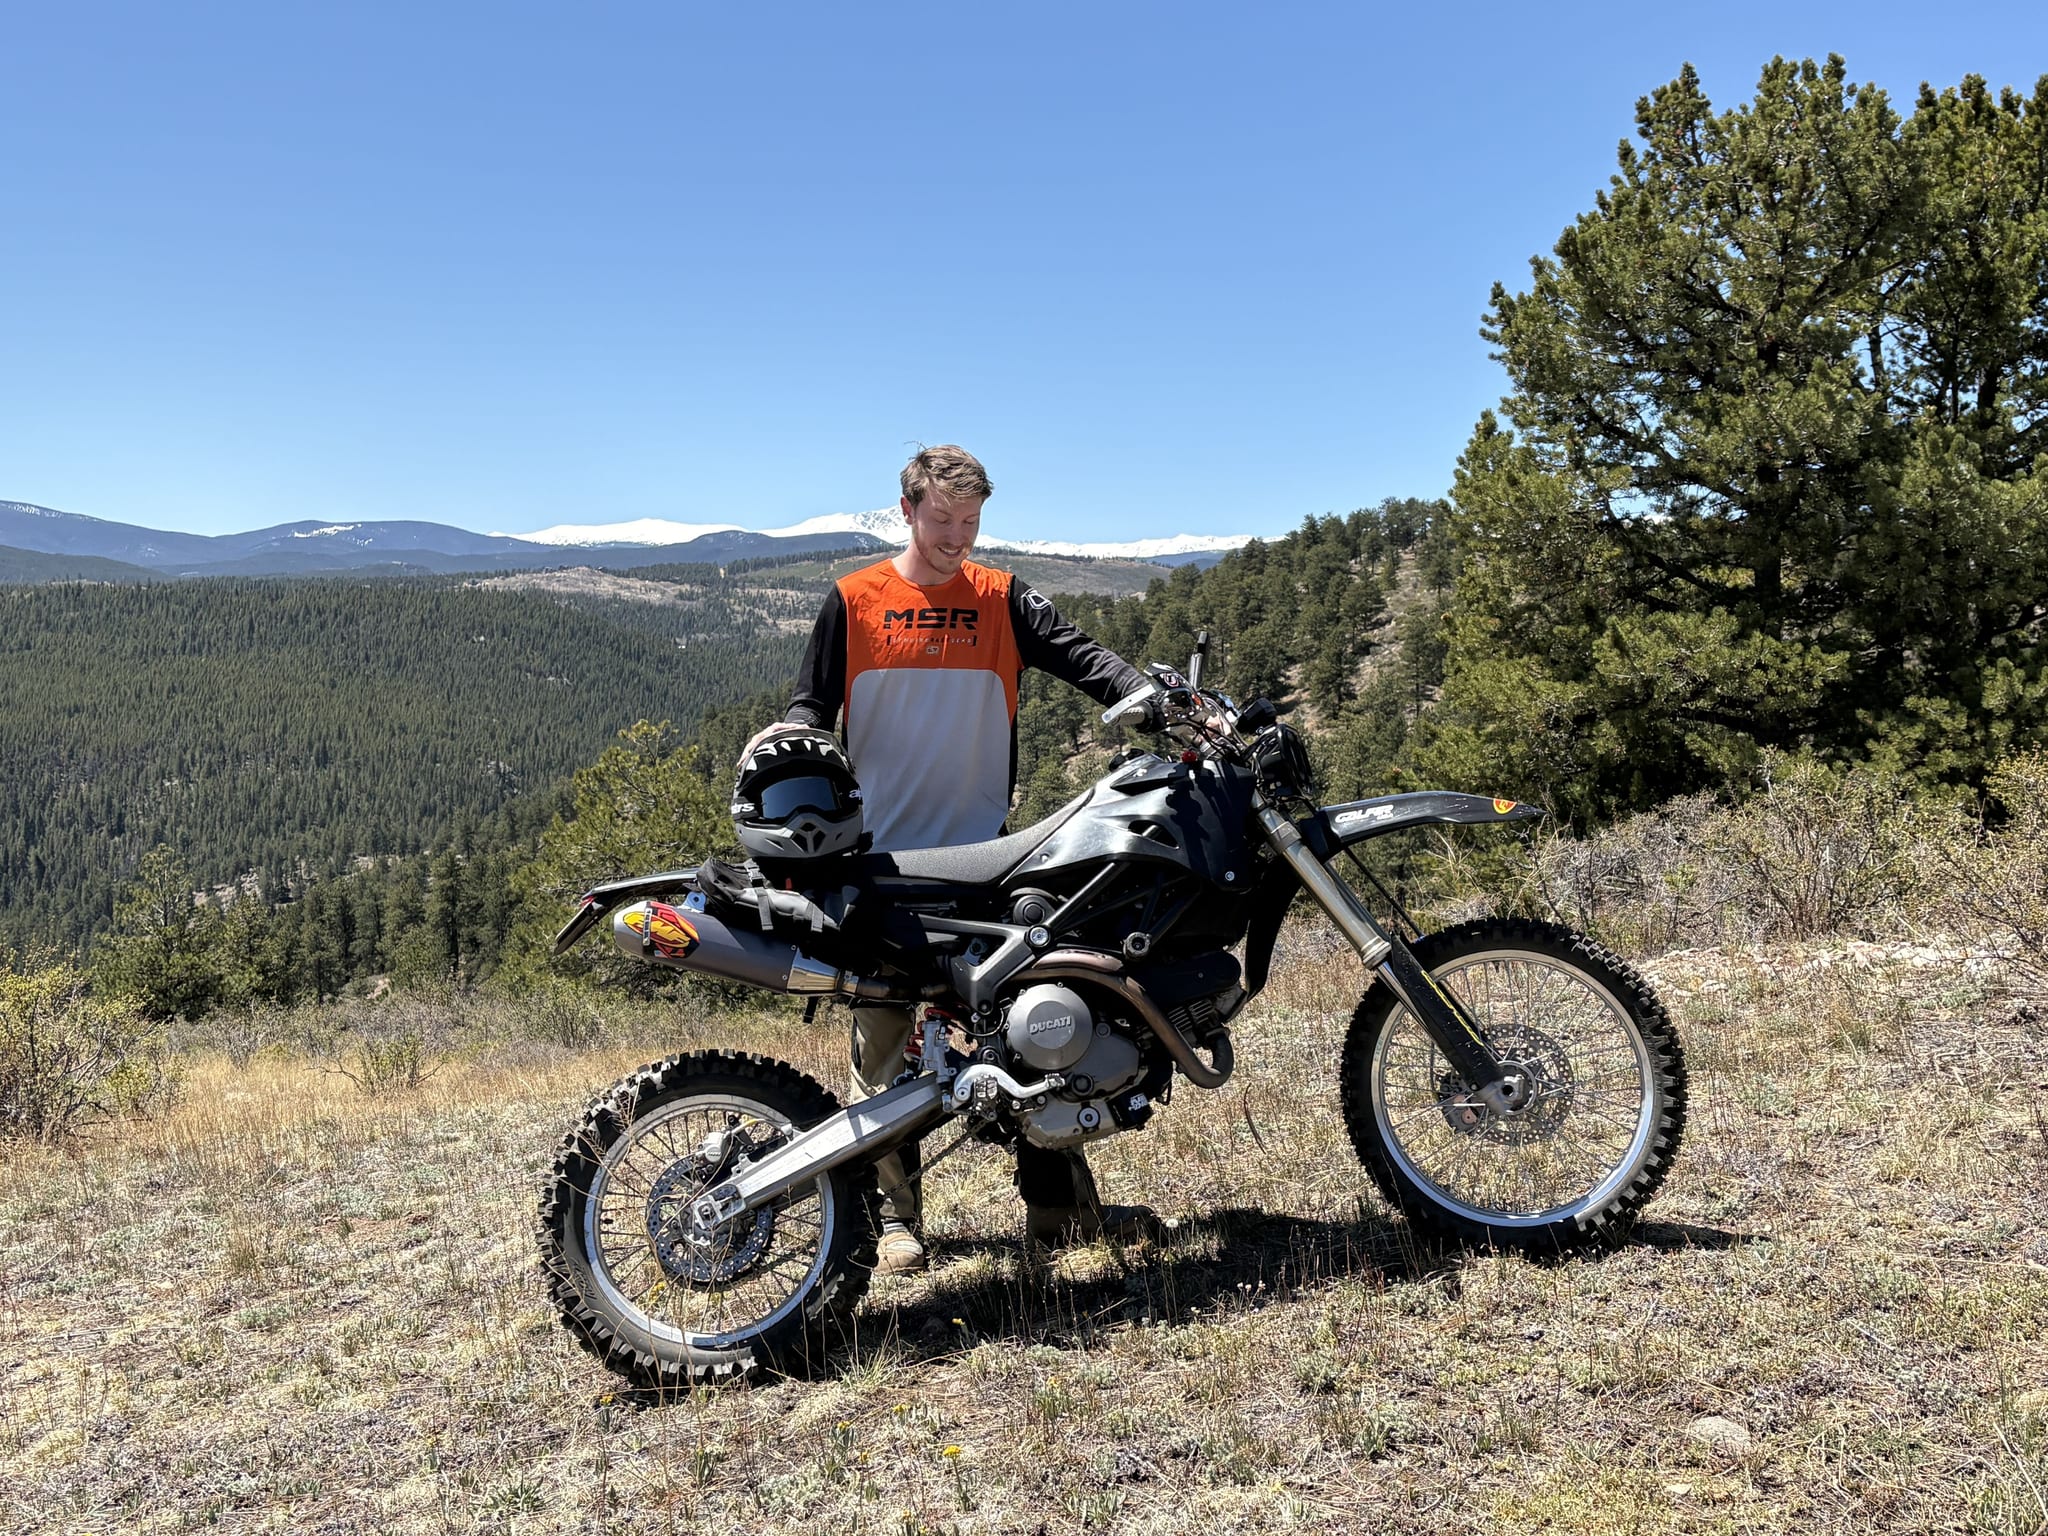
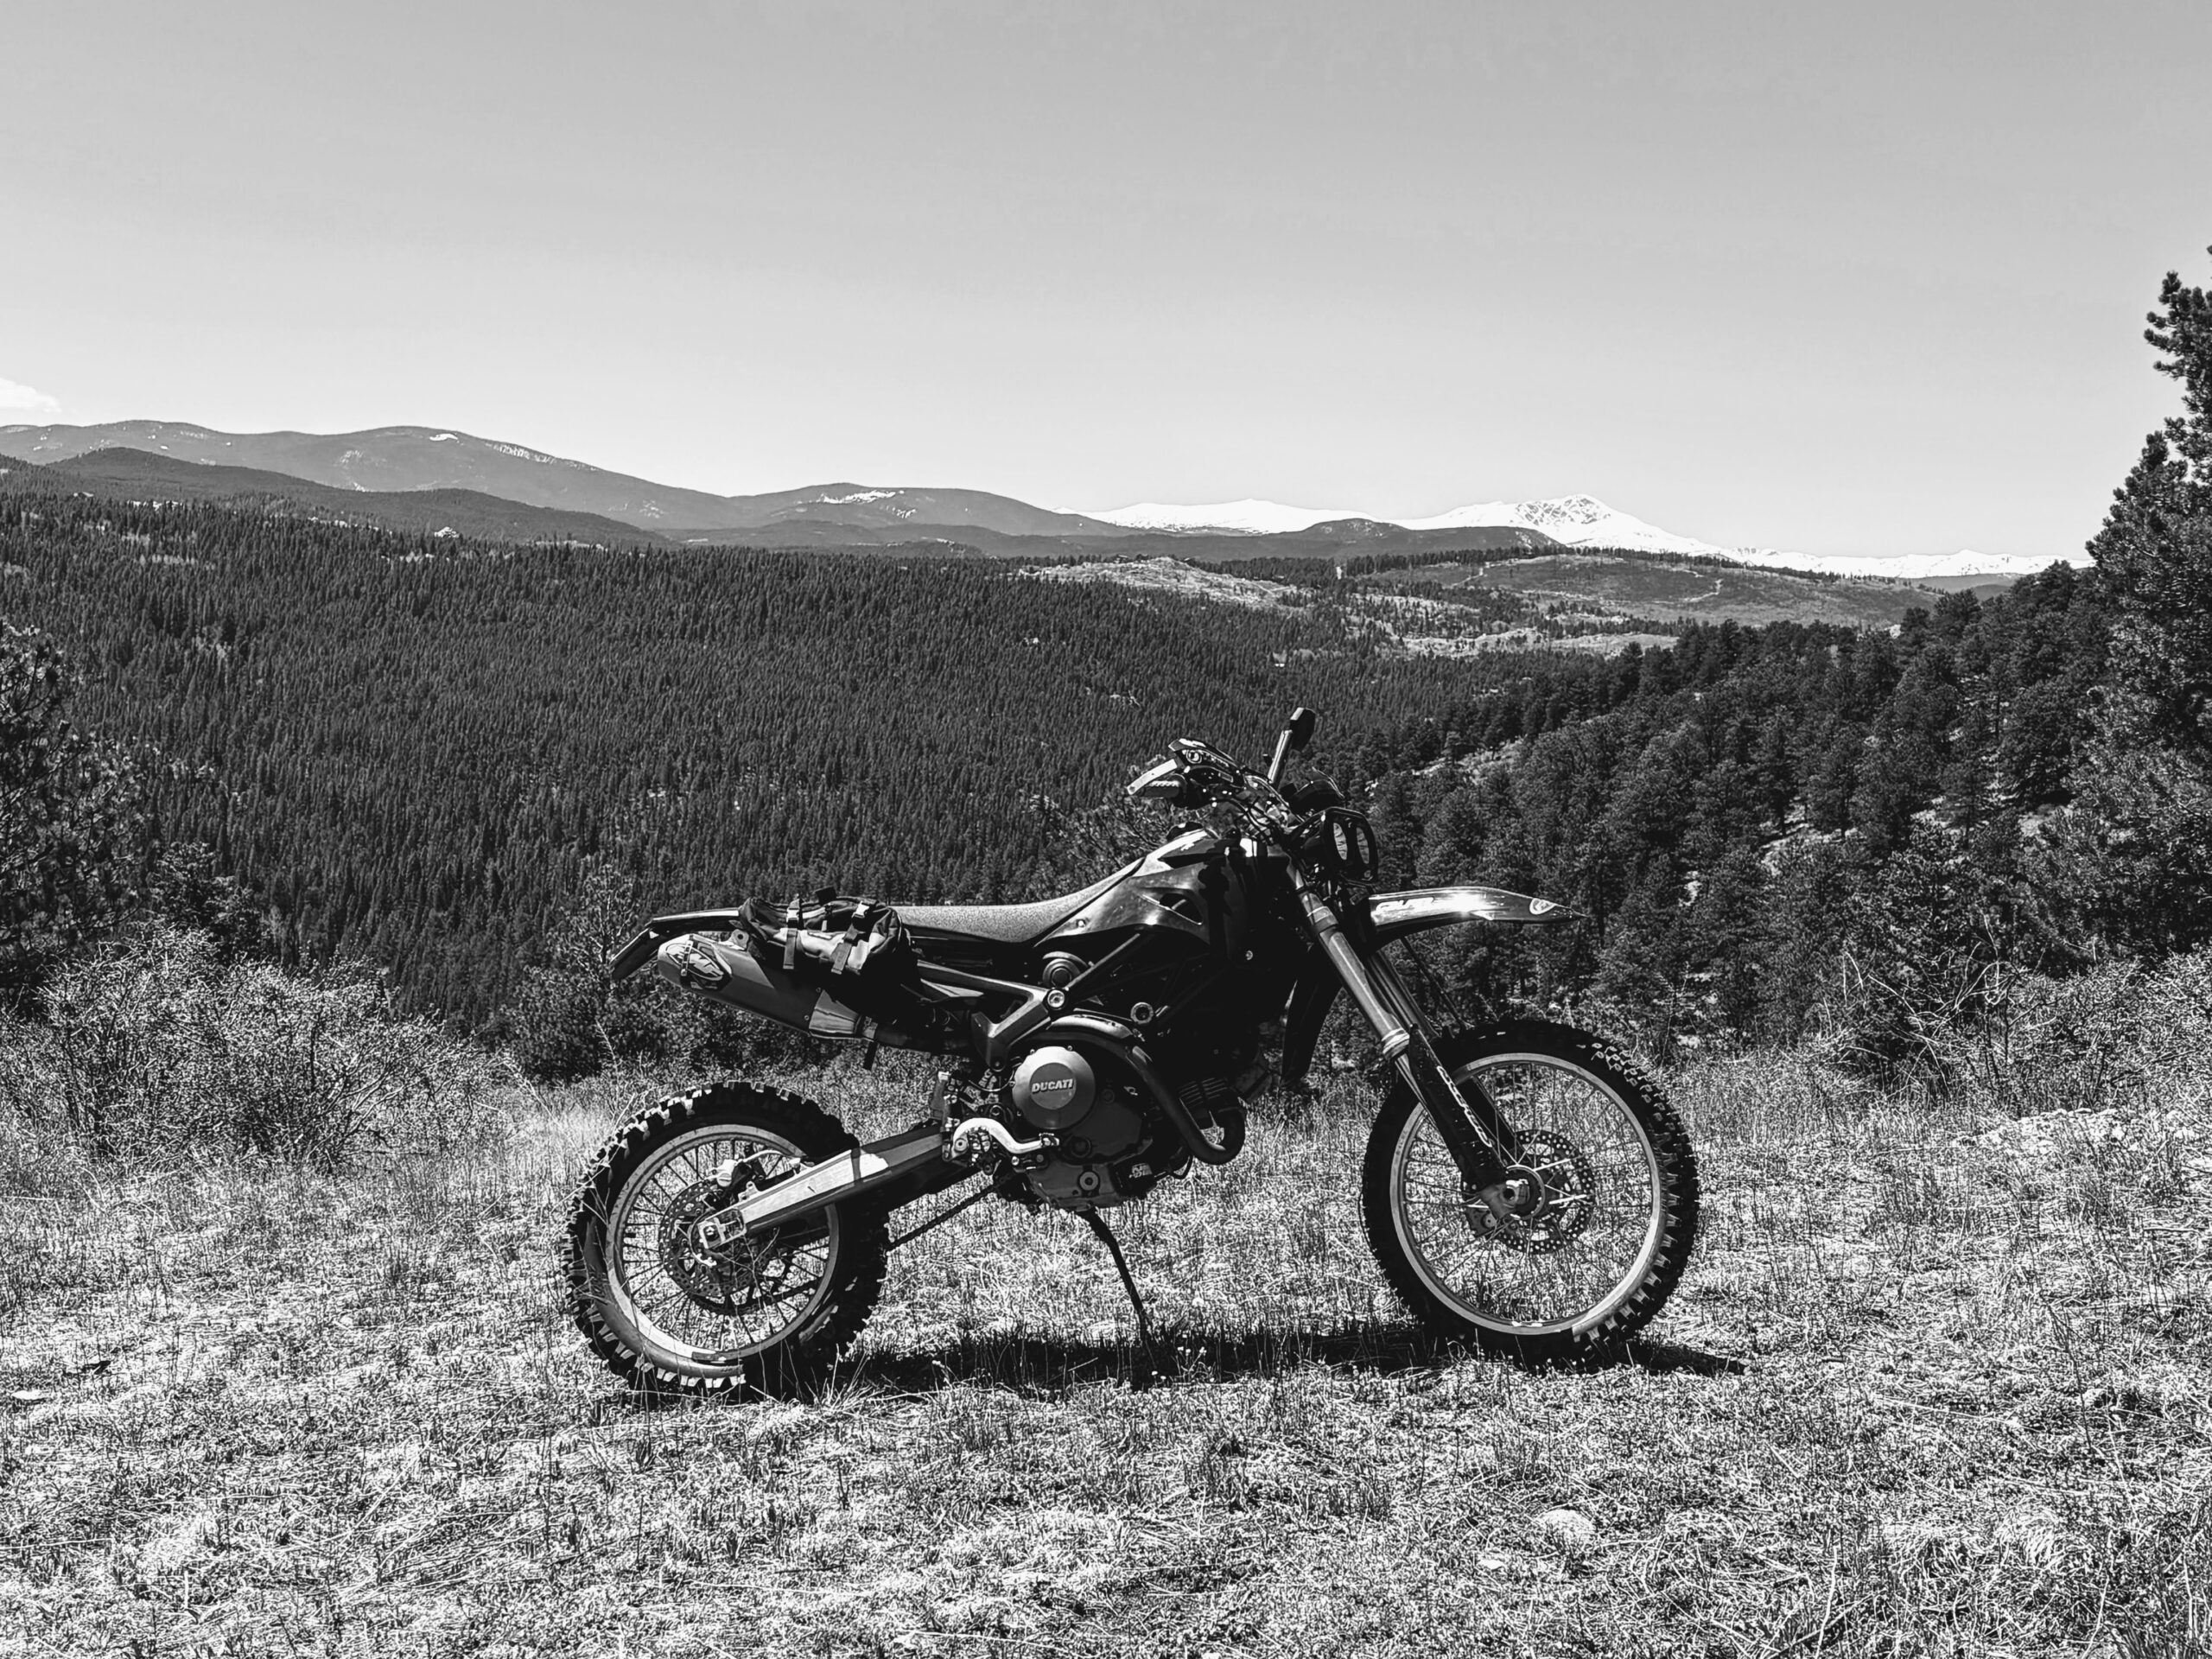
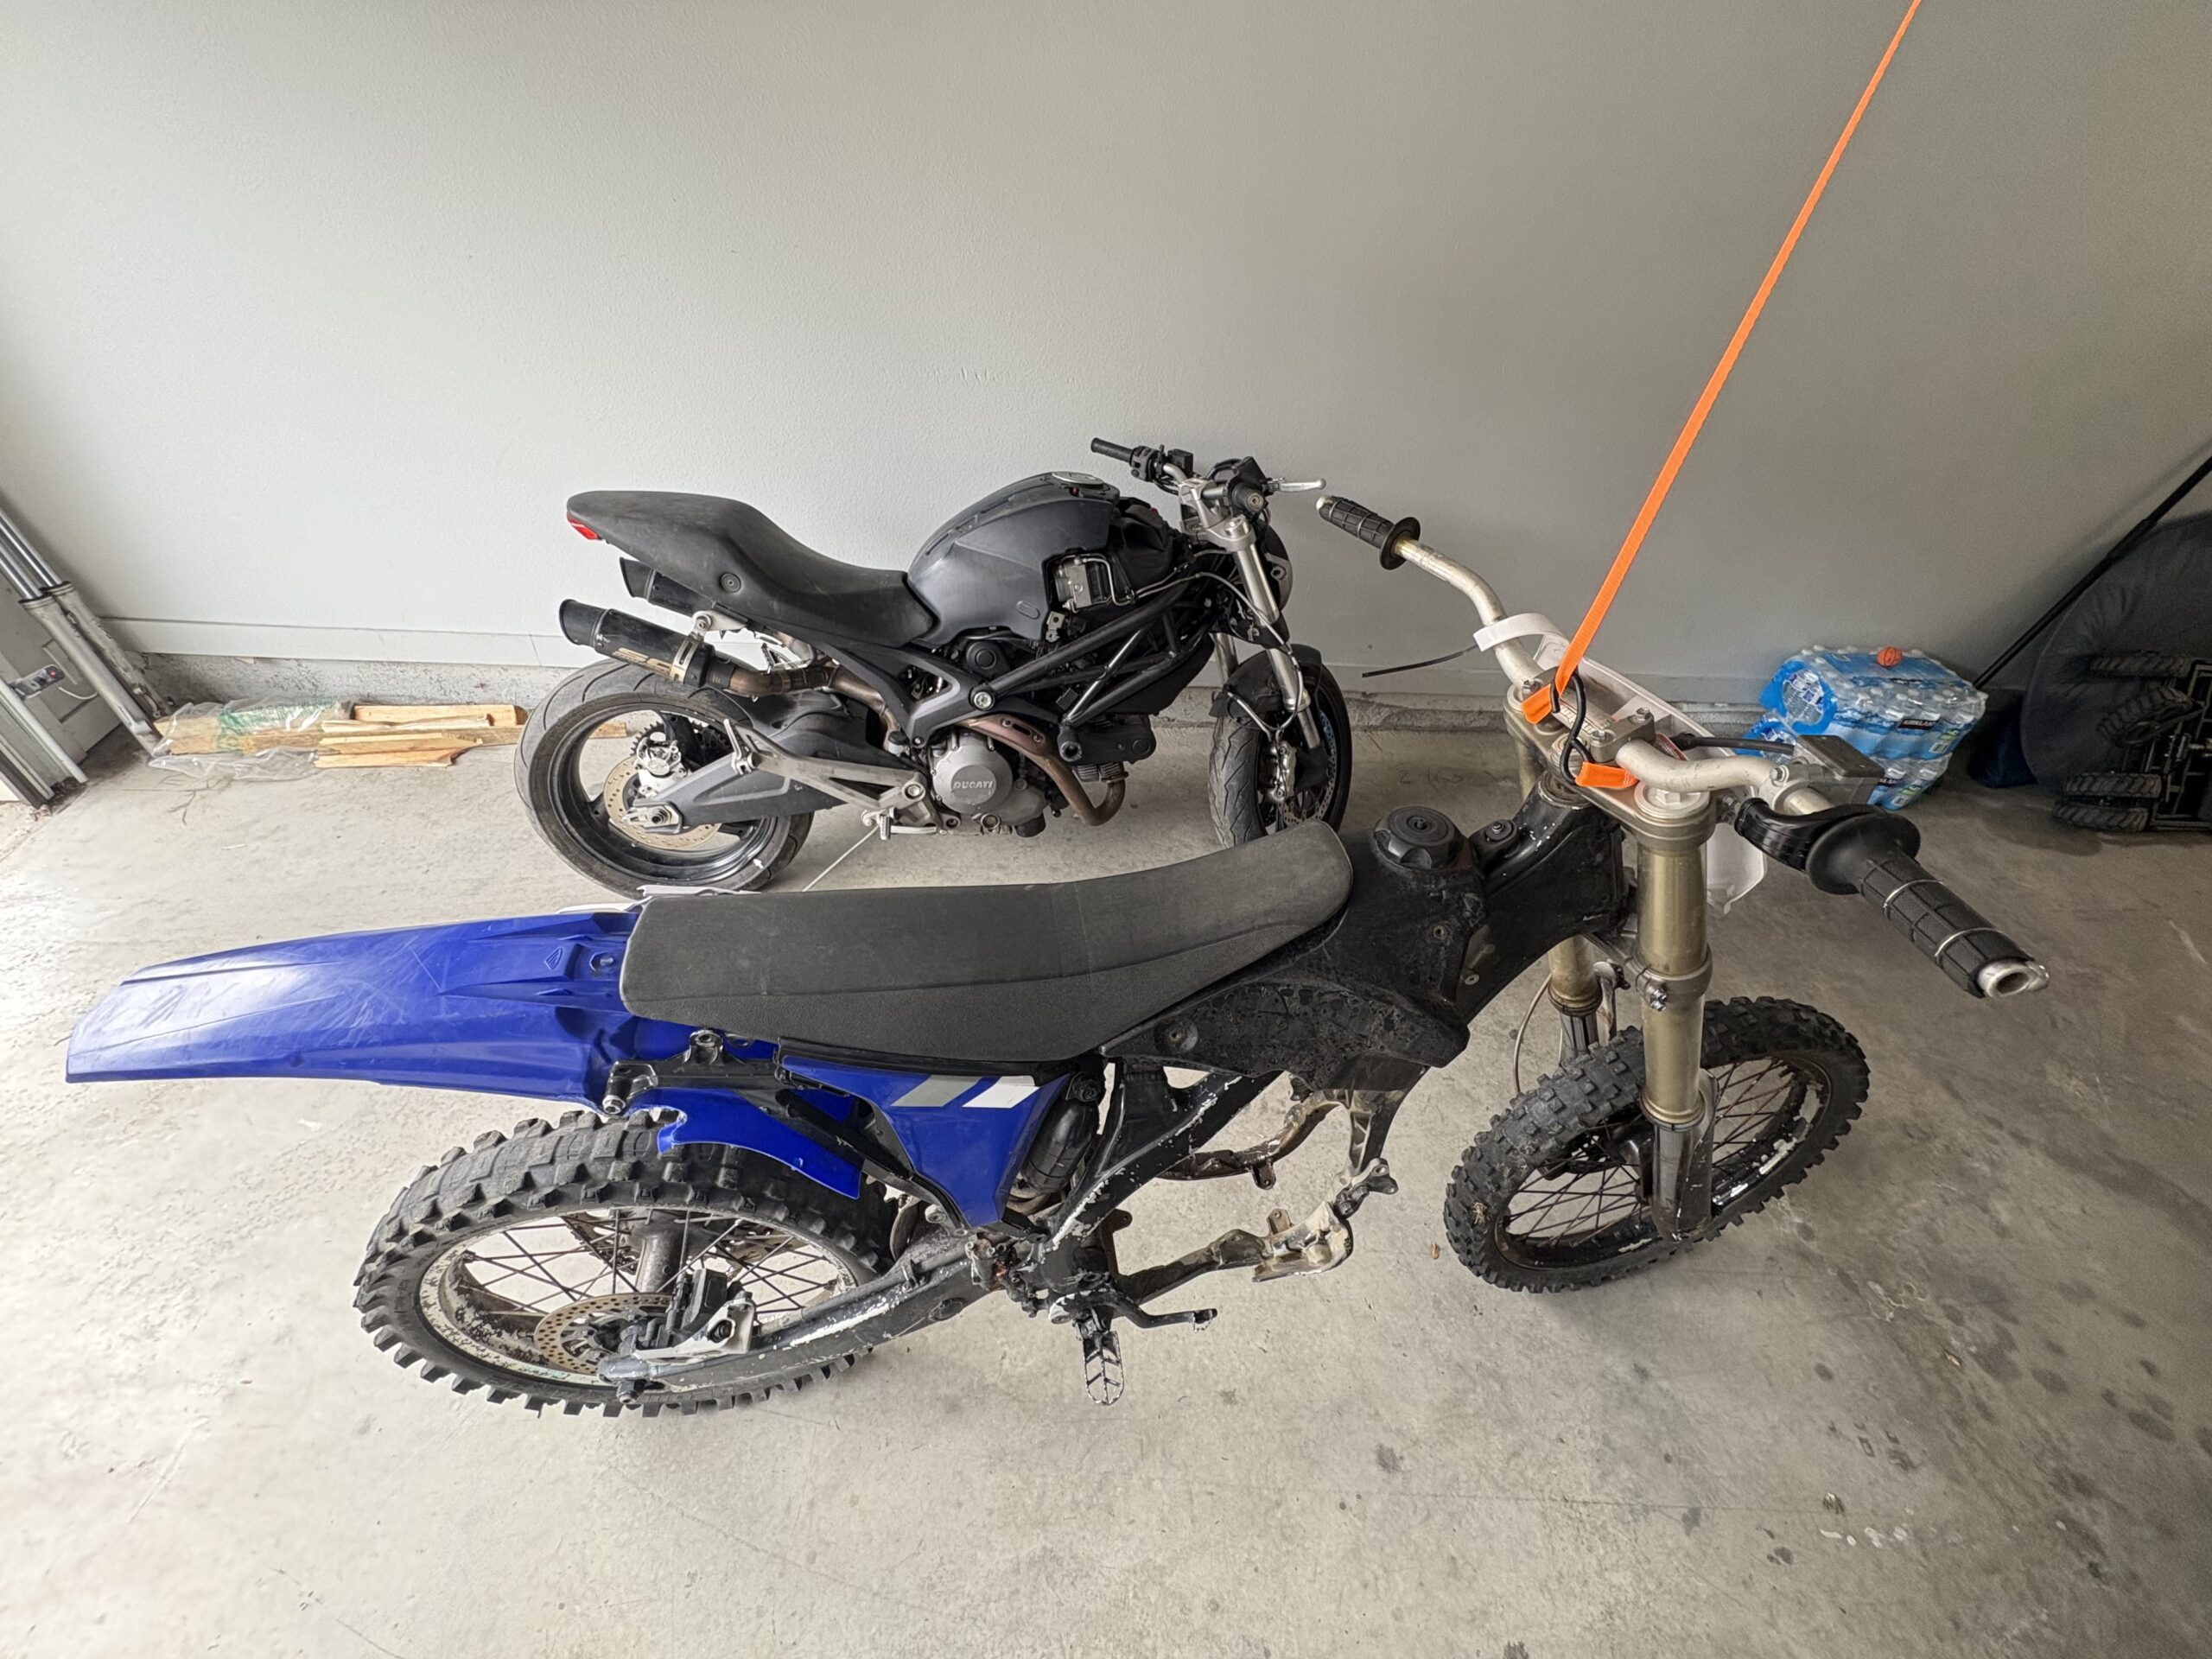
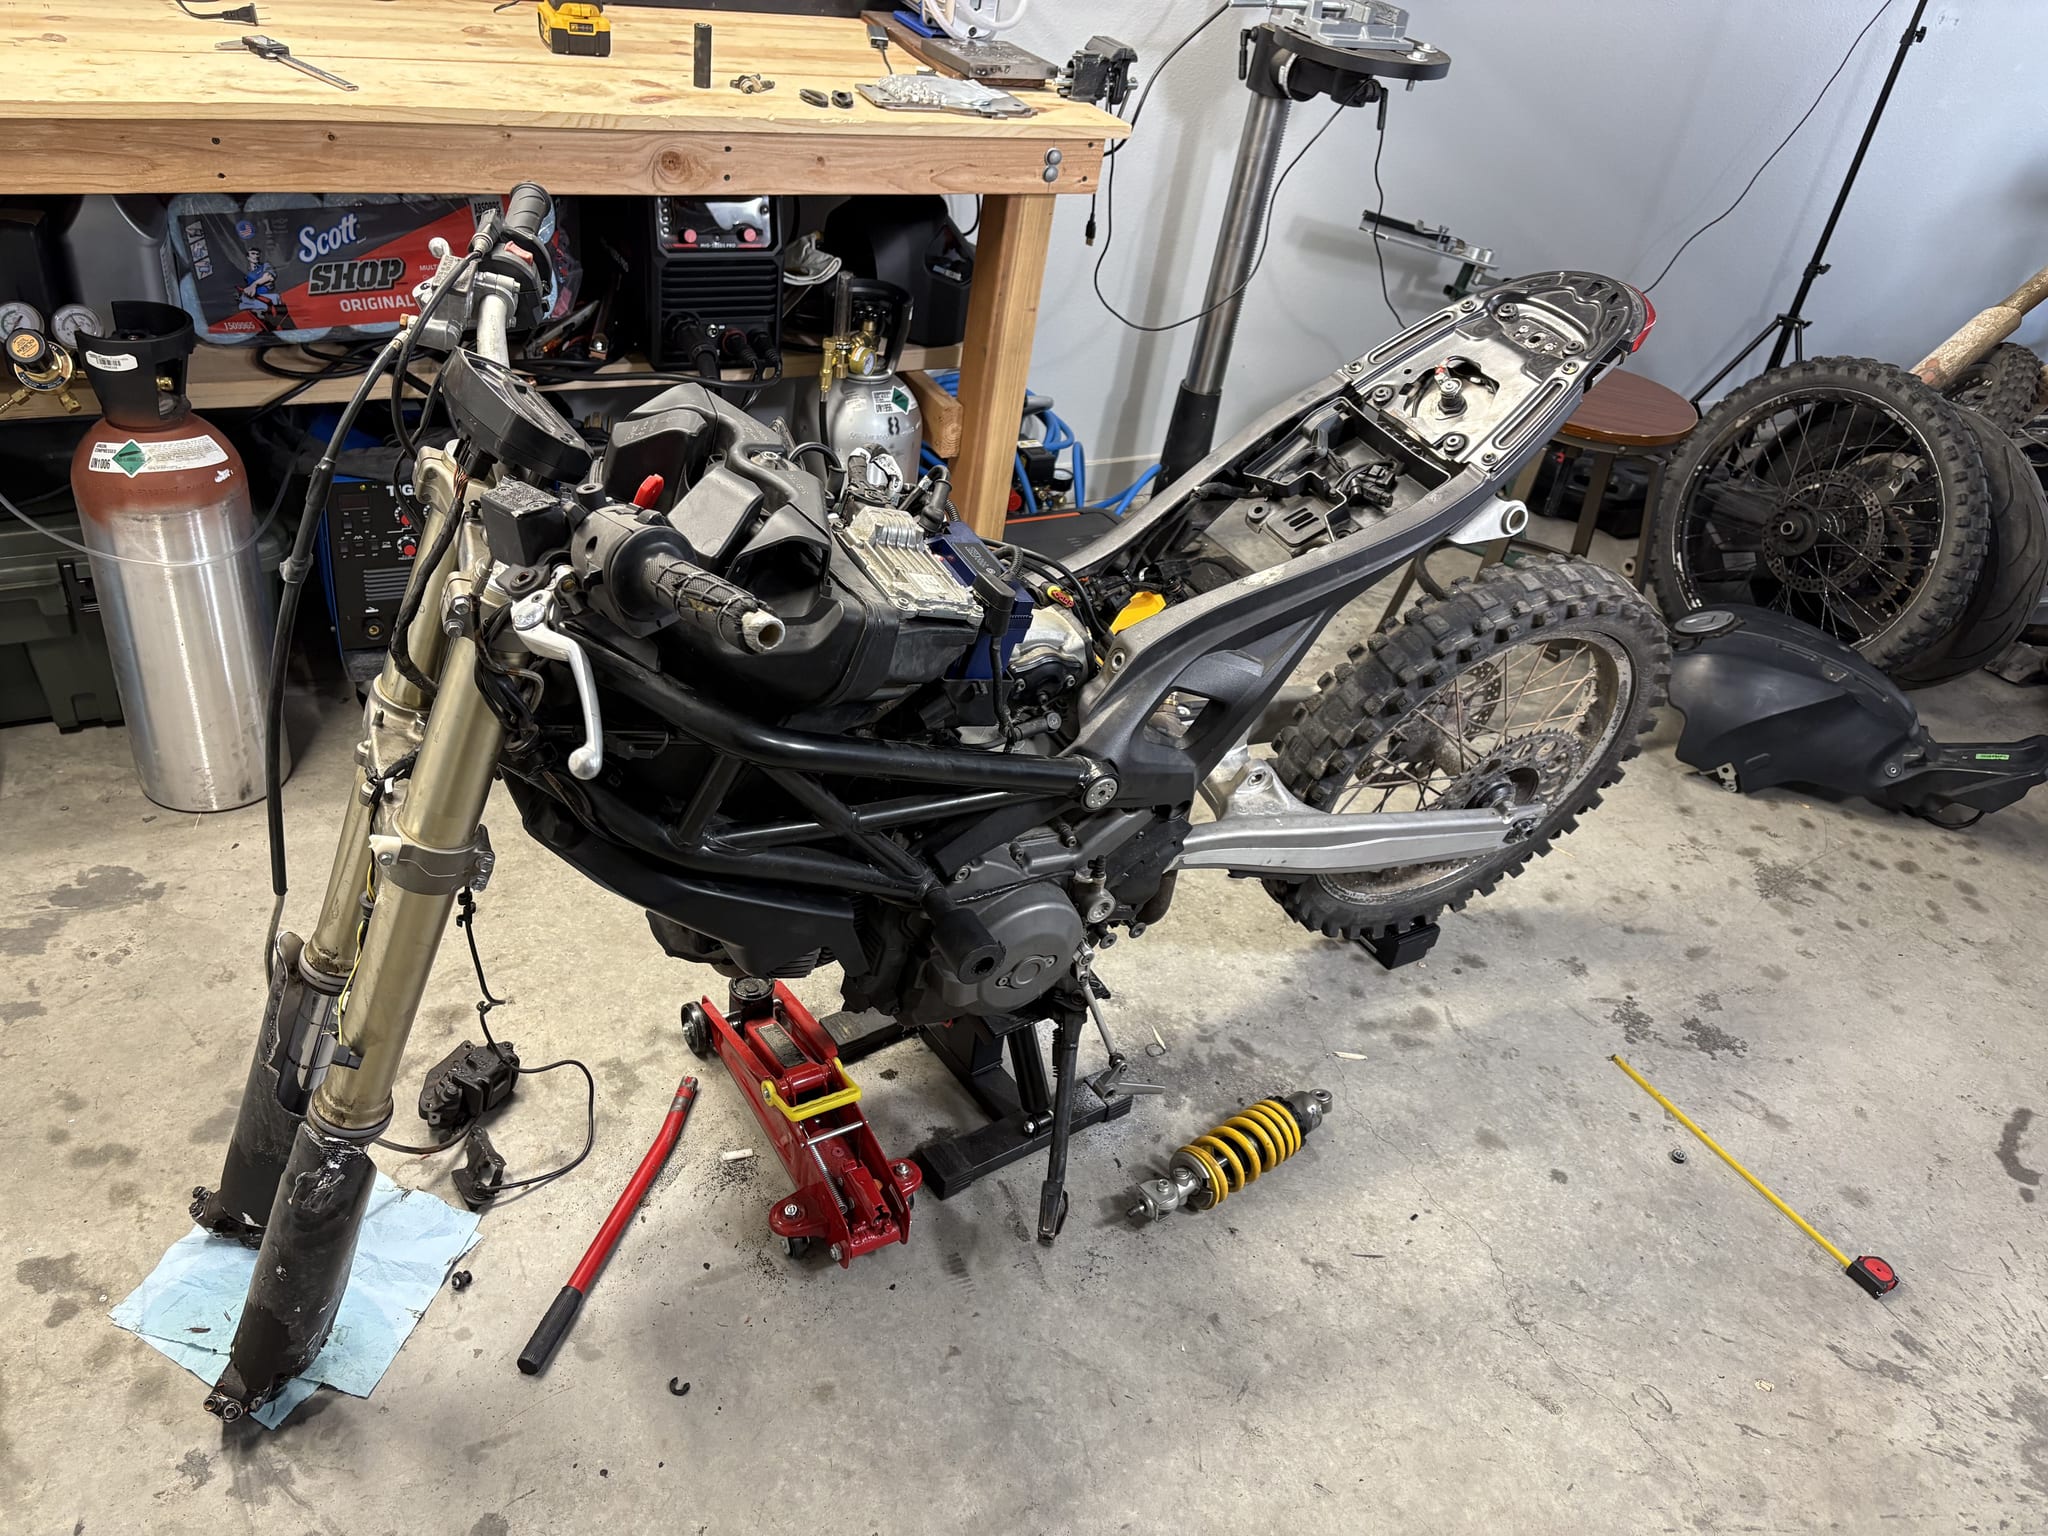
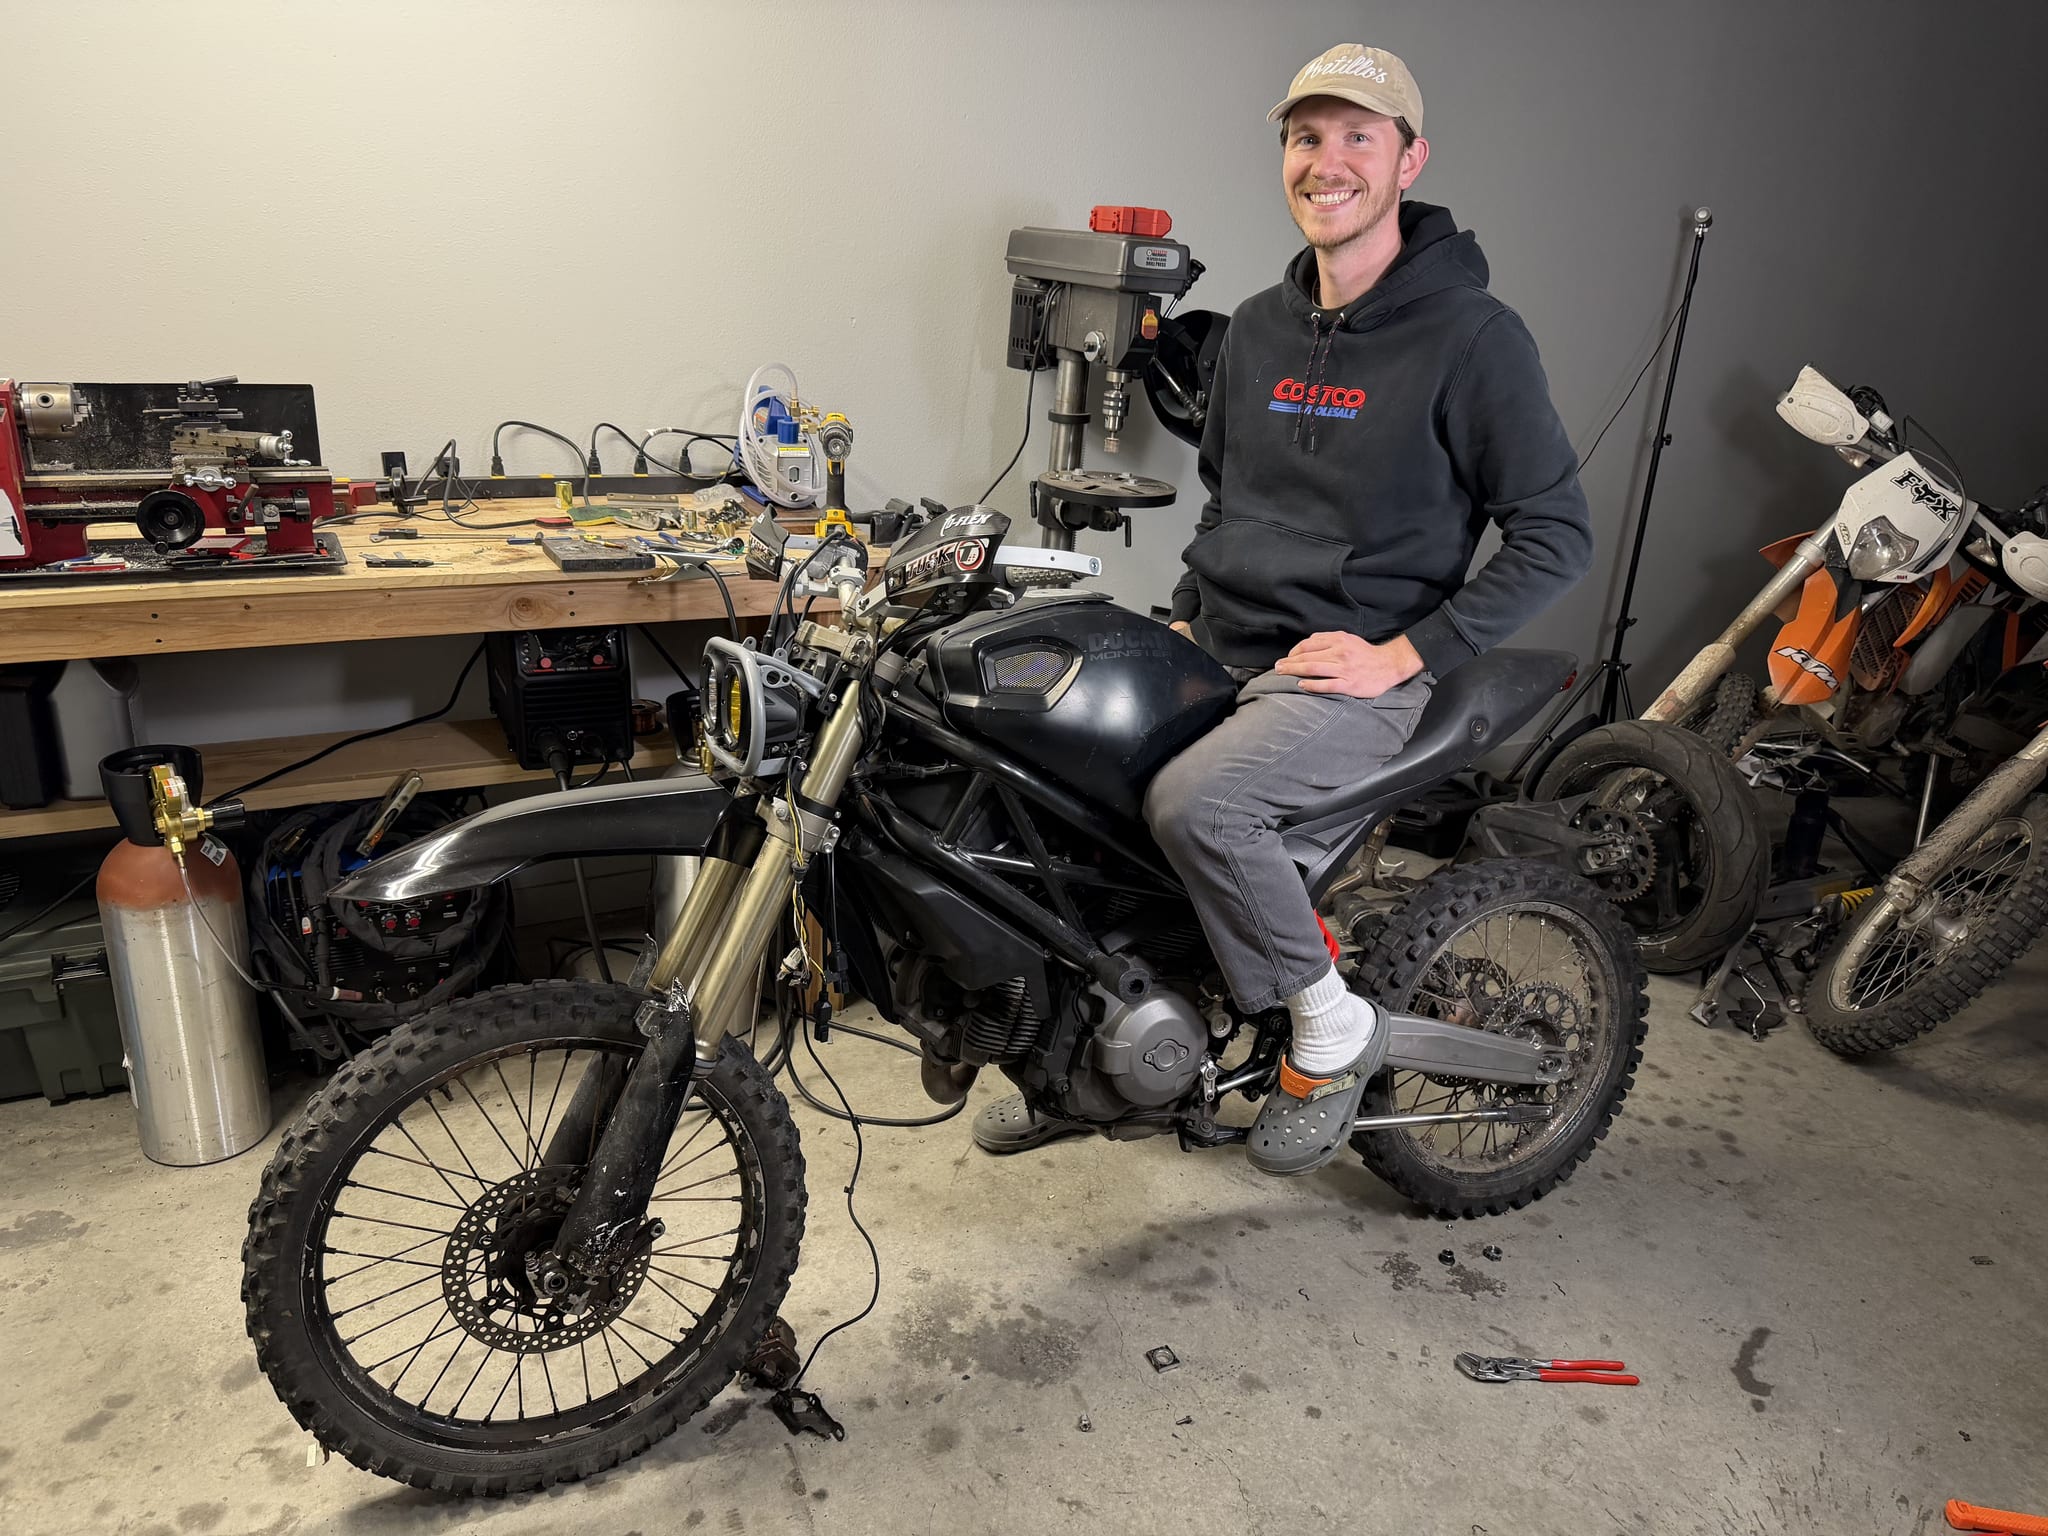
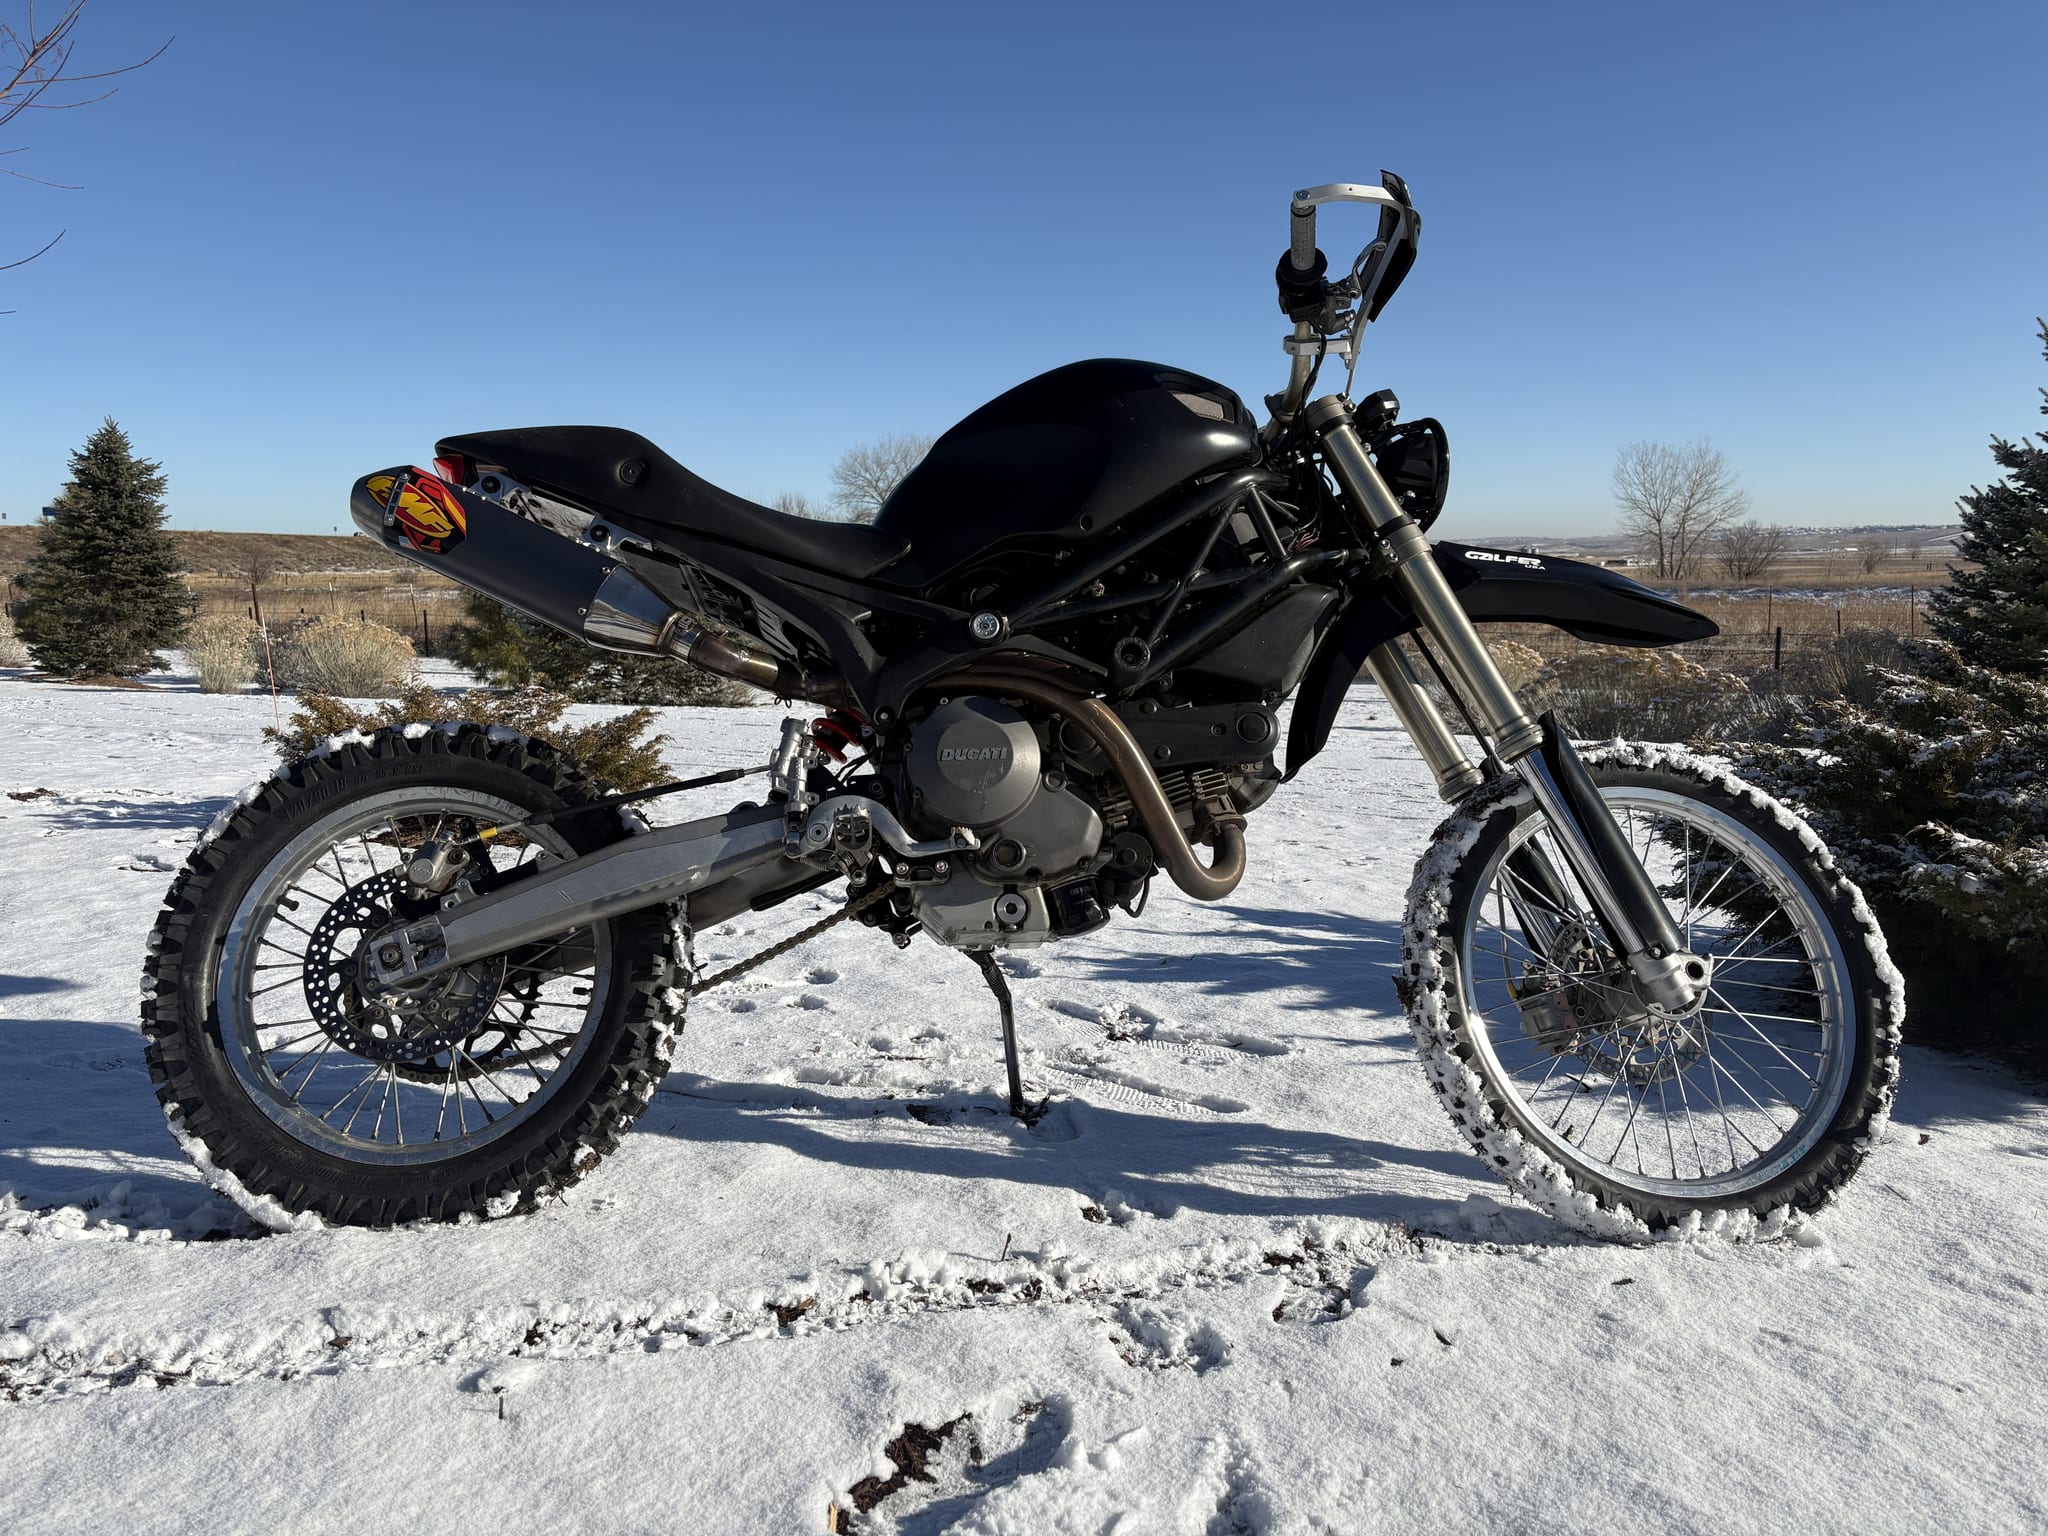
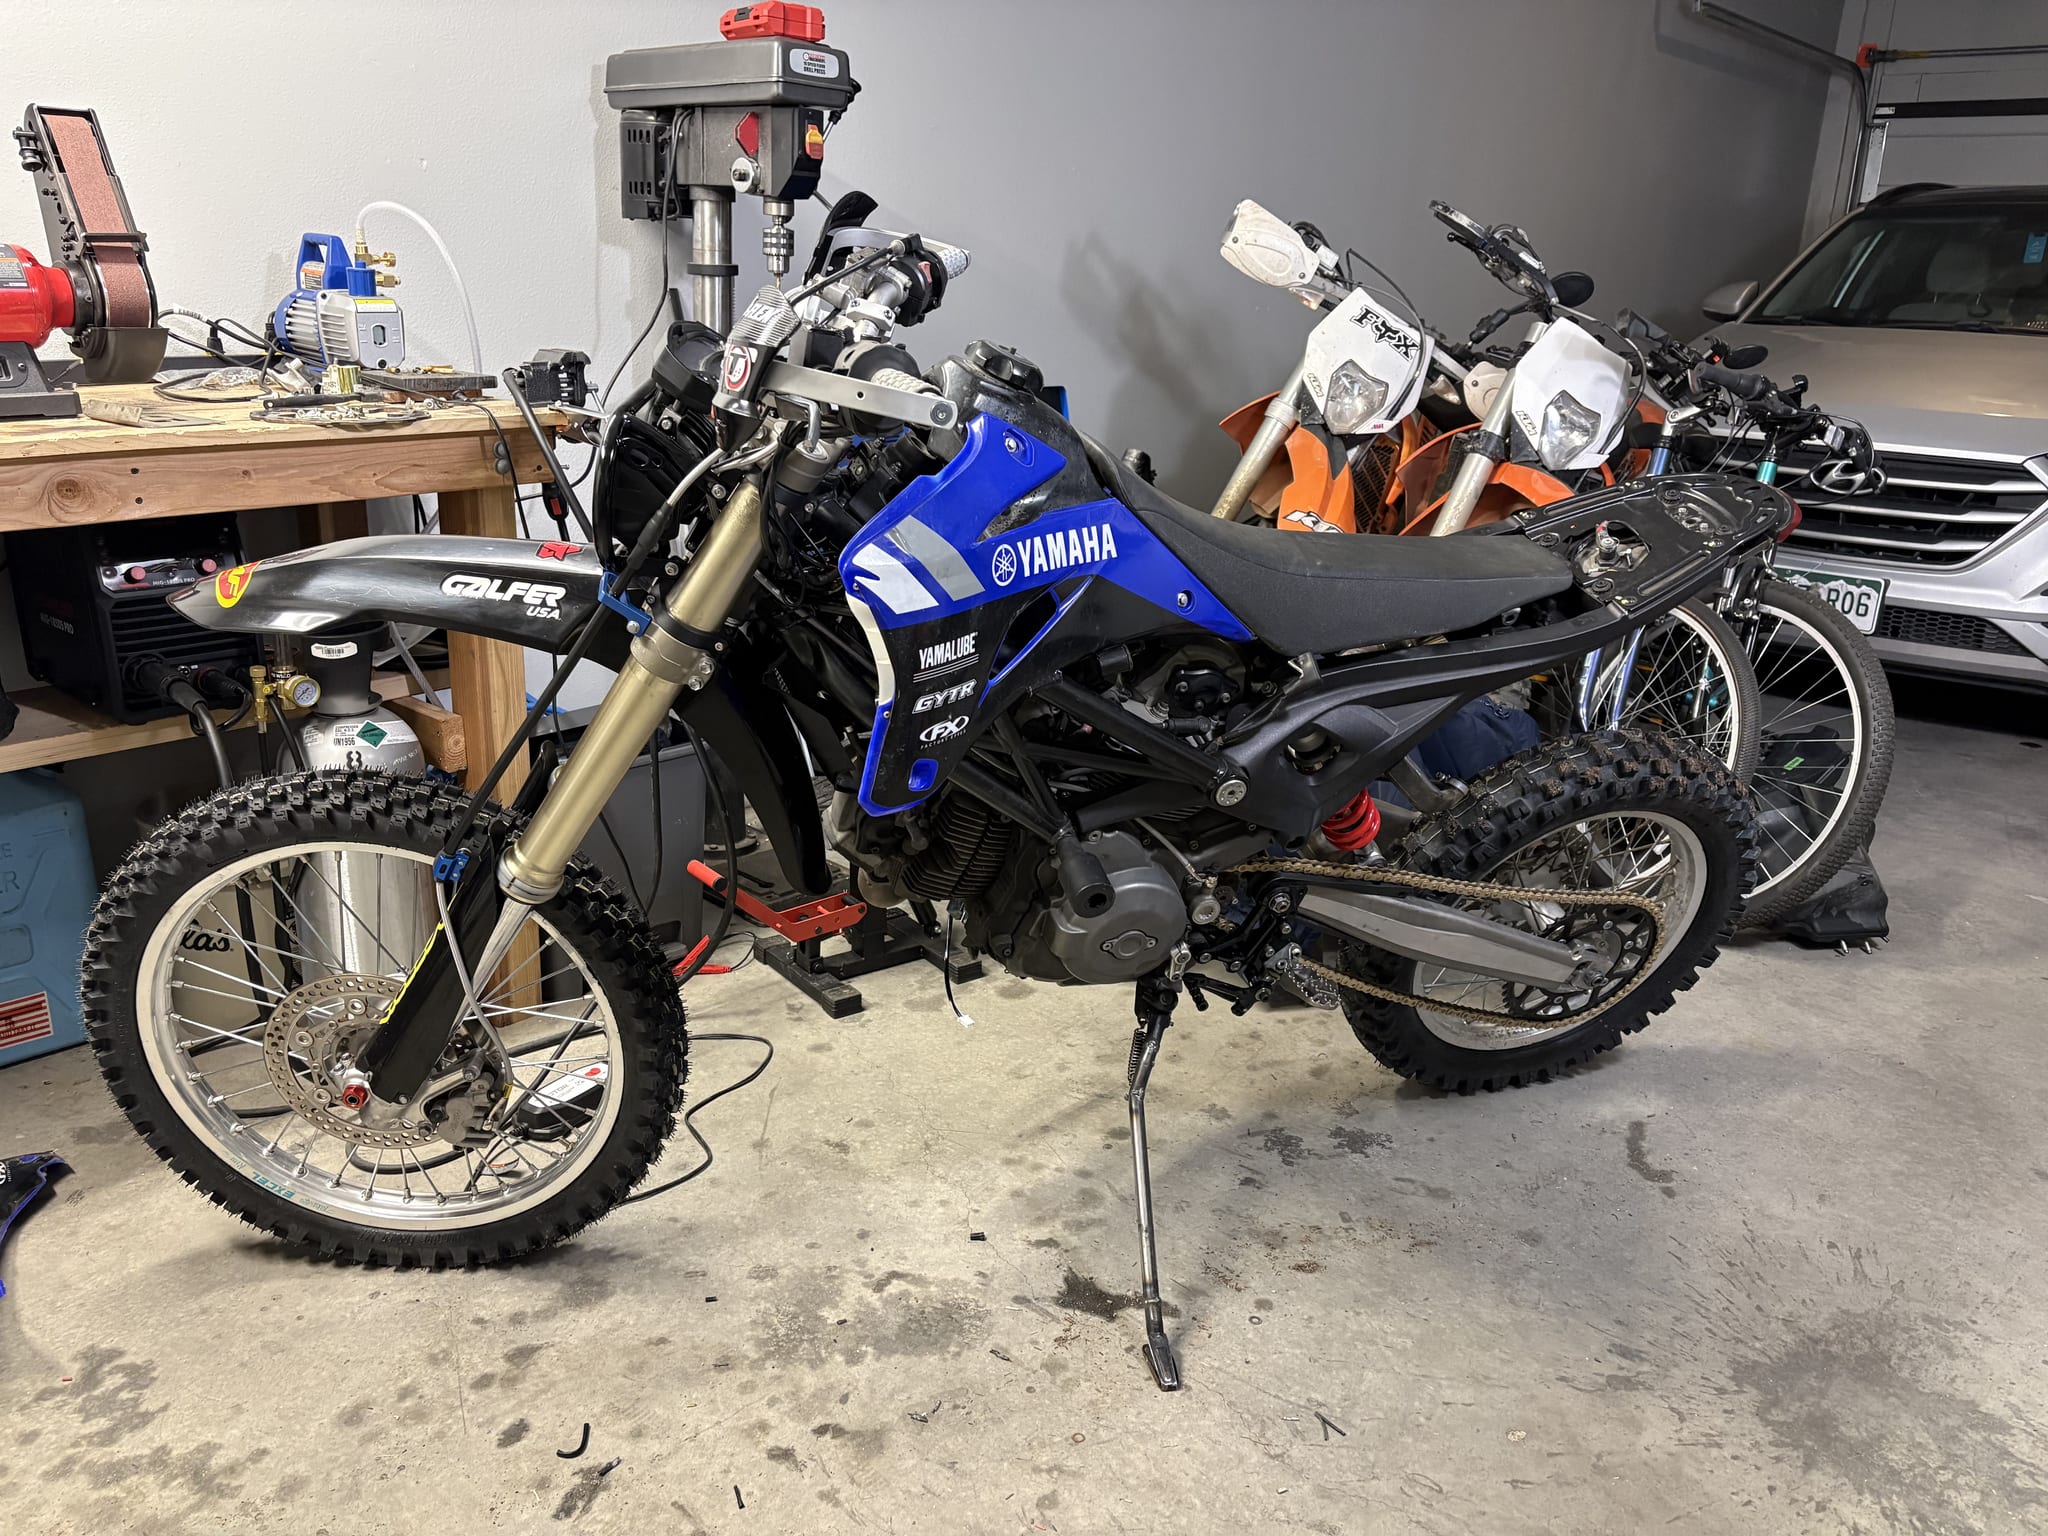
A crashed 2012 Ducati Monster 696, rebuilt with the forks of a Yamaha YZ450F, the swingarm of a KTM 690 Enduro and the fuel pump of a Honda ATV. This is the biggest project I have ever built, and the one I have wanted to do right for years.
Where it started
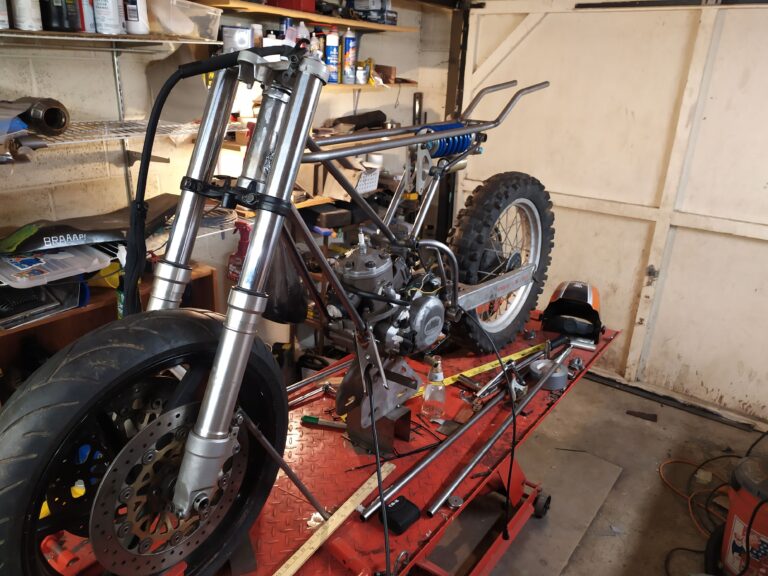
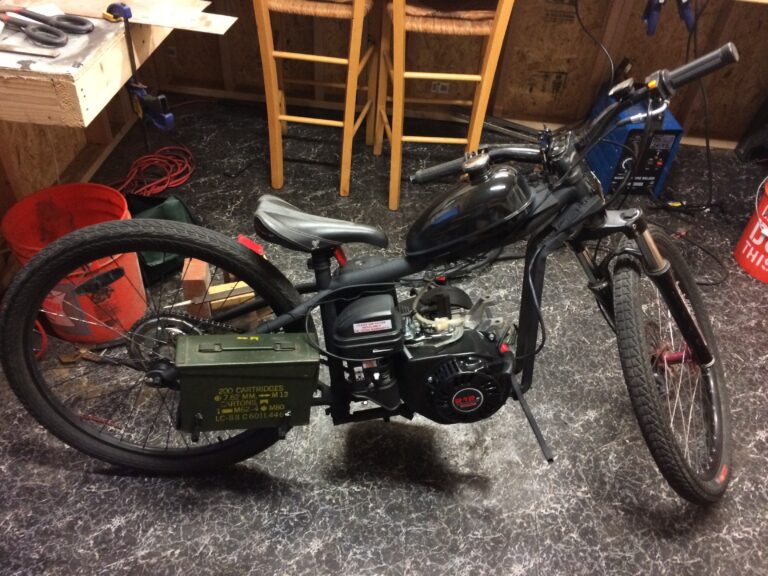
Years ago, for the final project of my engineering degree, I built a street-legal KTM 450 with a Suzuki GSX-R600 engine swapped in. The idea was proper dirt bike suspension paired with an engine that had far longer service intervals, without giving up any horsepower. The result was an ultra-fat, high-revving, low-torque, unwieldy dirt bike. It was a real eye-catcher, but it wasn’t what I had set out to build.
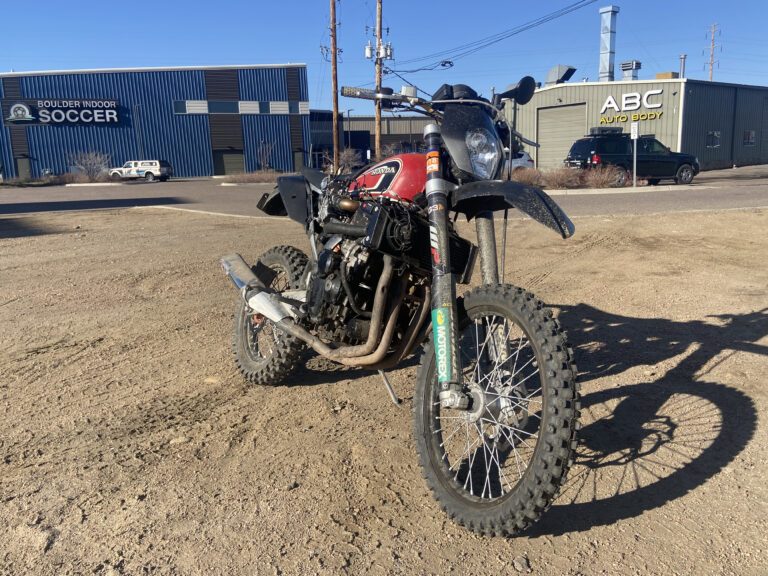
For years after that build I dreamed of doing the project again, properly. And I finally did it.
Picking the engine
Ever since the KTM, I had been trying to figure out the perfect engine. It needed the right mix of horsepower, torque and cool factor, plus moderate reliability. Well, maybe not reliability, but at least longer service intervals than a motocross engine.
I knew I wanted a twin this time. The GSX-R600 engine was ridiculous off-road, but the power wasn’t usable. There was almost no power or throttle response low in the rev range, and as the revs built the bike would accelerate until suddenly the rear tire was just spinning, roostertailing dirt down the trail. That is the exact opposite of what you want off-road. The fix is fewer cylinders: two big punches instead of four smaller, faster ones. The Ducati twin had exactly what I needed.
Finding the donors
Finding the right donor was surprisingly easy. Once I had narrowed my search down to a few models, I started browsing Facebook Marketplace and almost immediately found a crashed 2012 Ducati Monster 696.
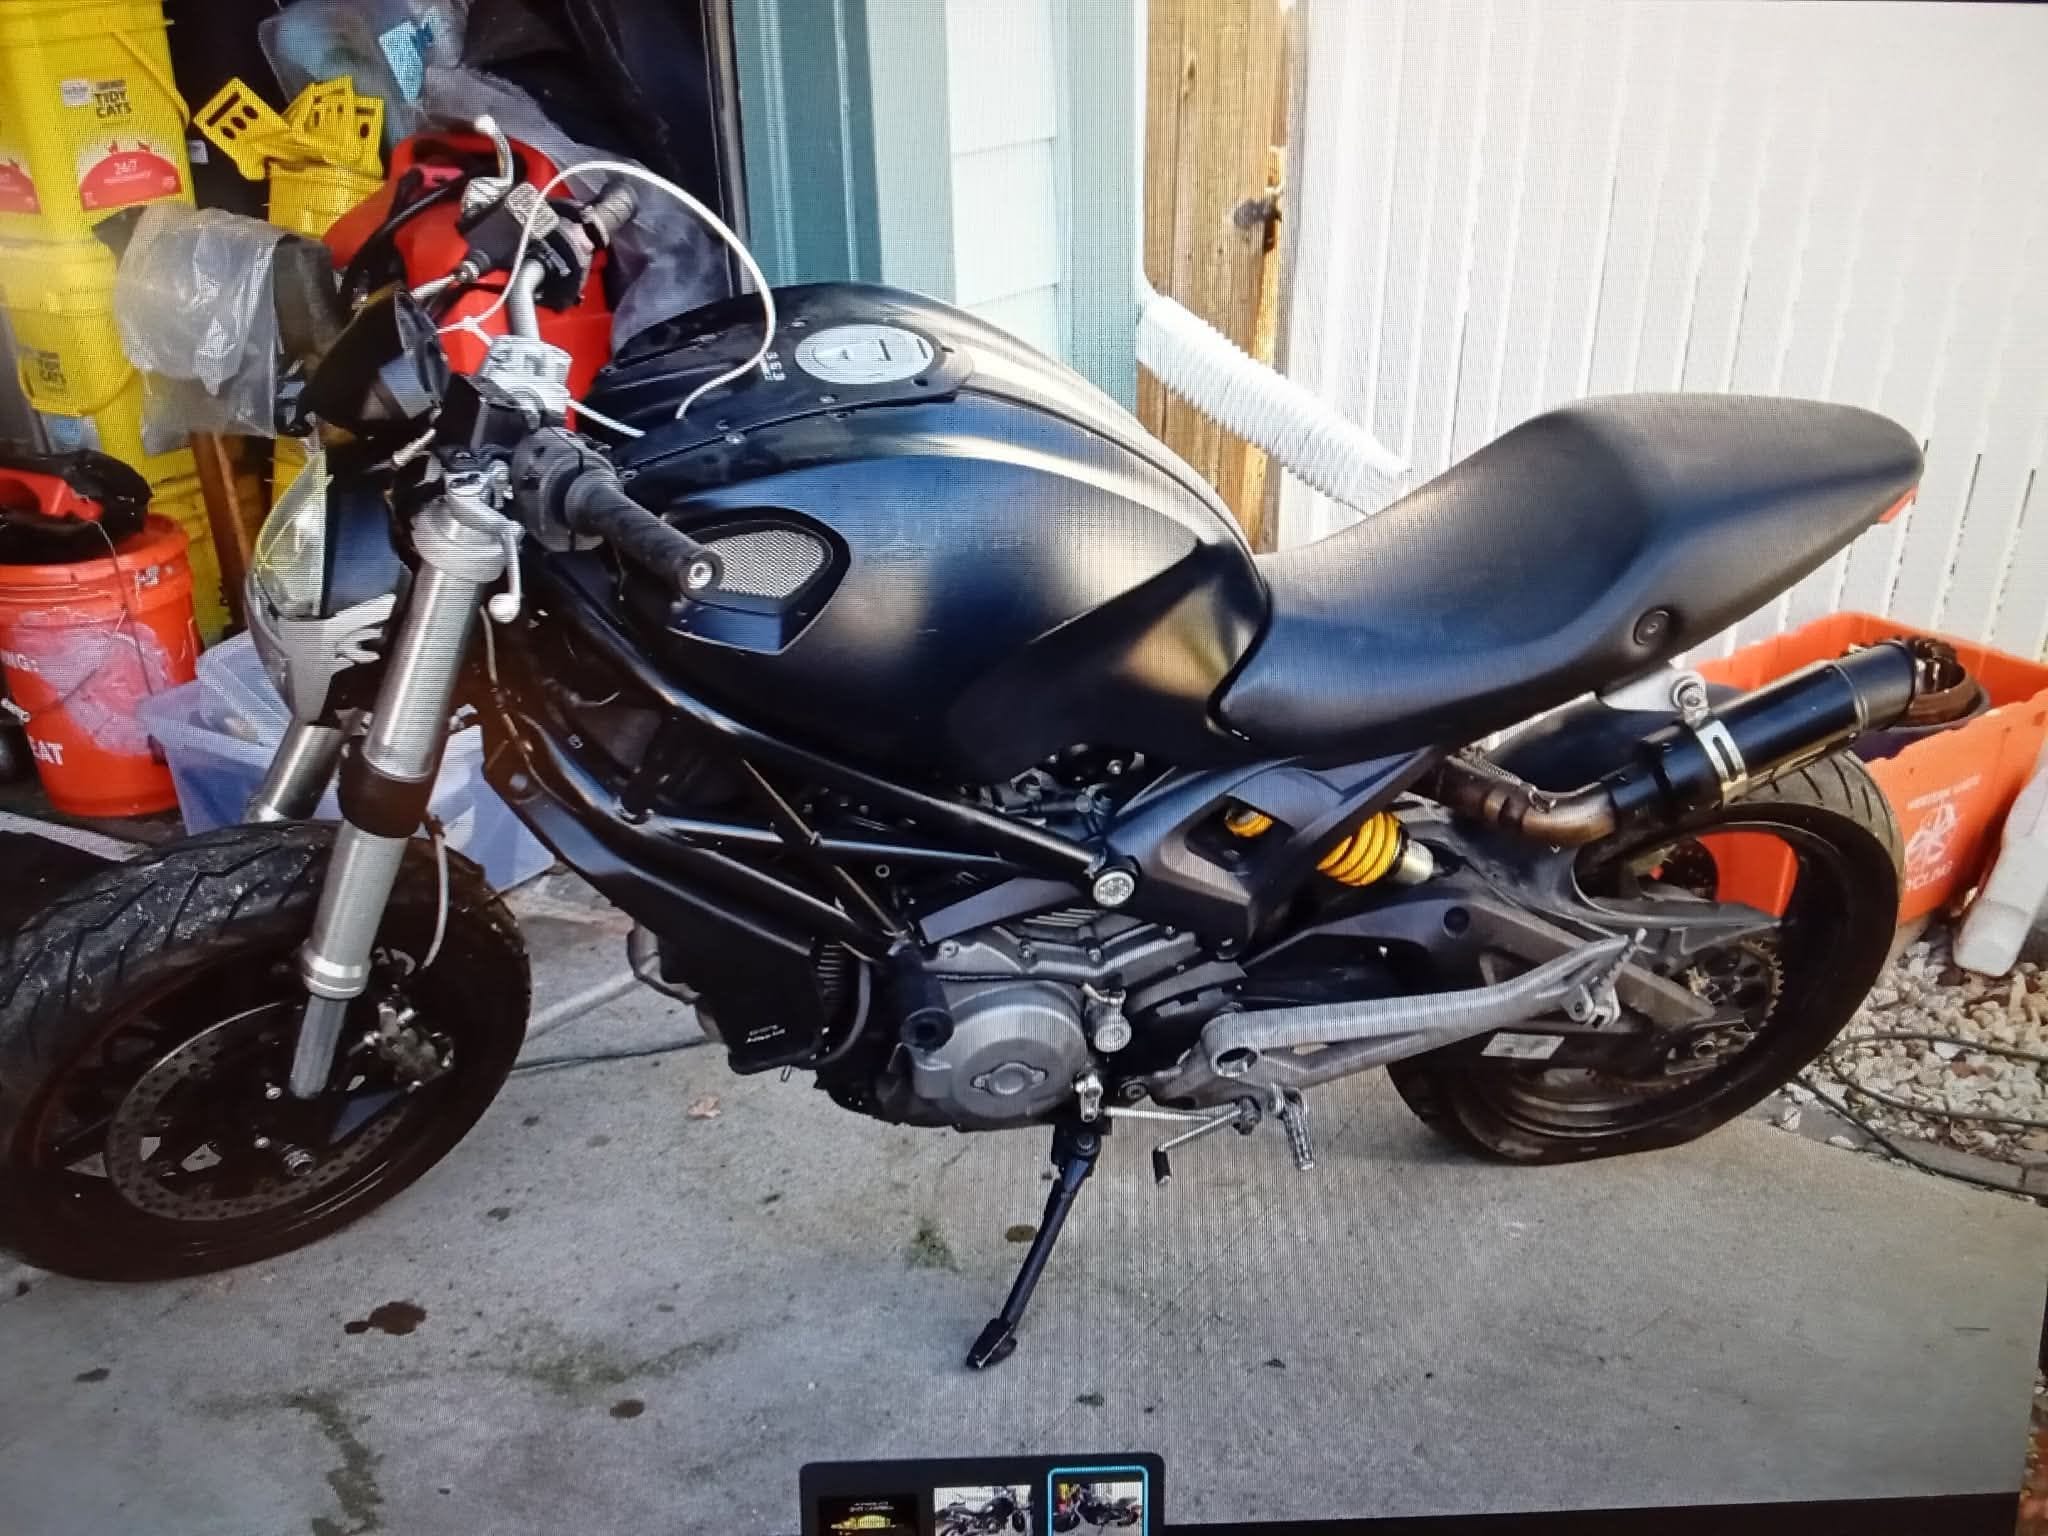
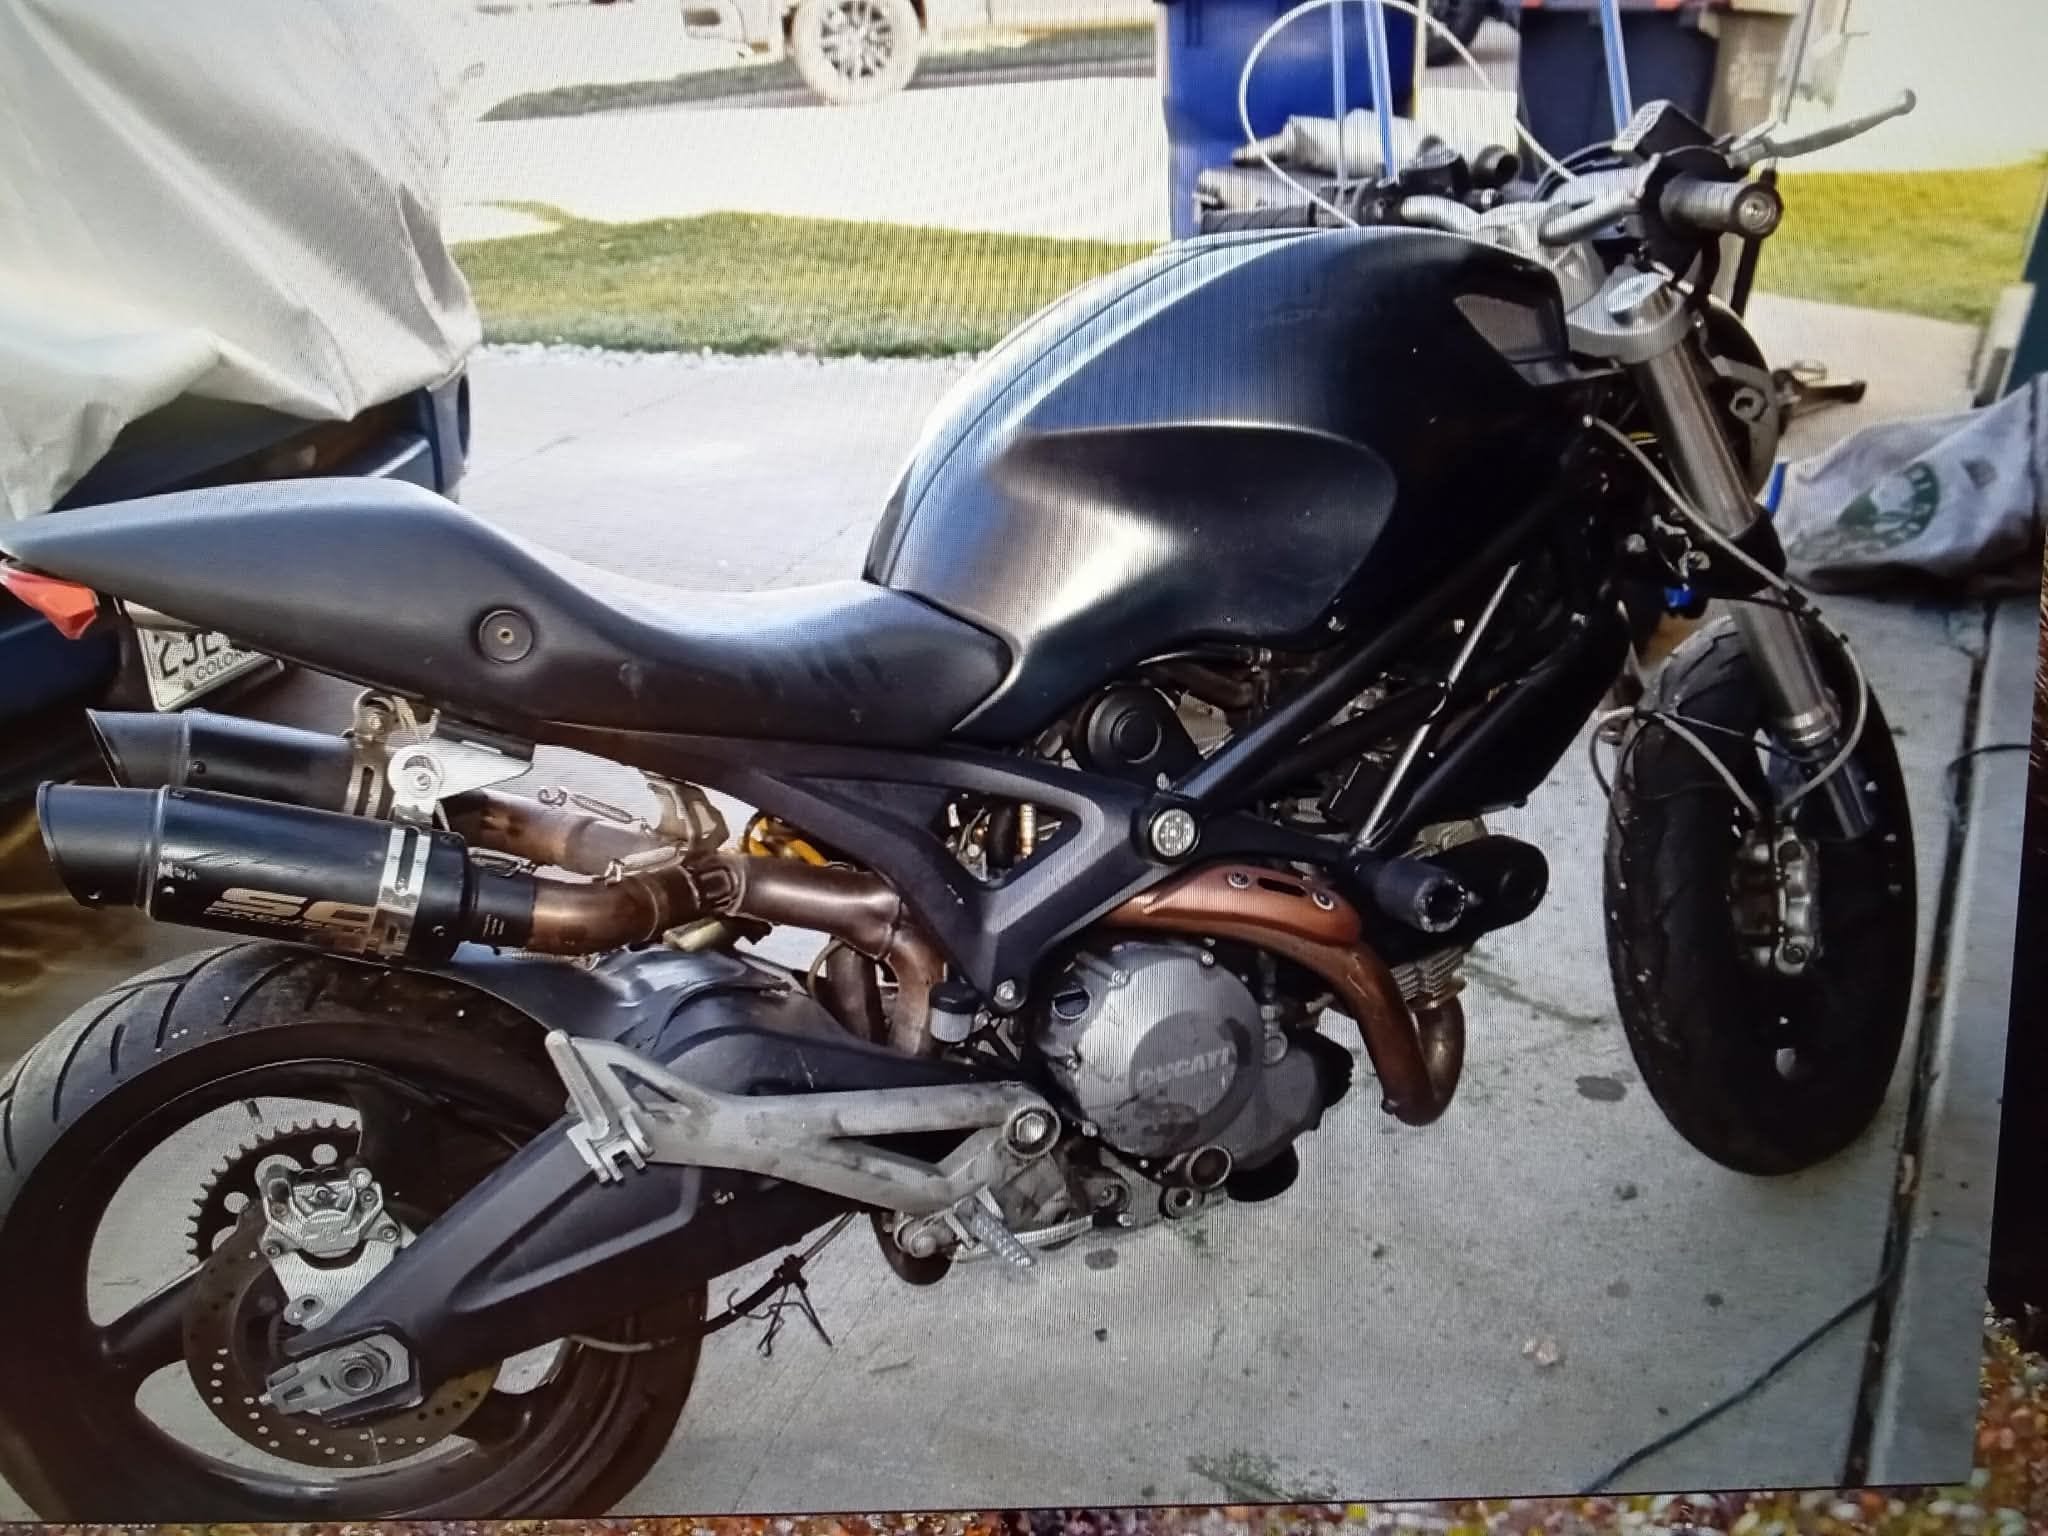
Then it got stranger. While I was looking for the replacement parts it would need, I found another Marketplace seller with pictures of what looked like the same motorcycle, selling a handful of parts like mufflers and an ignition. I sent him a picture of the bike and asked if he knew anything about it. It turned out he was the one who had crashed it in the first place. I was happy to hear that nobody had died or been badly hurt on it. He also told me the bike should absolutely run, since it had run after his crash. That was the final nail in the coffin.
I bought the Ducati for $1,200.
Around the same time I found a titled, street-legal 2006 Yamaha YZ450F rolling chassis with no engine. It was the perfect other half for this monster.
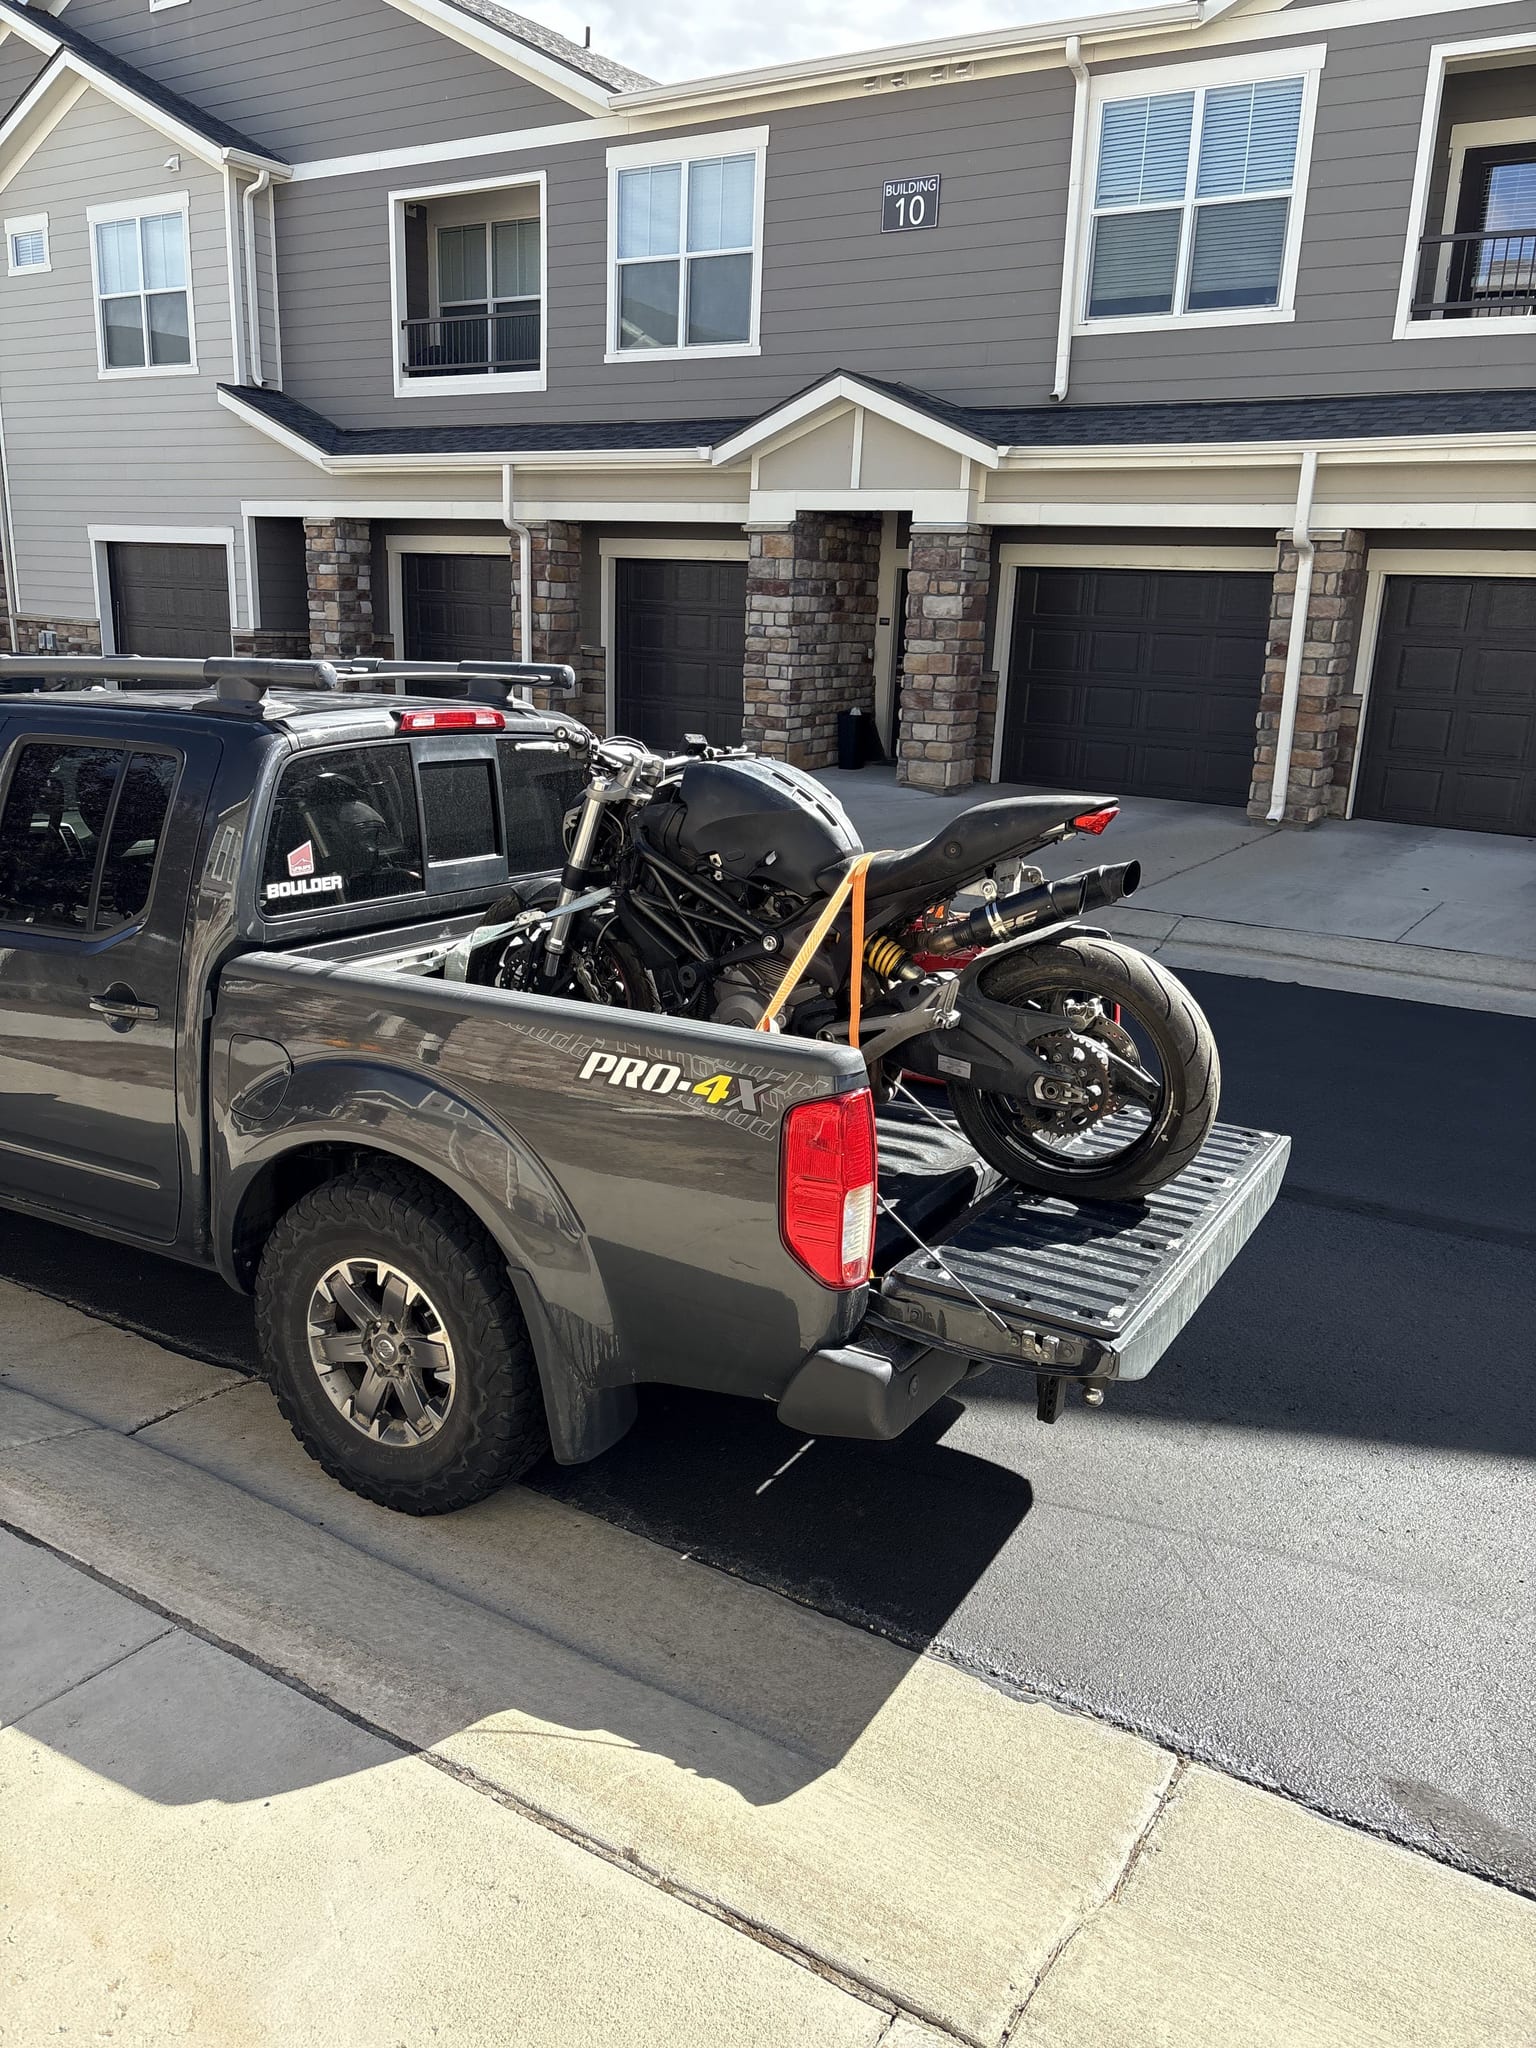
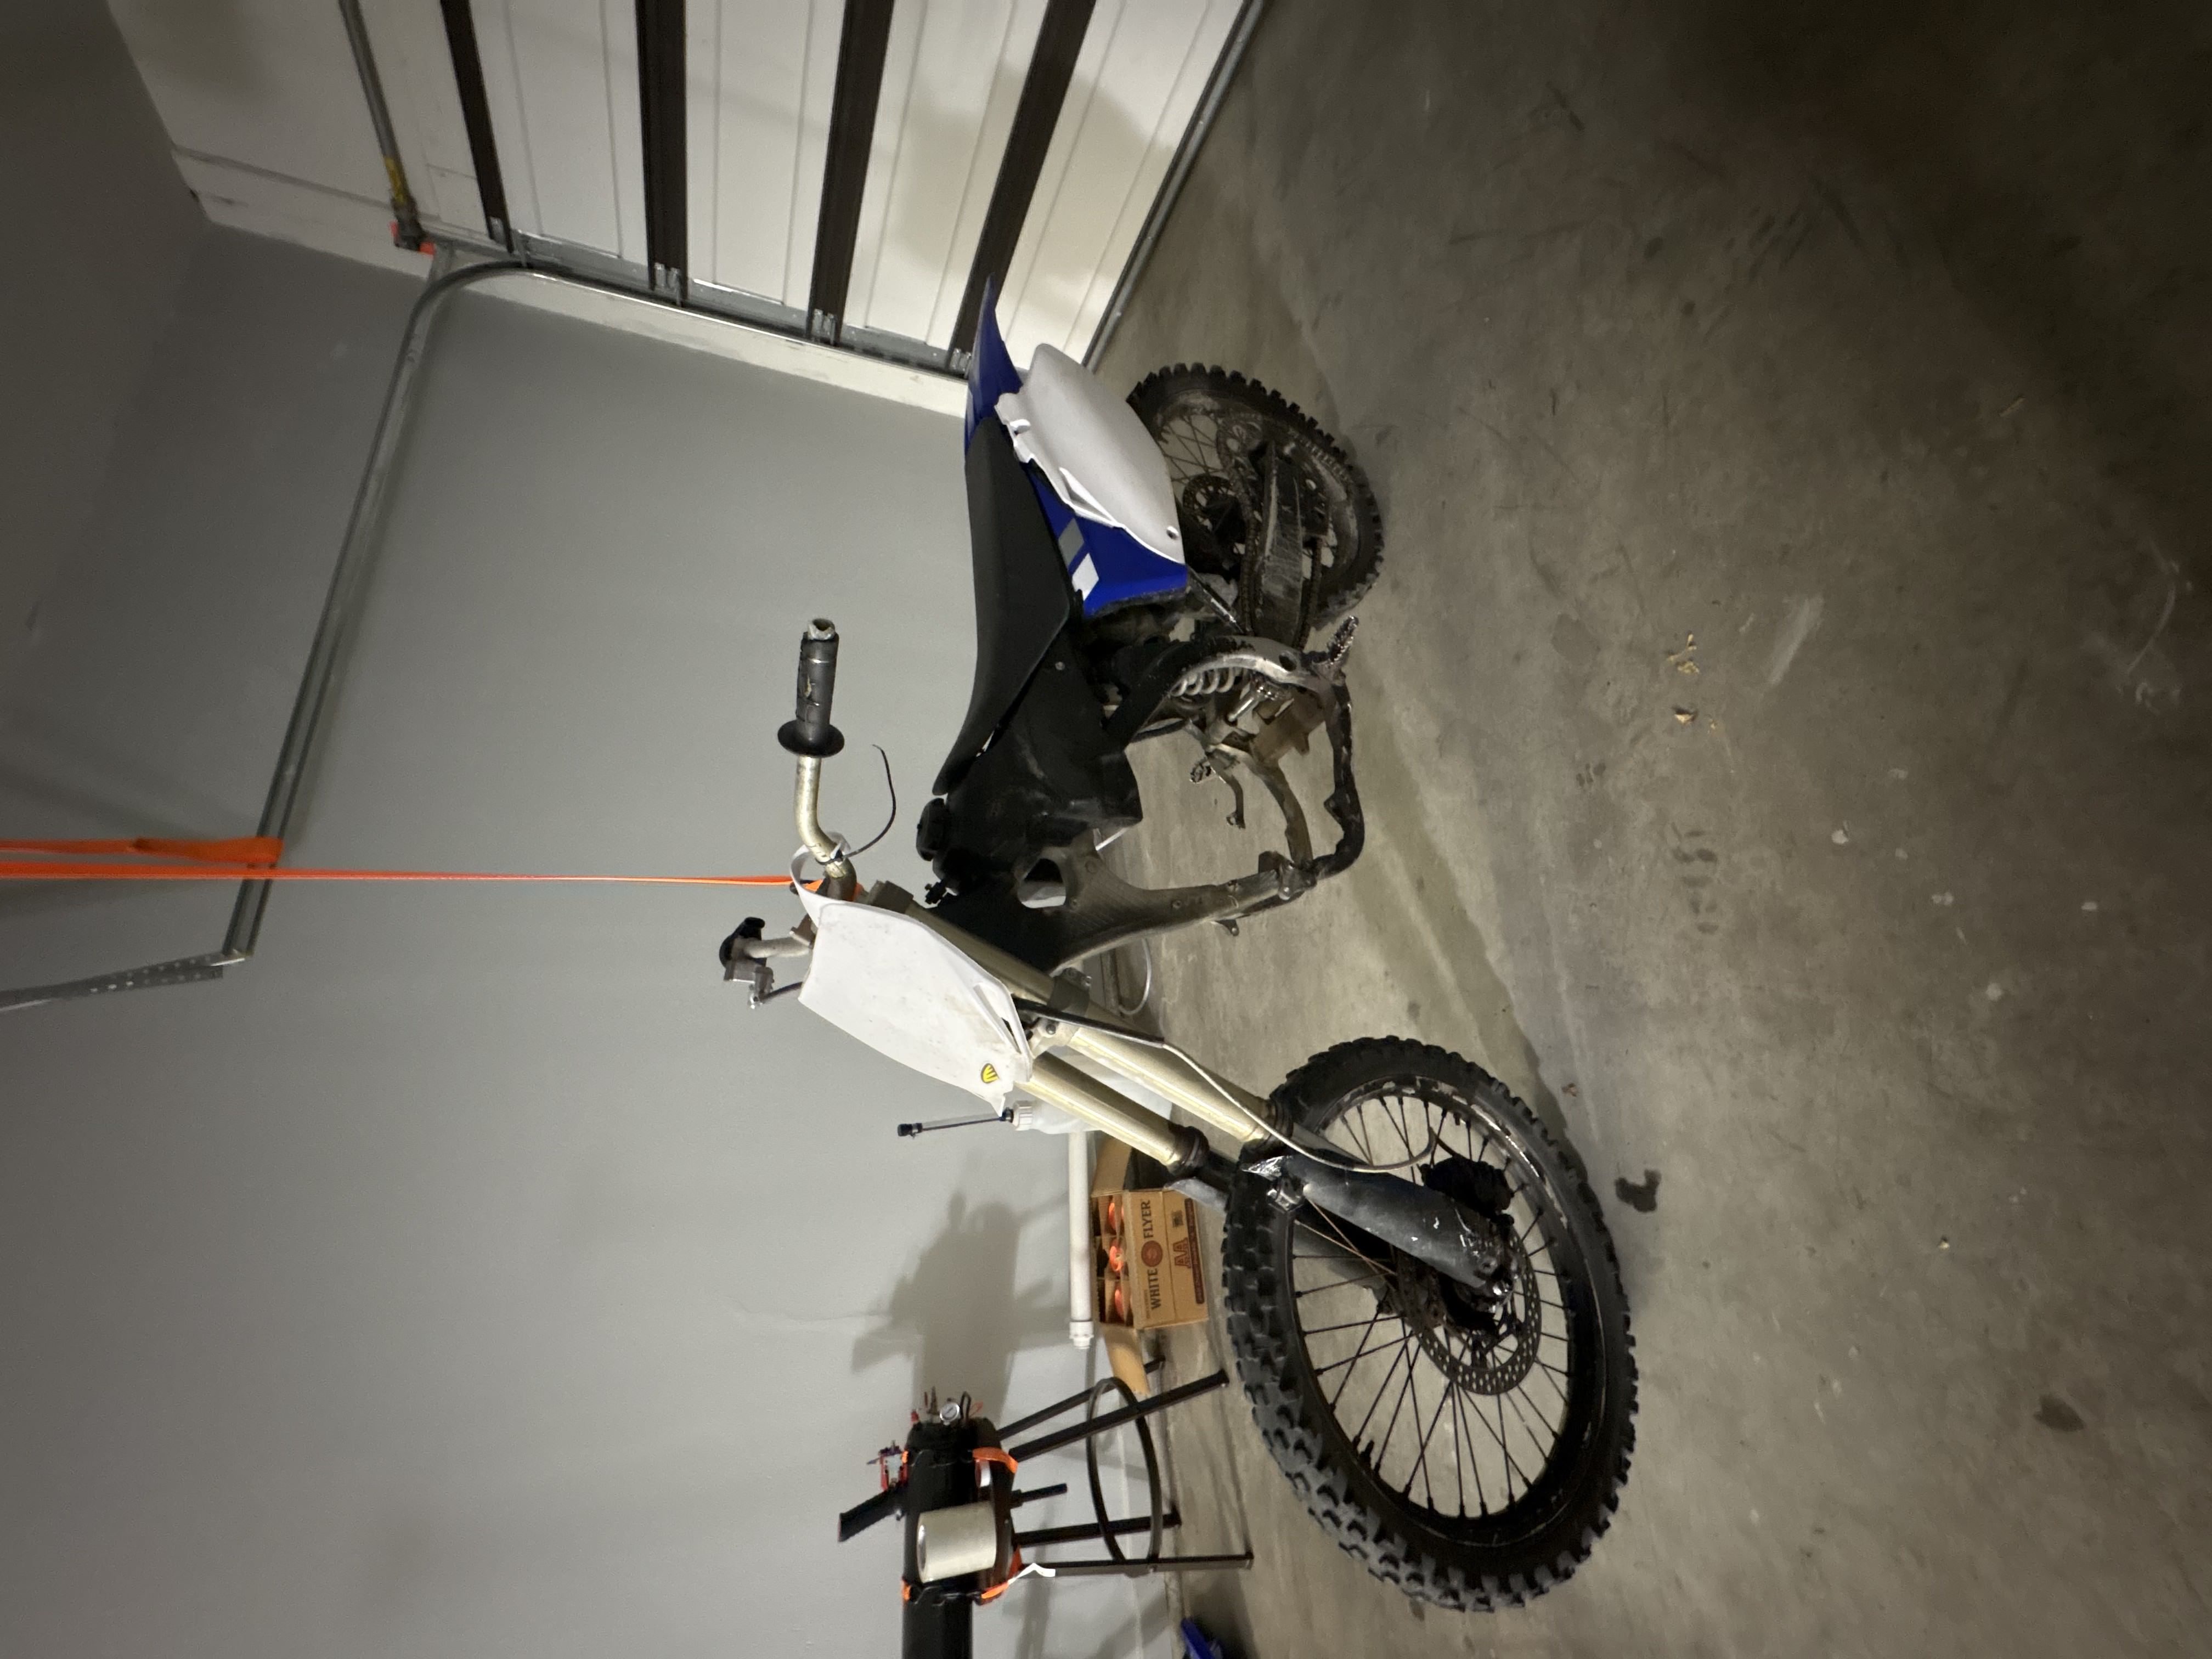
Engine into the frame, or suspension onto the Ducati?
My first plan was to put the Ducati engine into the YZ450F frame. I used an Xbox 360 Kinect as a 3D scanner to scan the YZ frame, then found a CAD model of a Ducati Monster 796 engine and placed it roughly in the scan to check the fit.
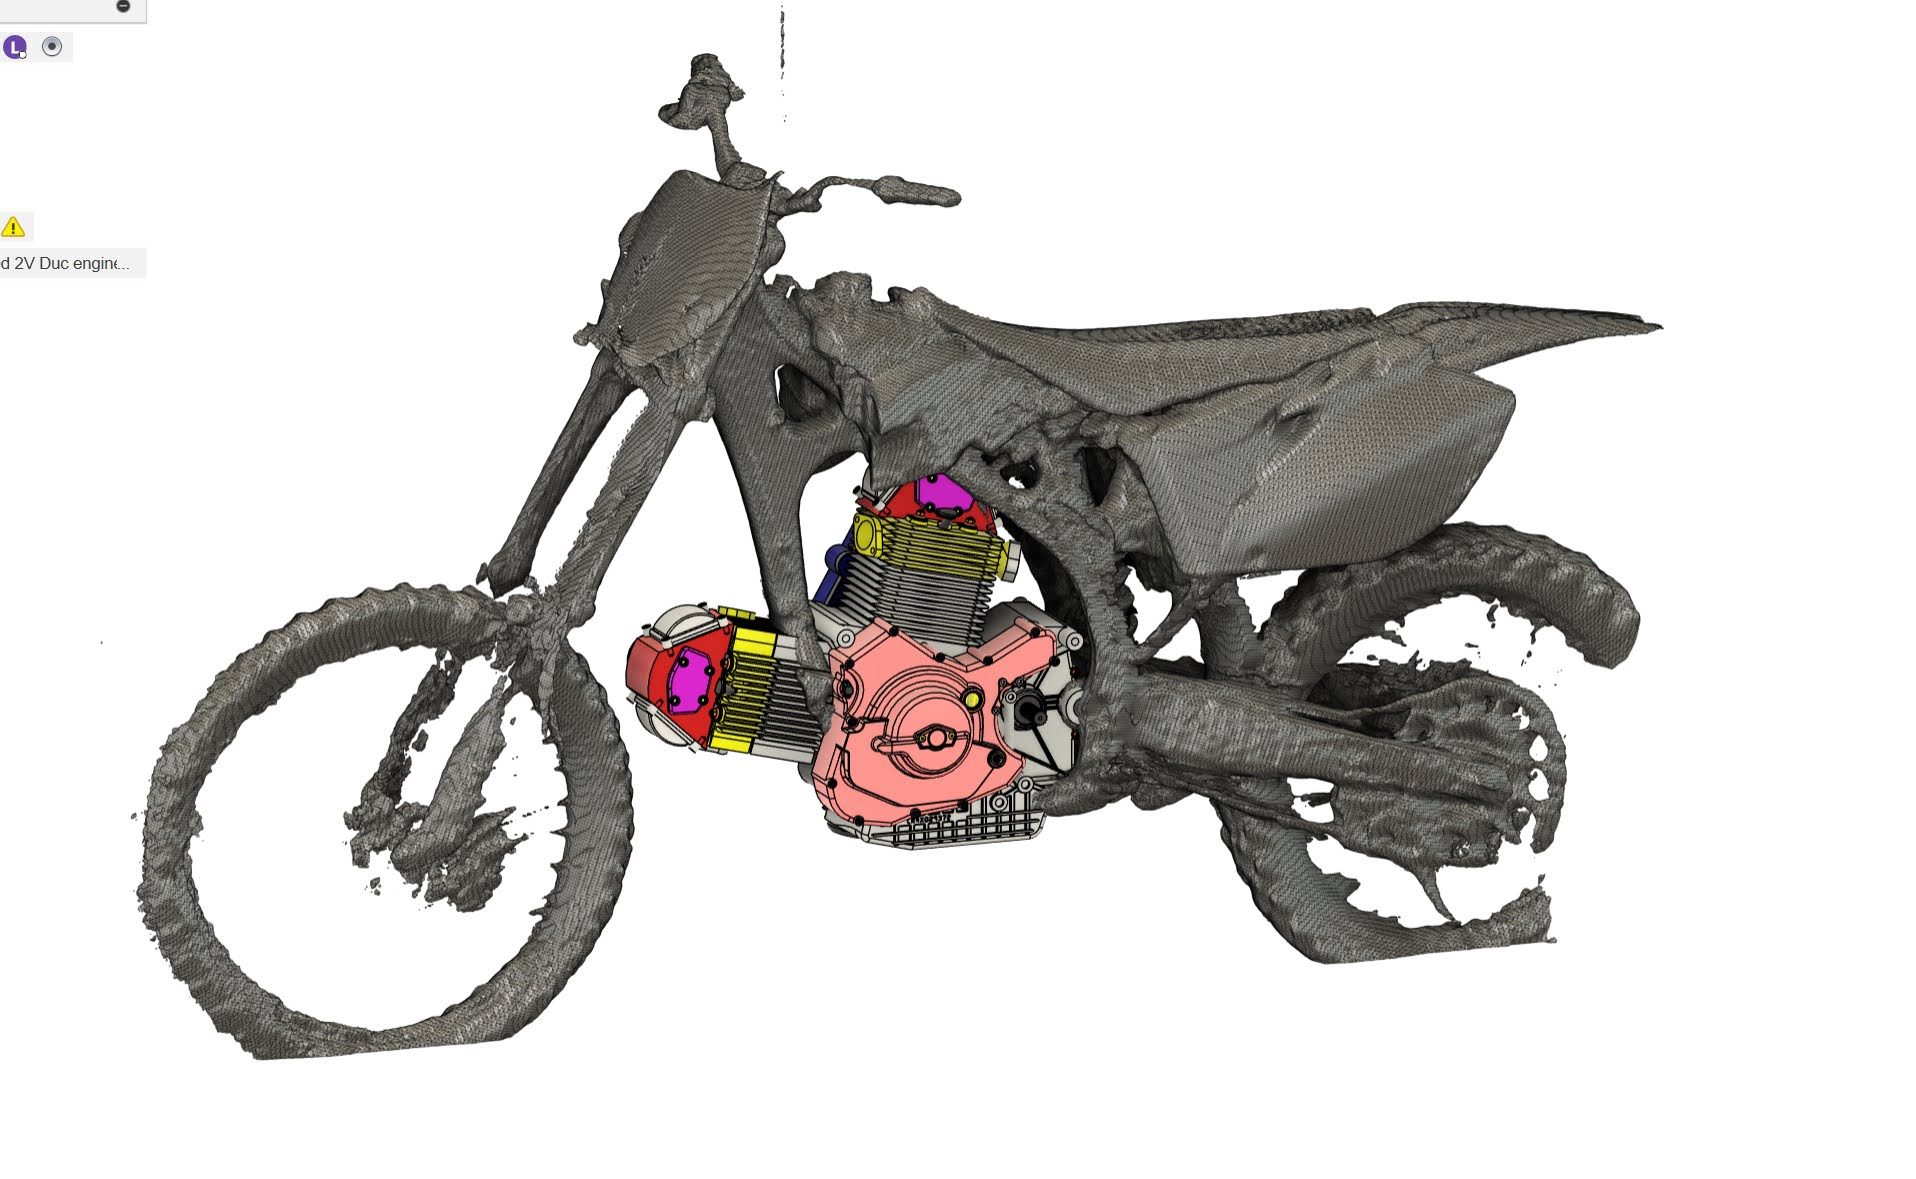
I could see right away that with the Ducati engine in the dirt bike frame, there would be absolutely zero front suspension travel. The only other option was the reverse: move the dirt bike’s suspension onto the Ducati.
The front end
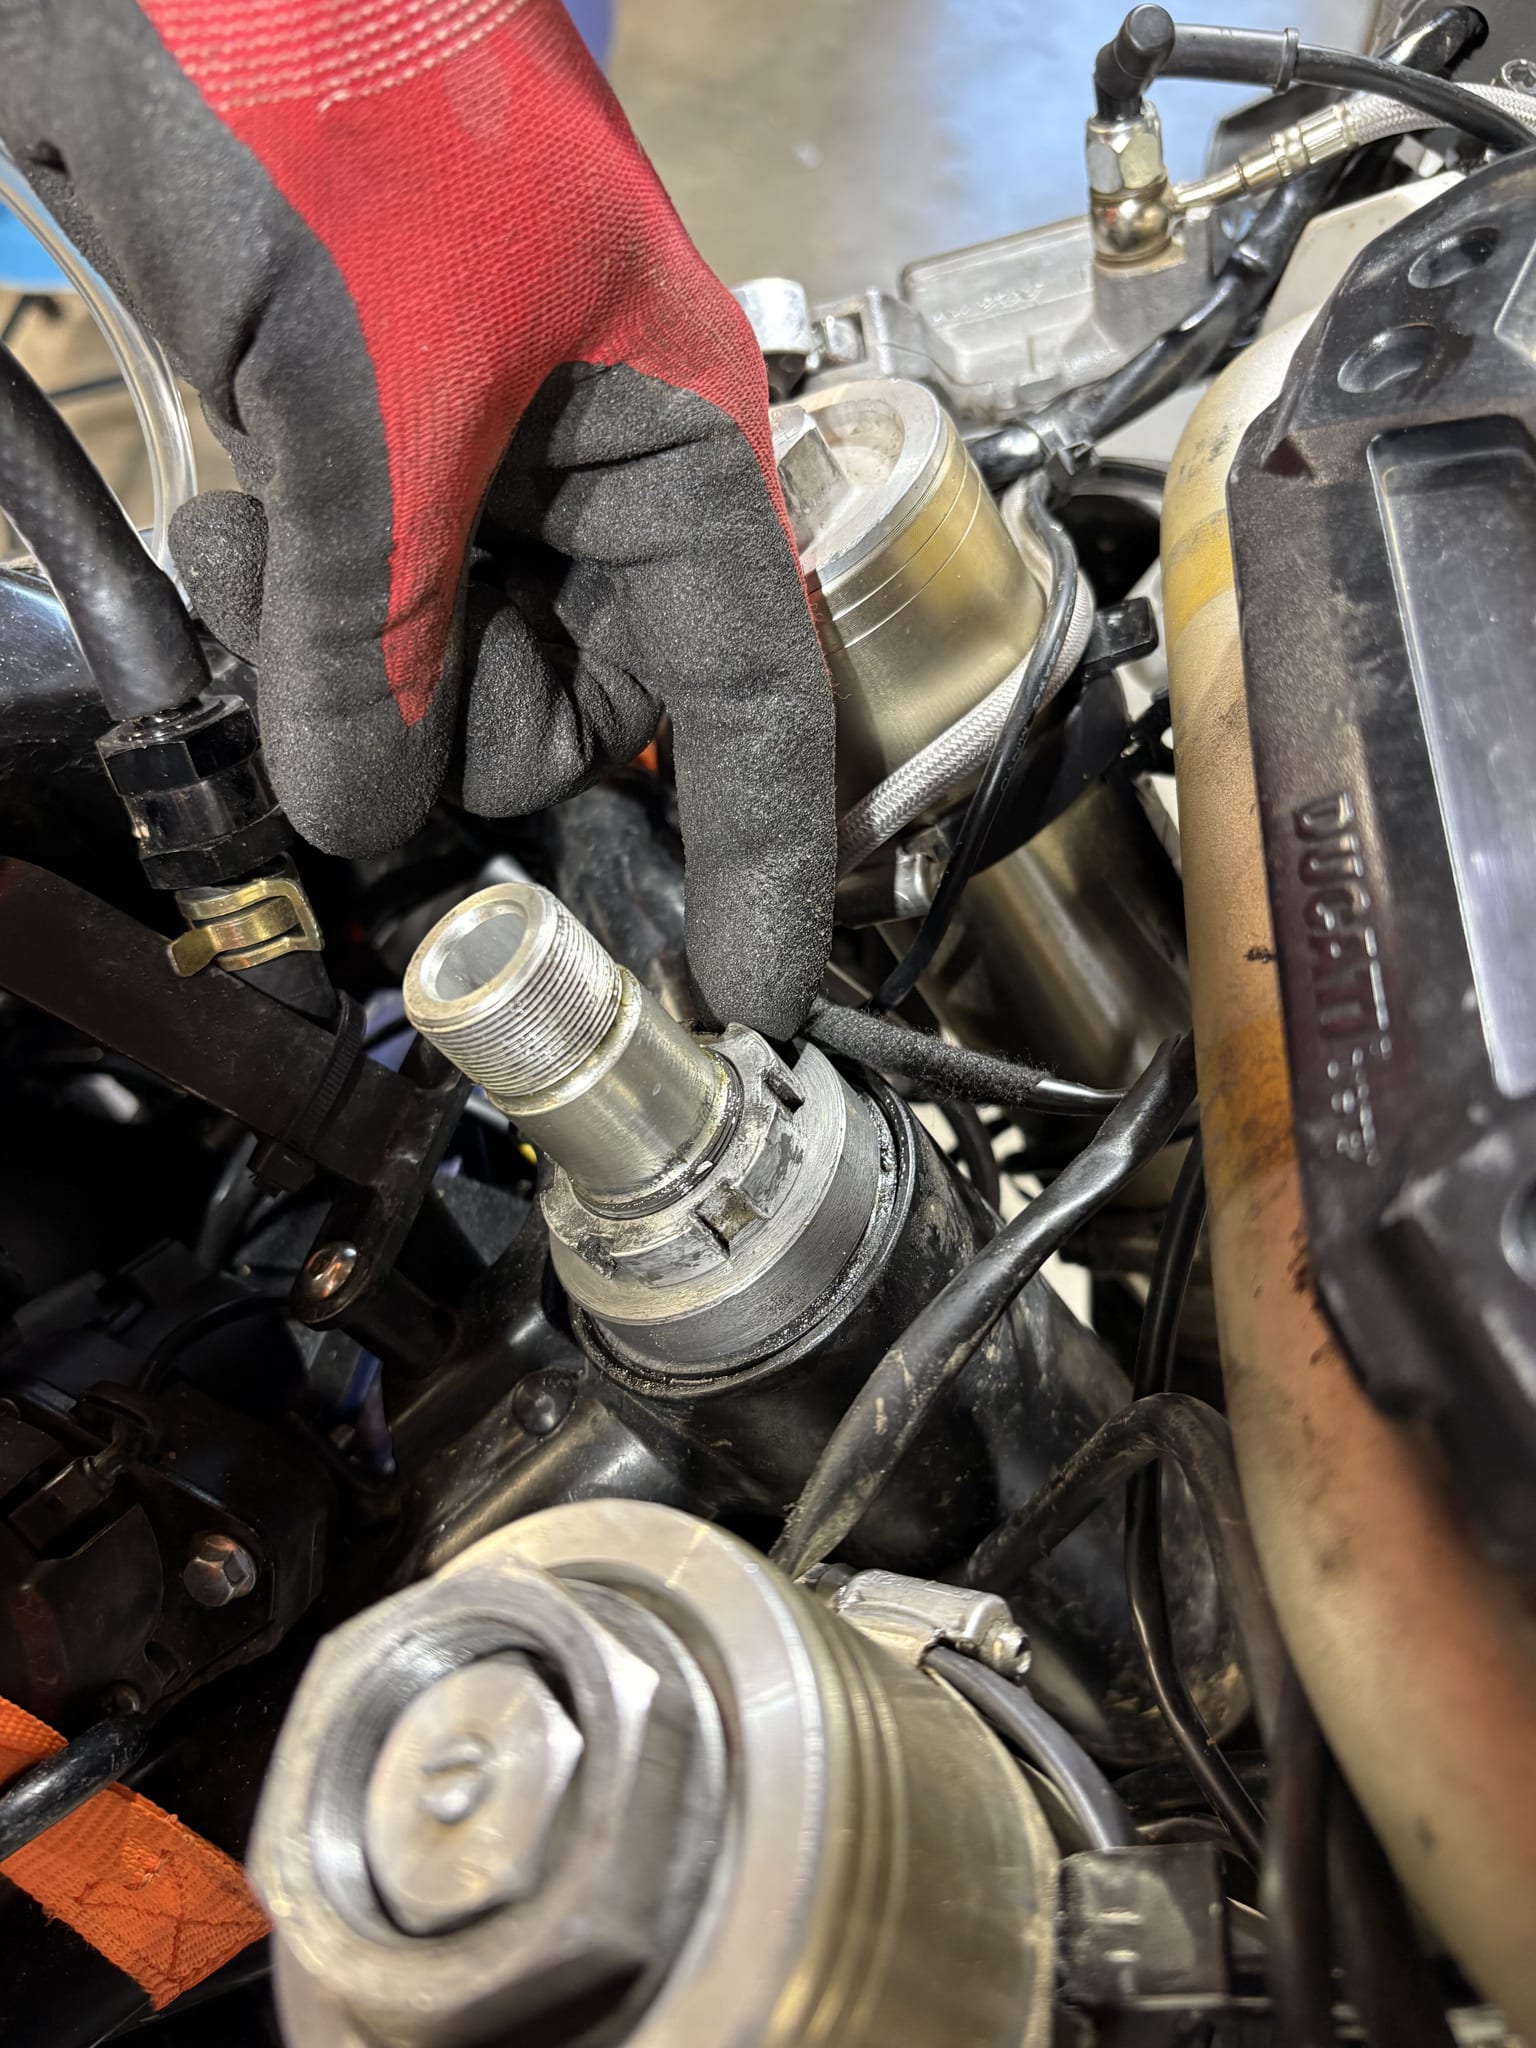
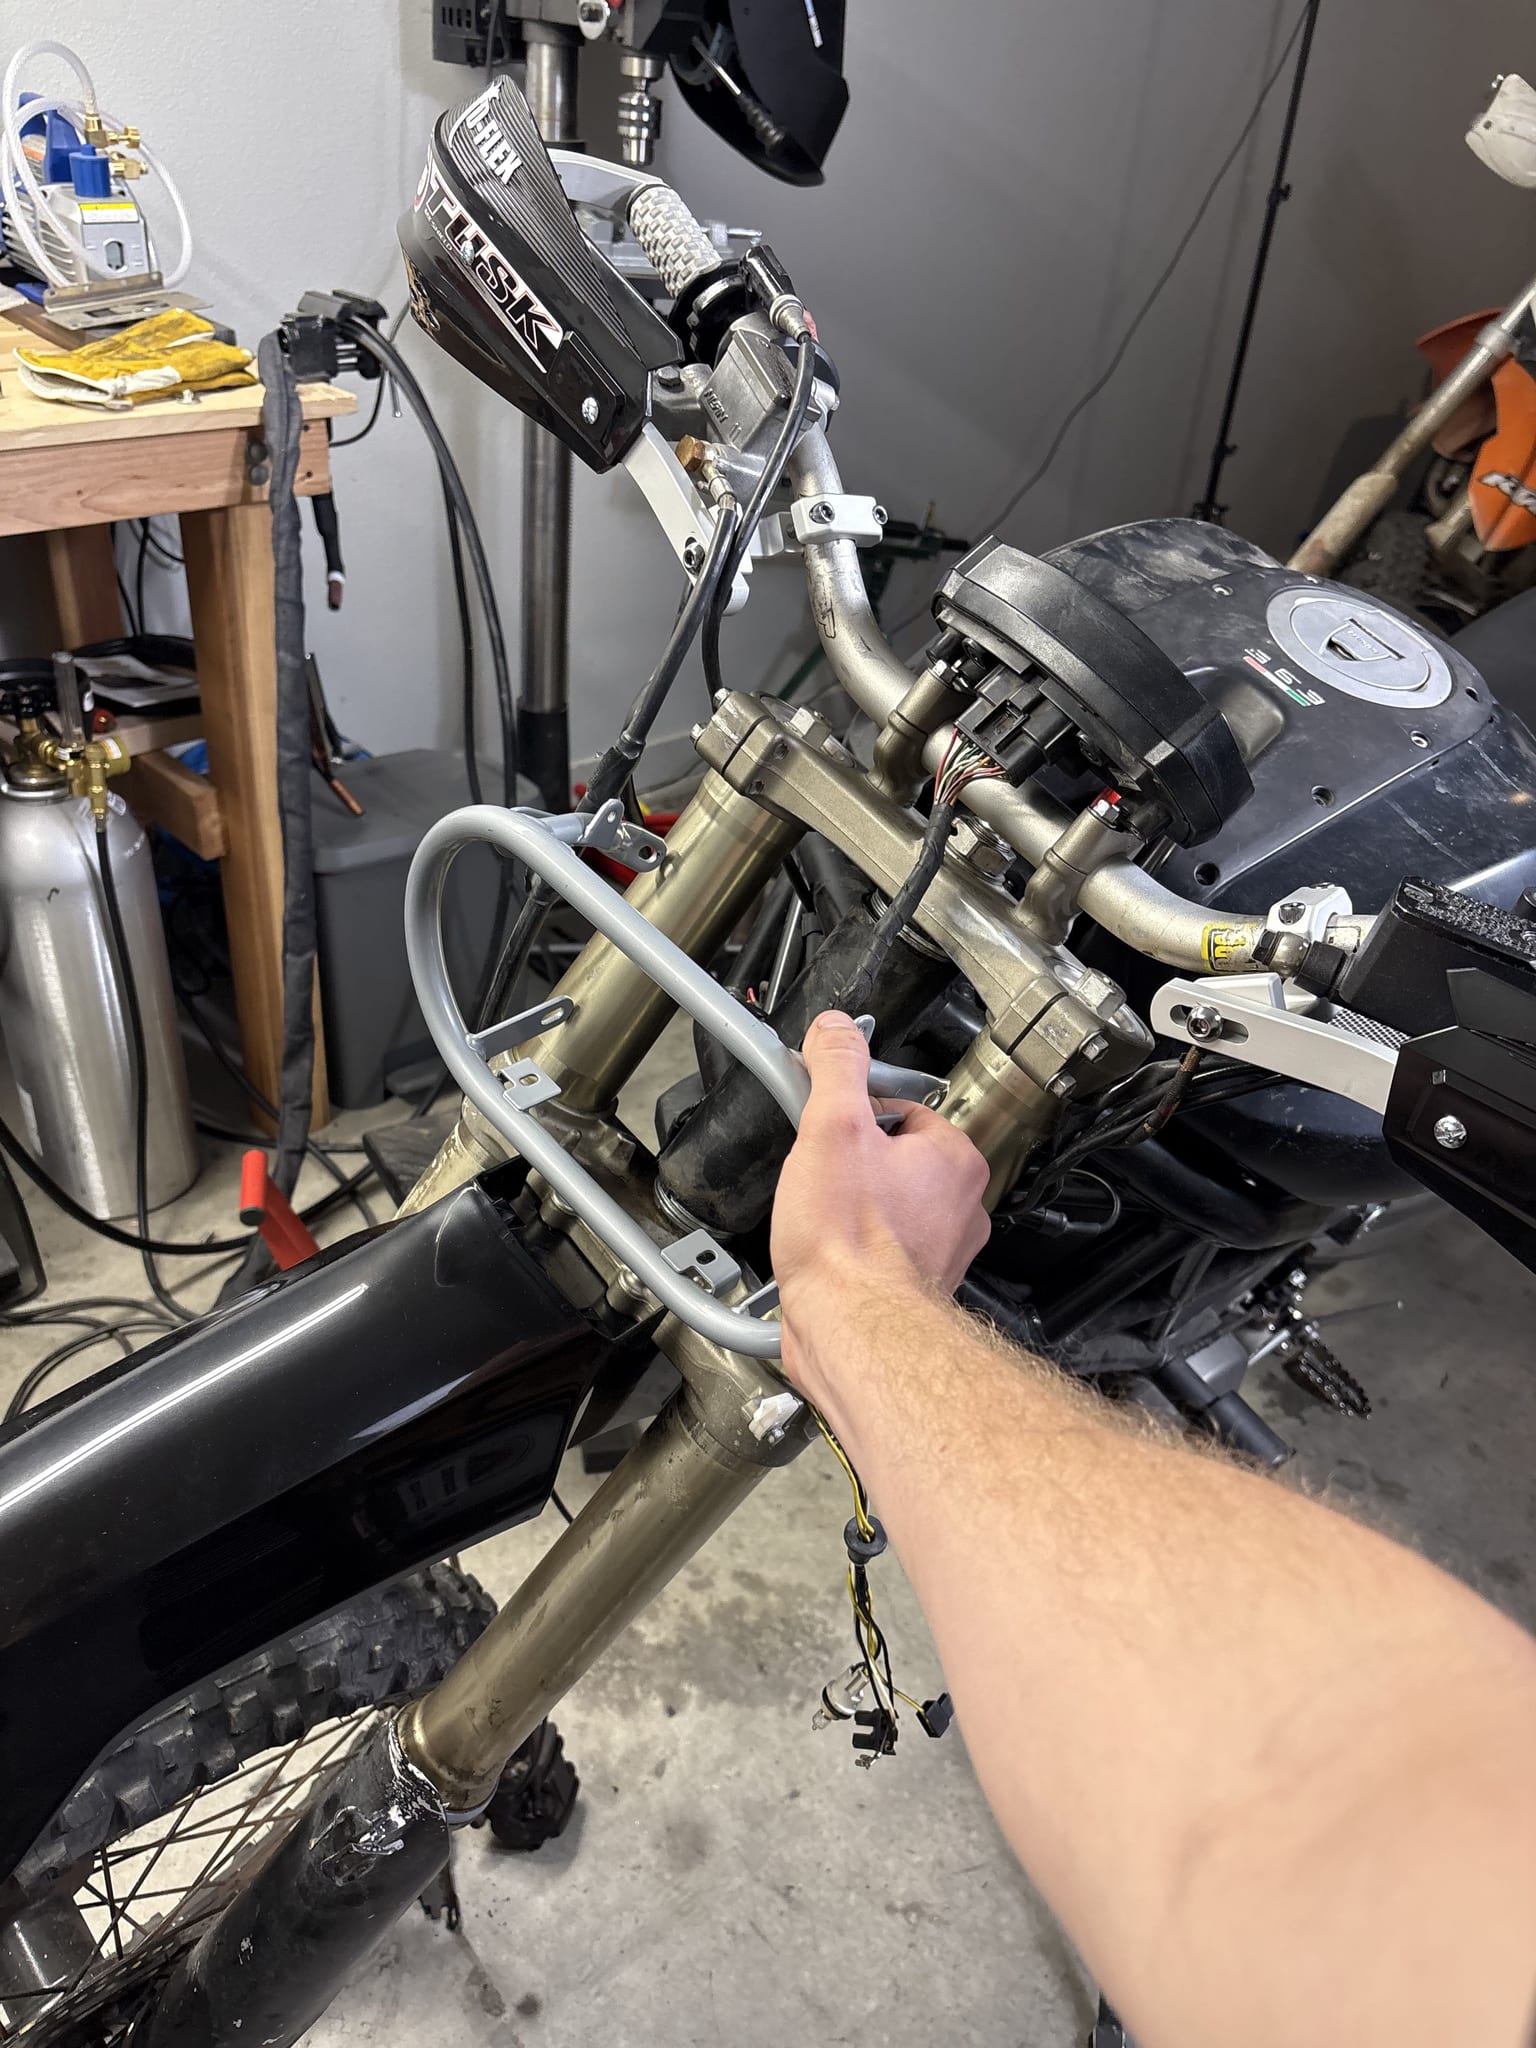
I started with the front forks, which meant adapting the YZ450F triple tree to the Ducati’s steering bearings. All it needed was a spacer between the YZ’s steering stem and the Ducati’s bearing race. When I started this build I didn’t own a lathe, so the easiest way to get a spacer was to find something online that fit. I found a silicon bronze bushing that fit perfectly between the stem and the race, hammered it into the race, and the front end bolted right up to the Ducati.
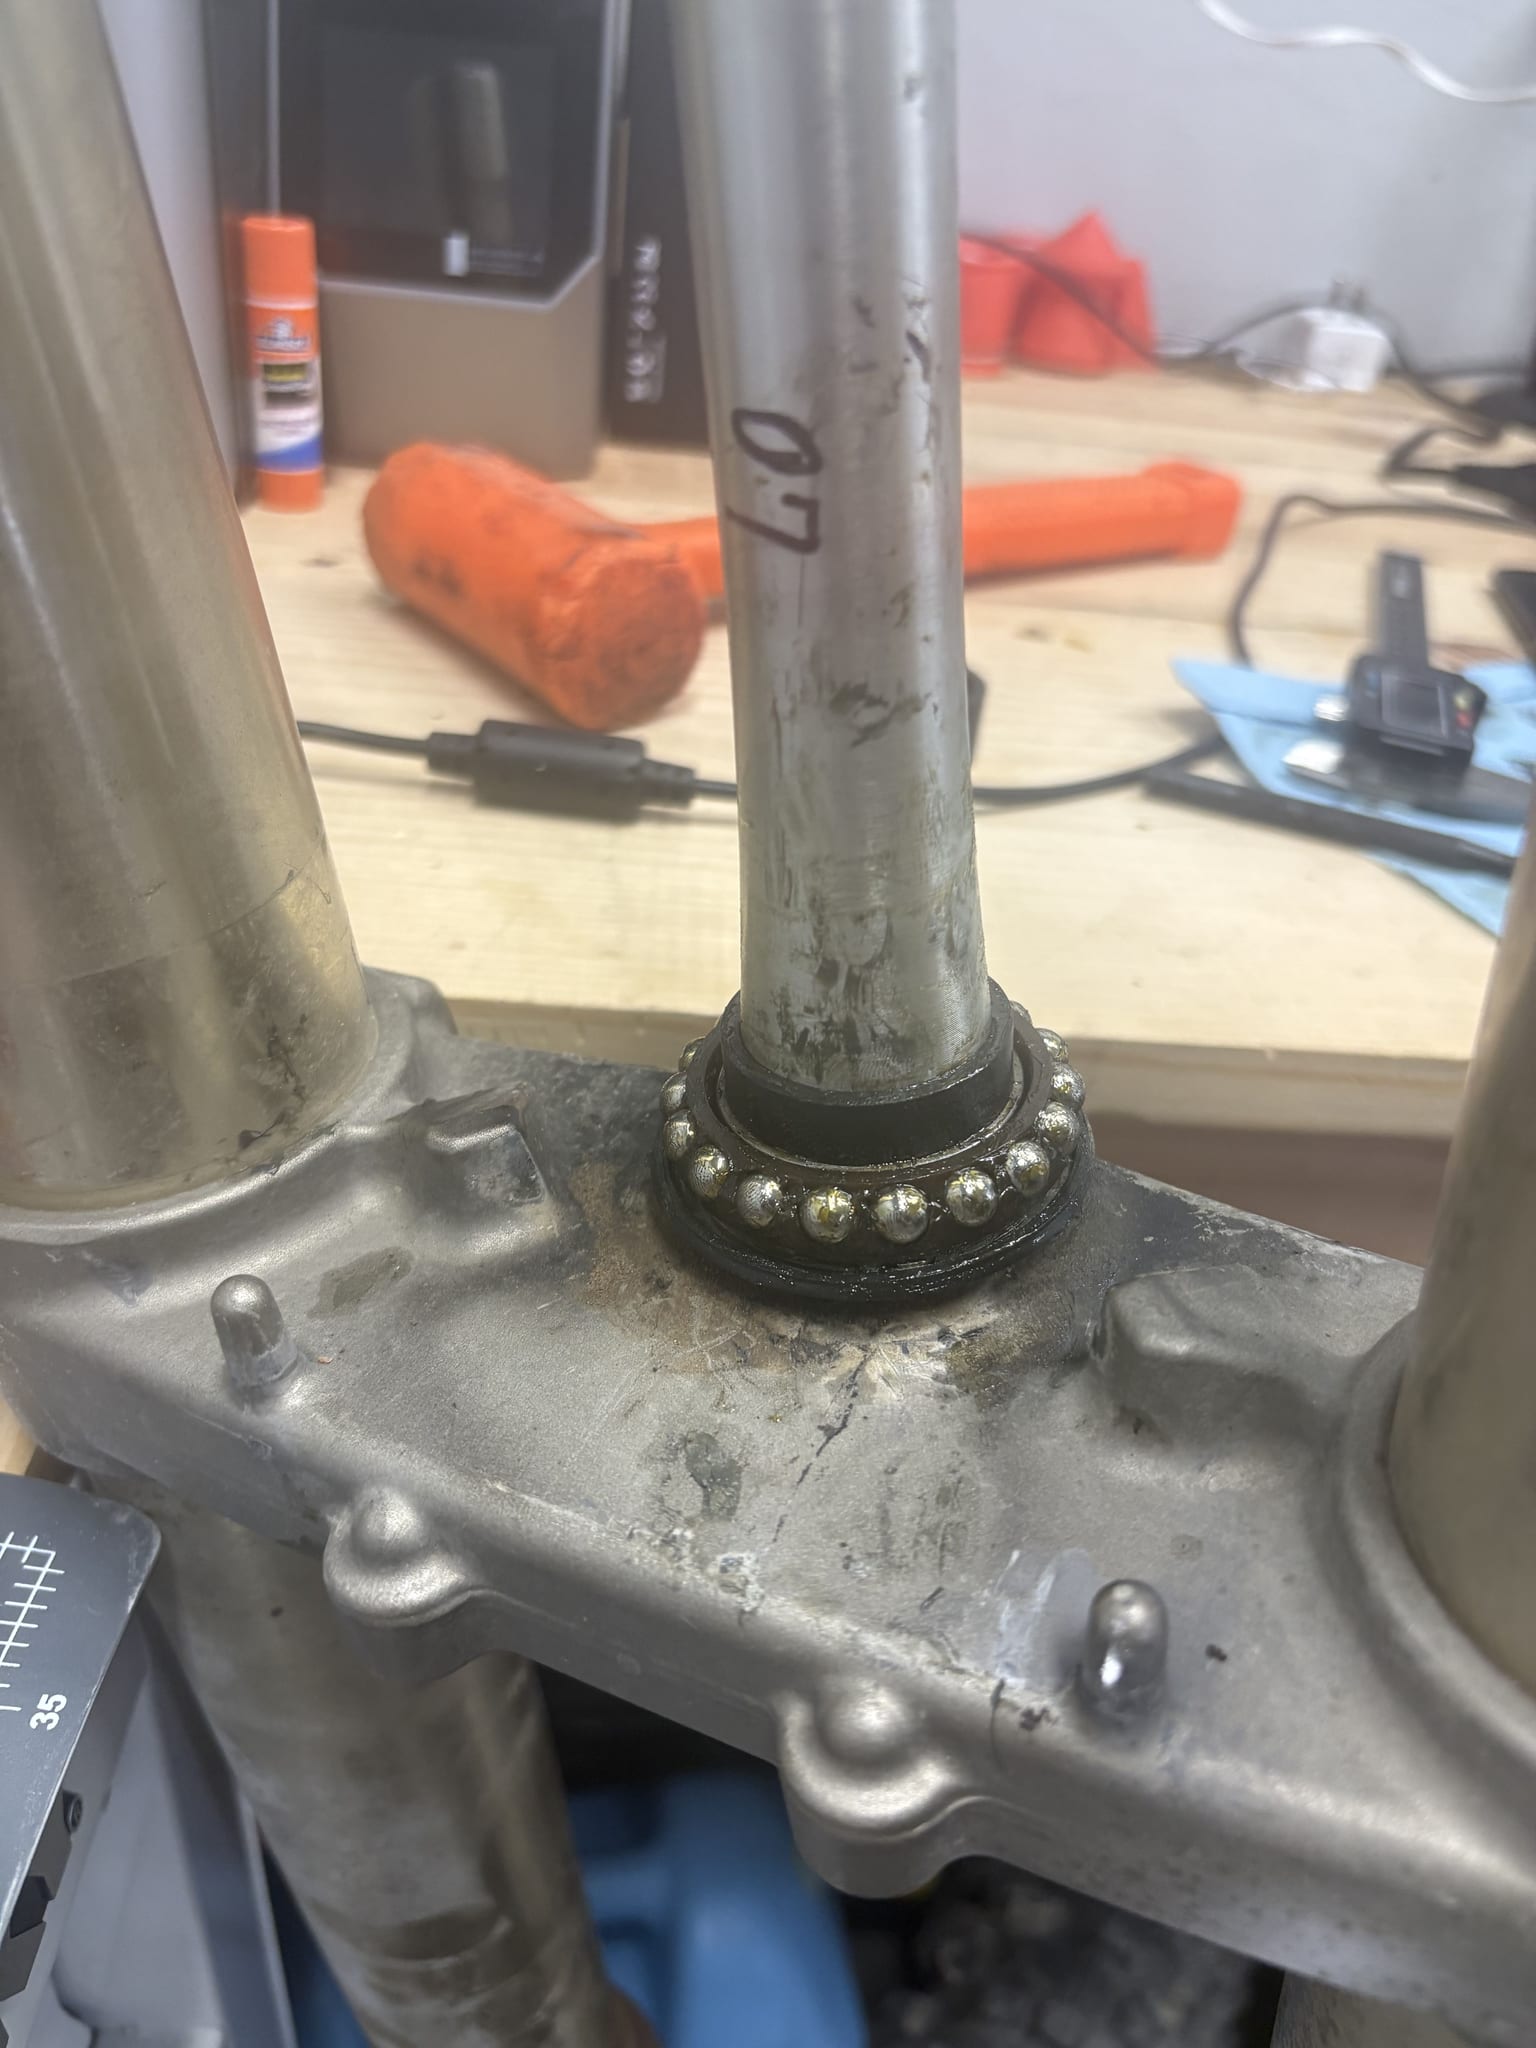
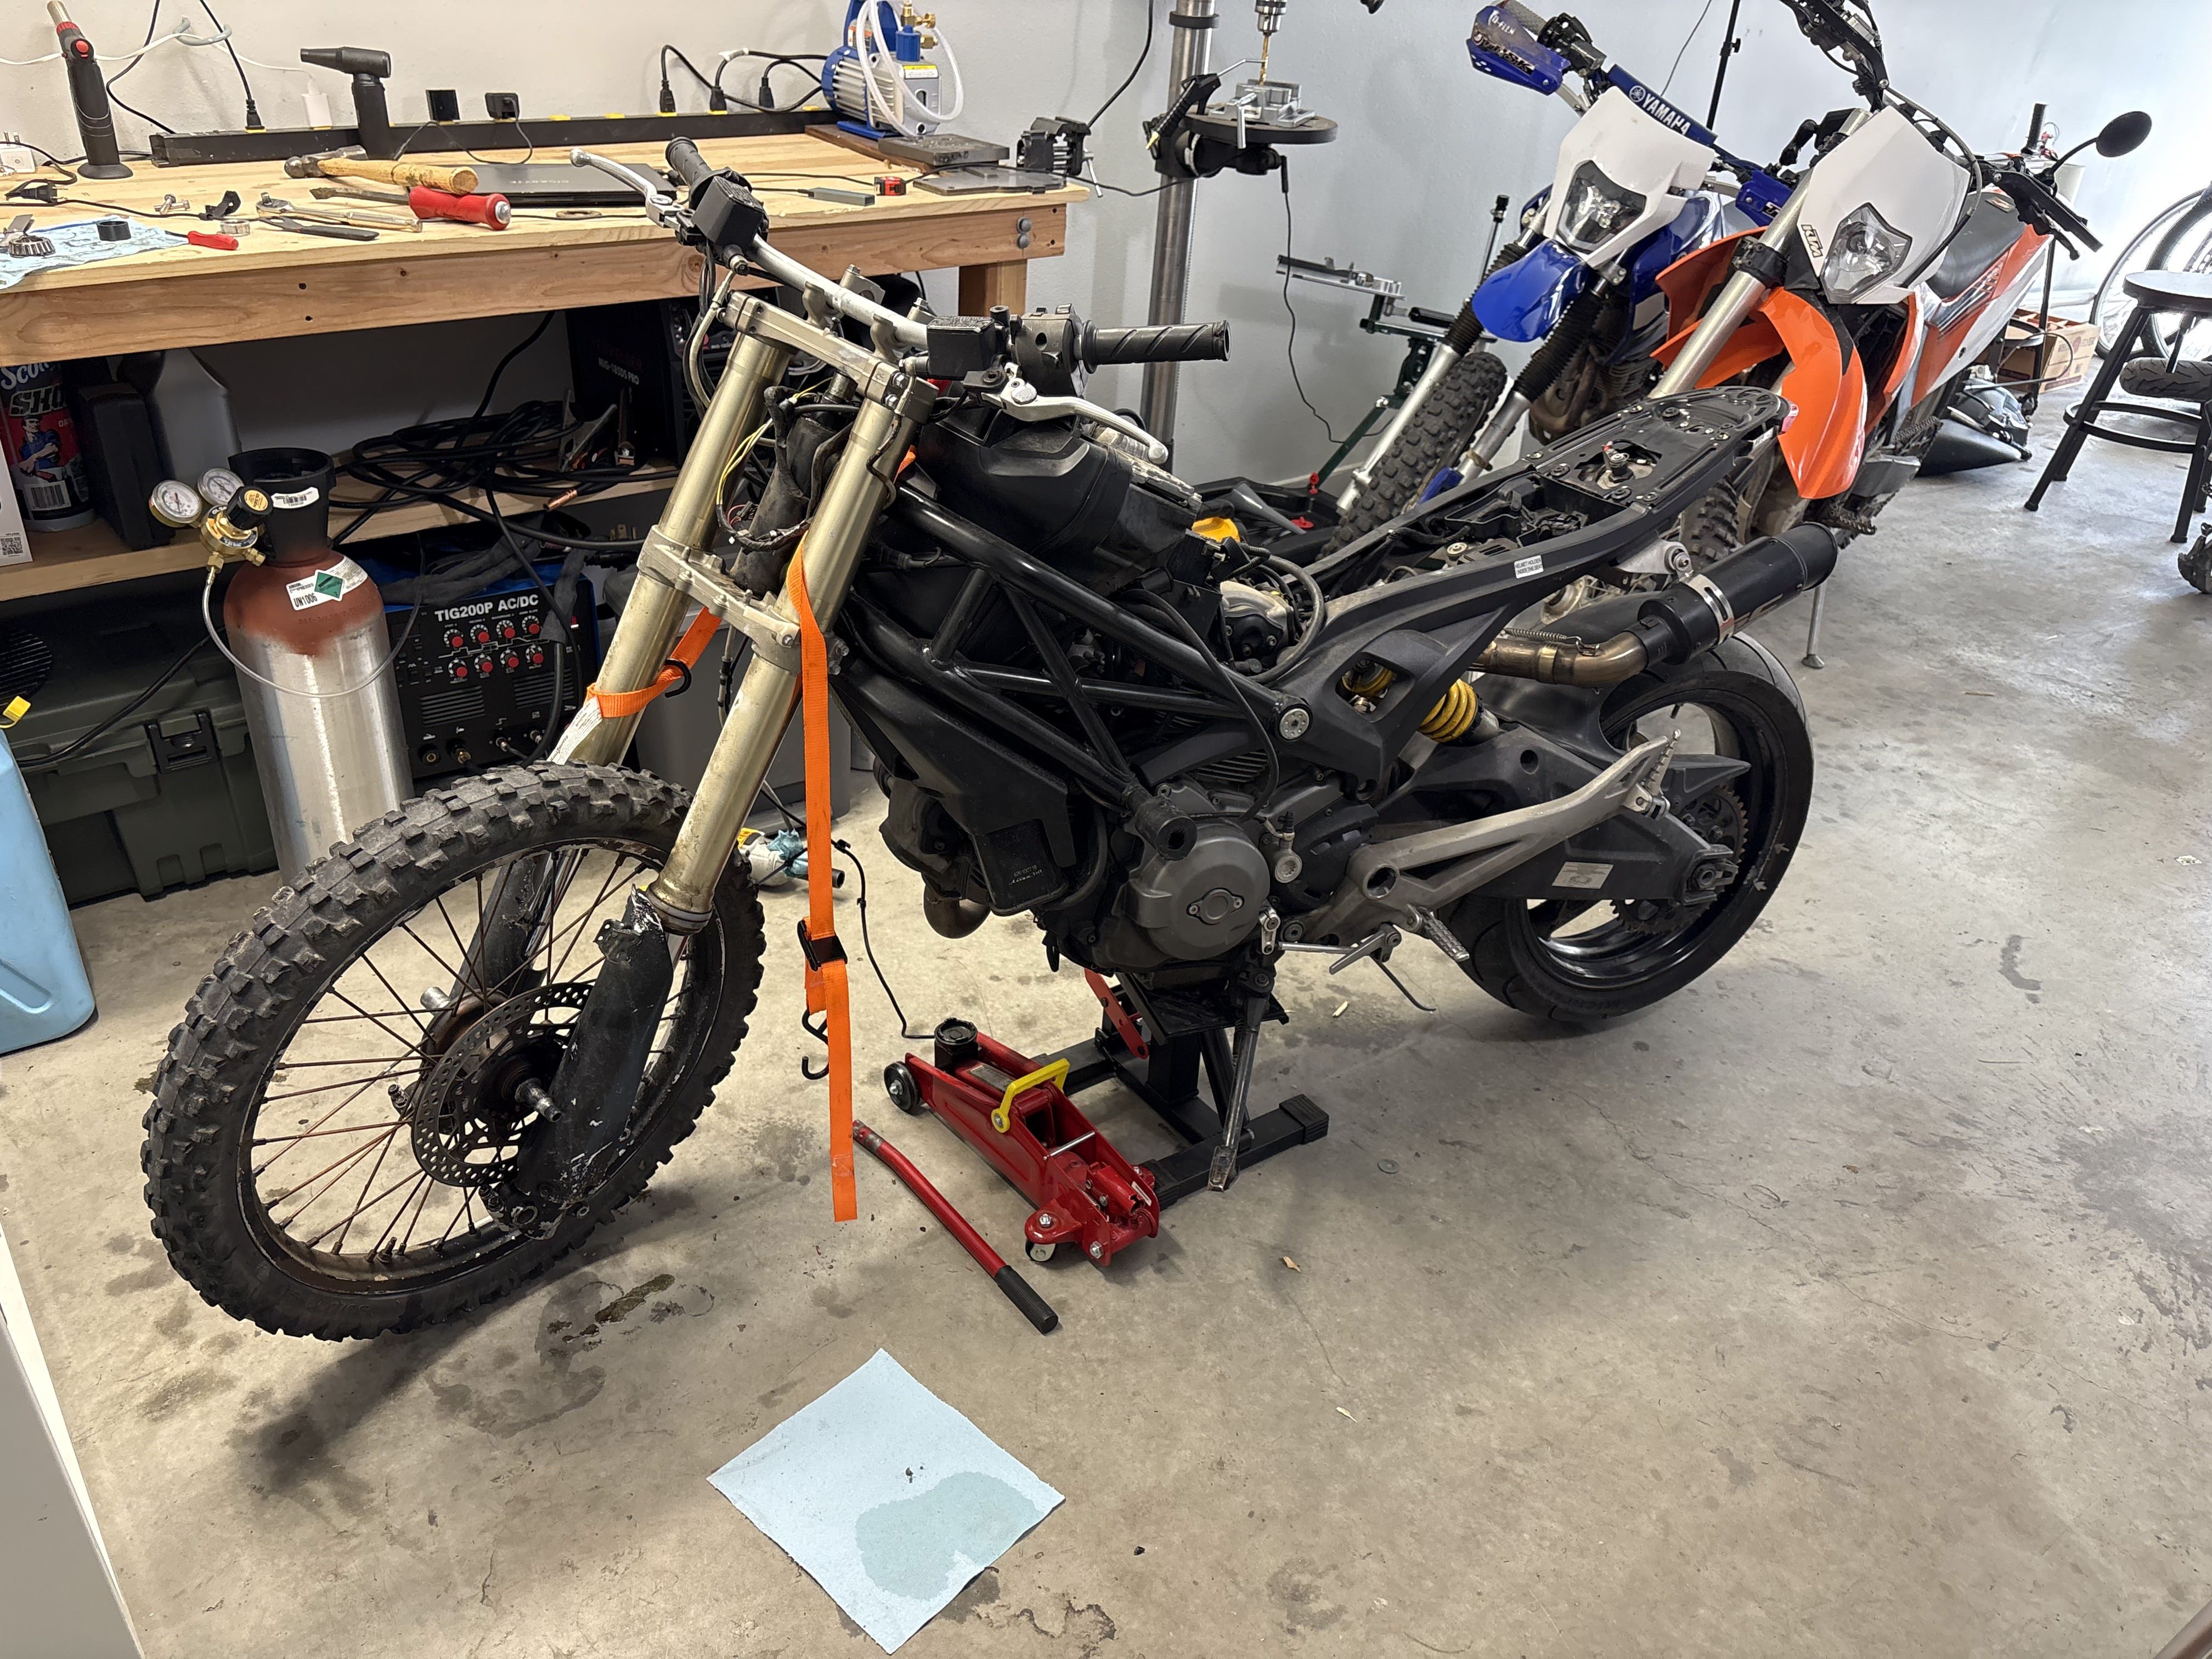
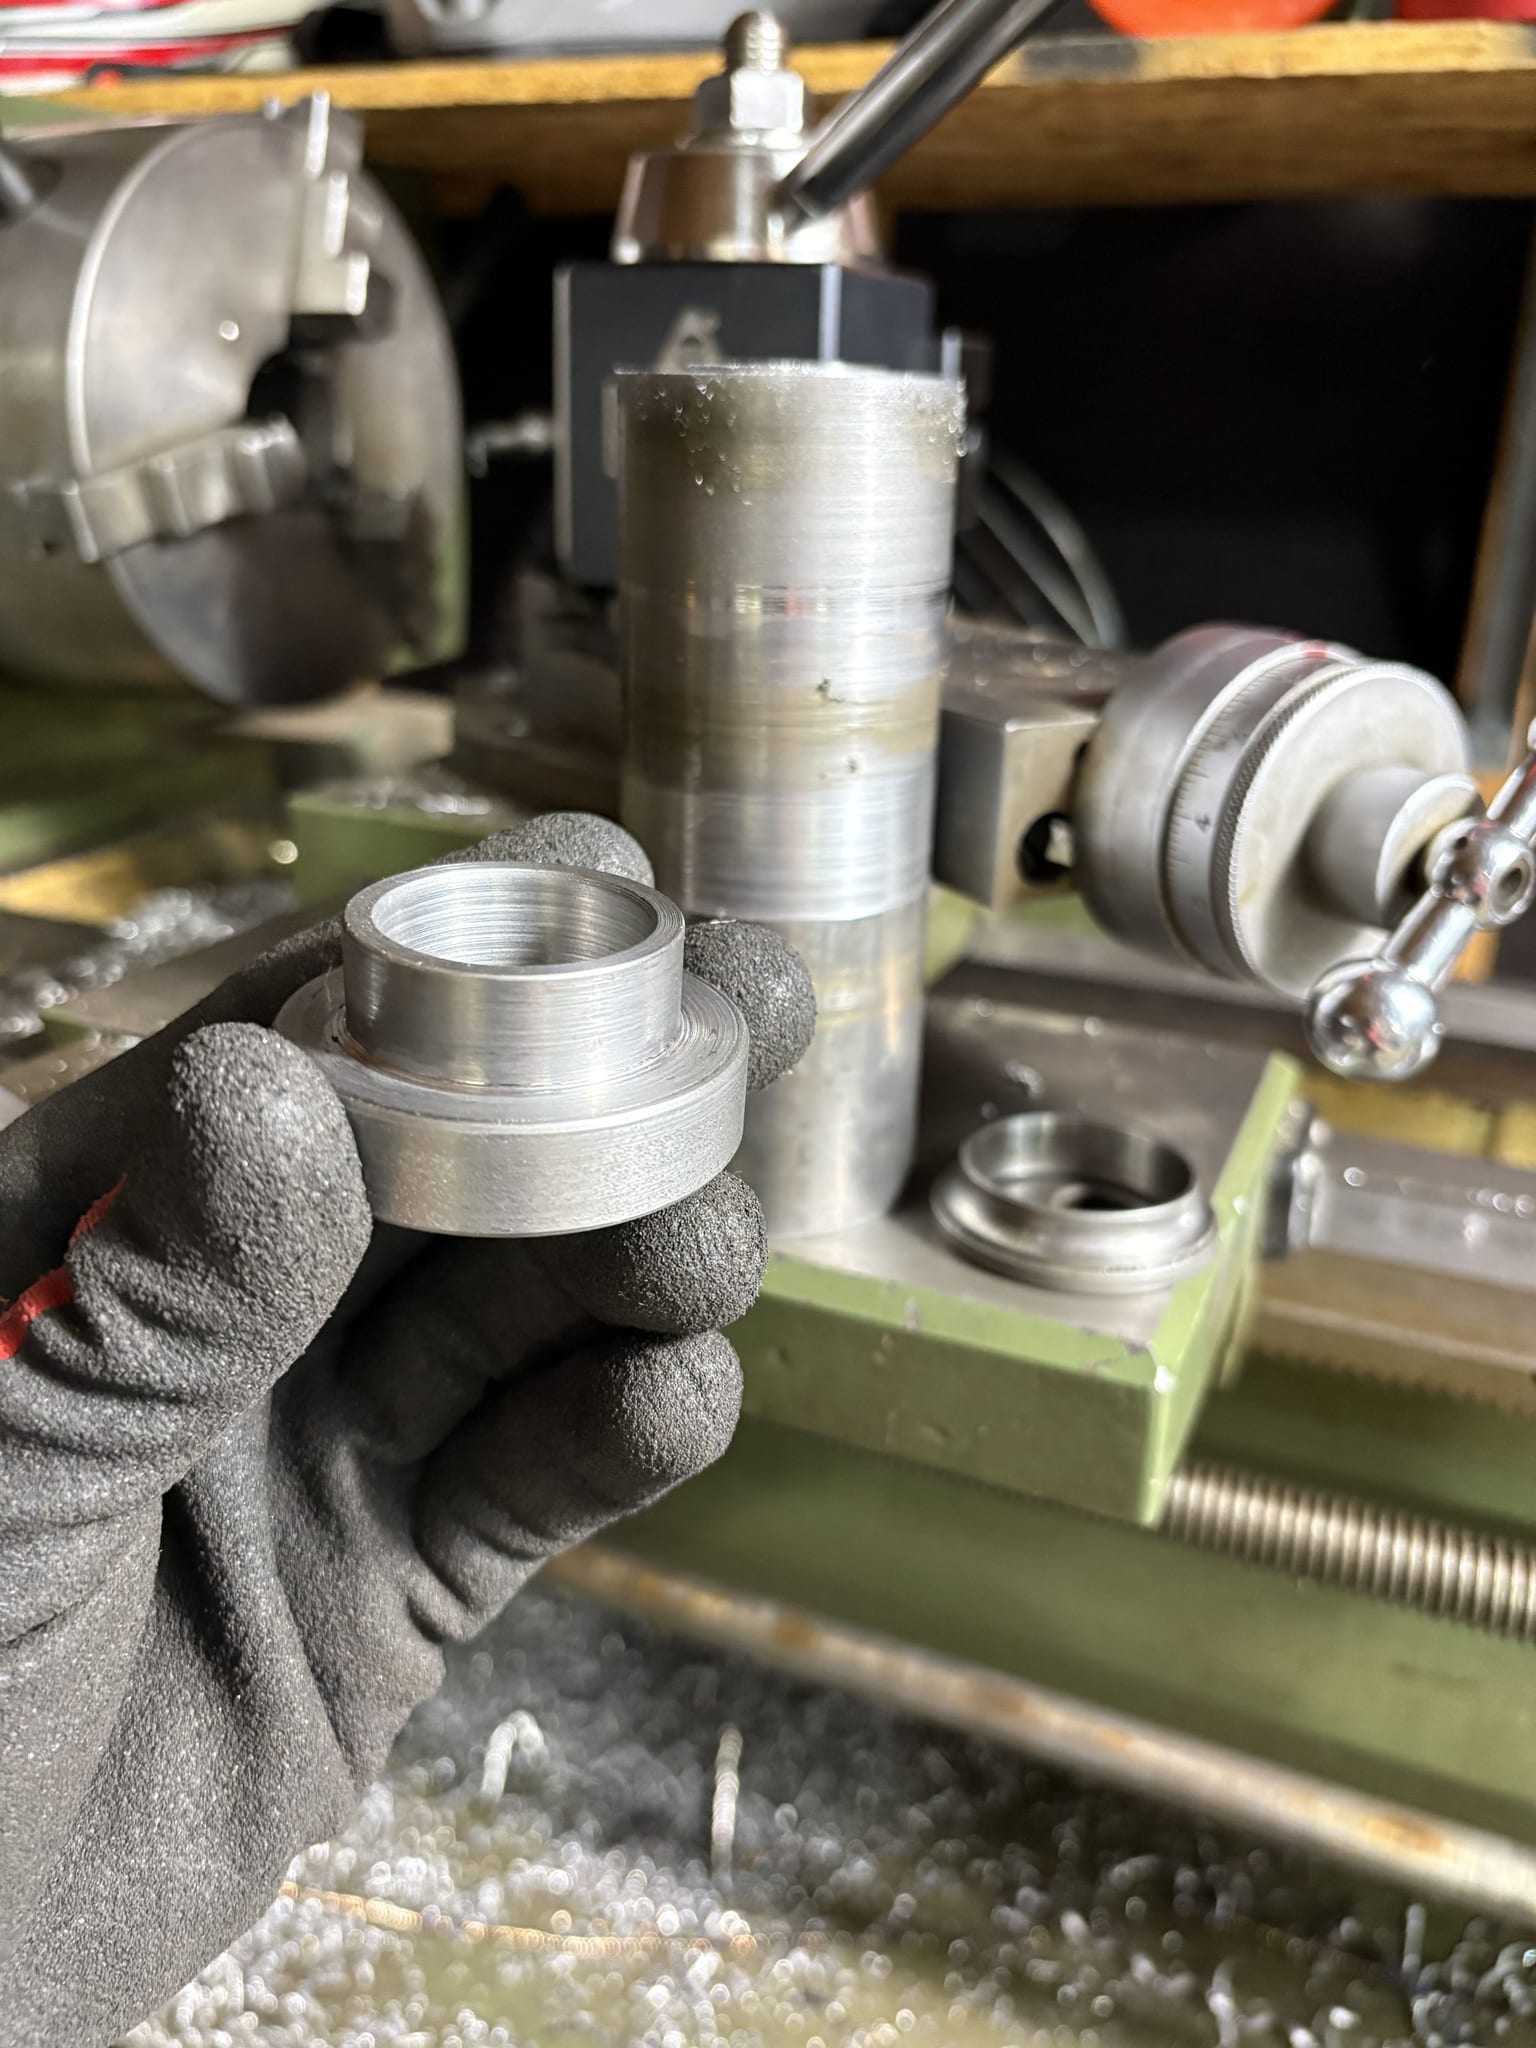
Months later that shortcut came back to bite me. I took the bike on an overnight camping ride up Rollins Pass, and on the way down the mountain the bushing fell out, leaving a huge amount of slop in the front end. By then I owned a lathe, so I machined a proper spacer. It has a large flange at the top that doubles as the top spacer, so it physically can’t fall through.
The swingarm
The rear is where it got tough. For weeks I messaged eBay sellers, asking them to measure different swingarms so I could check whether any of them could fit the Ducati engine, with or without modification.
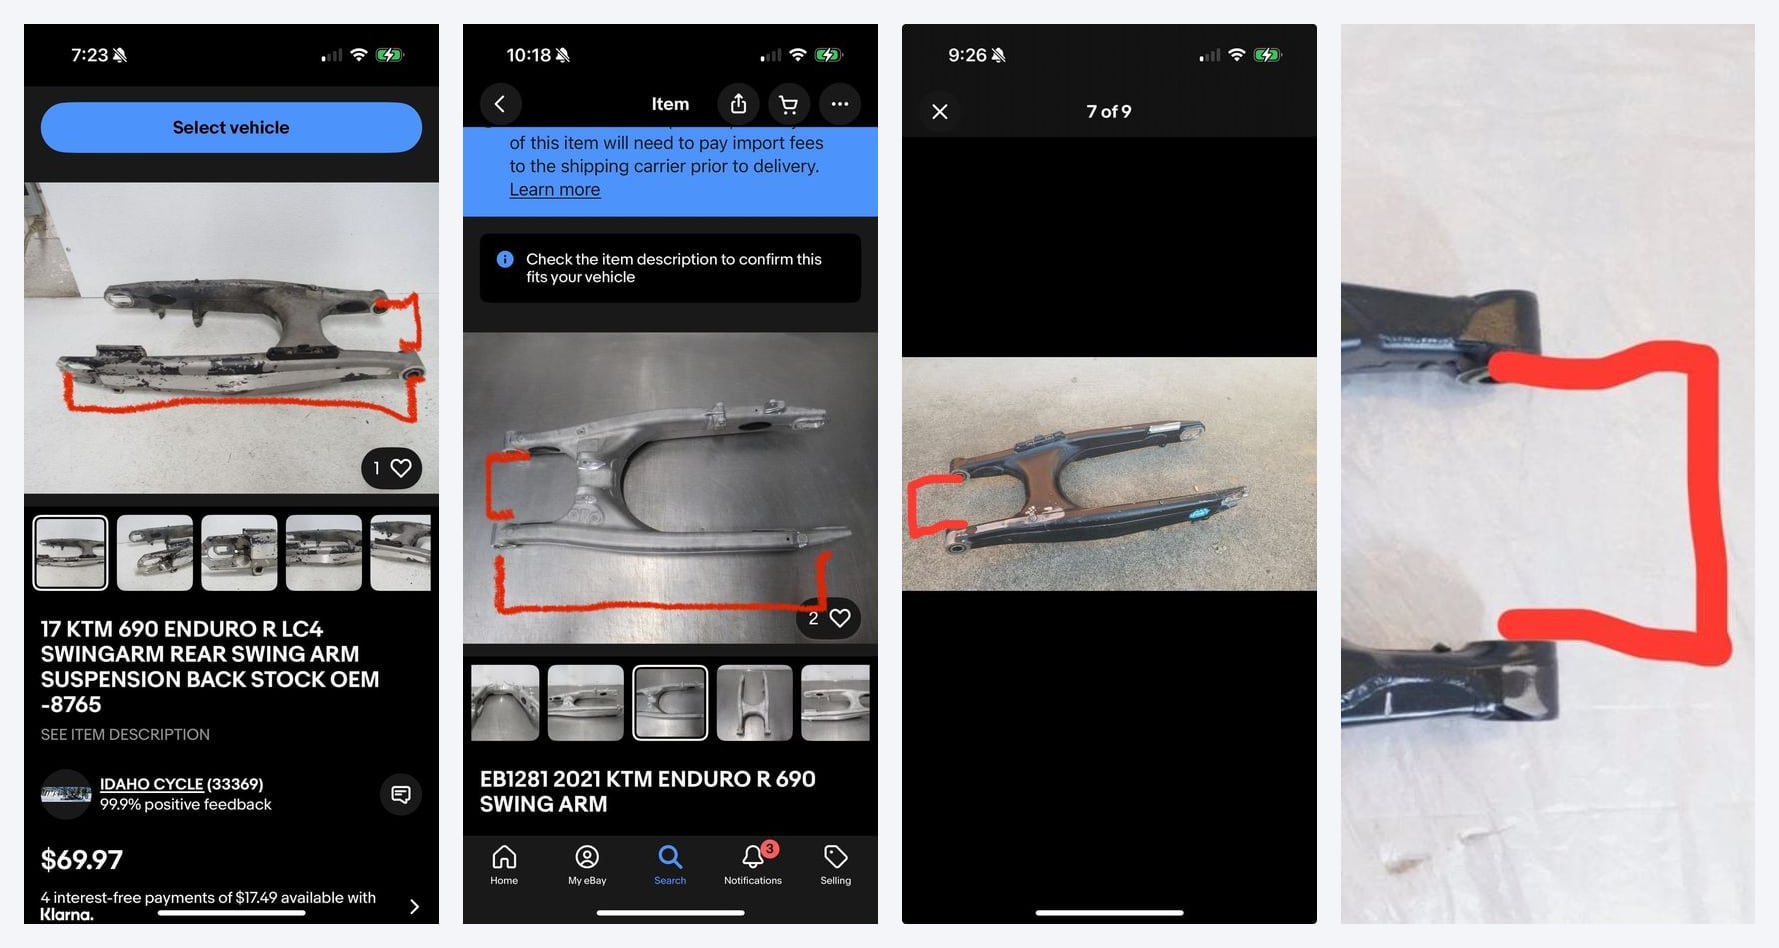
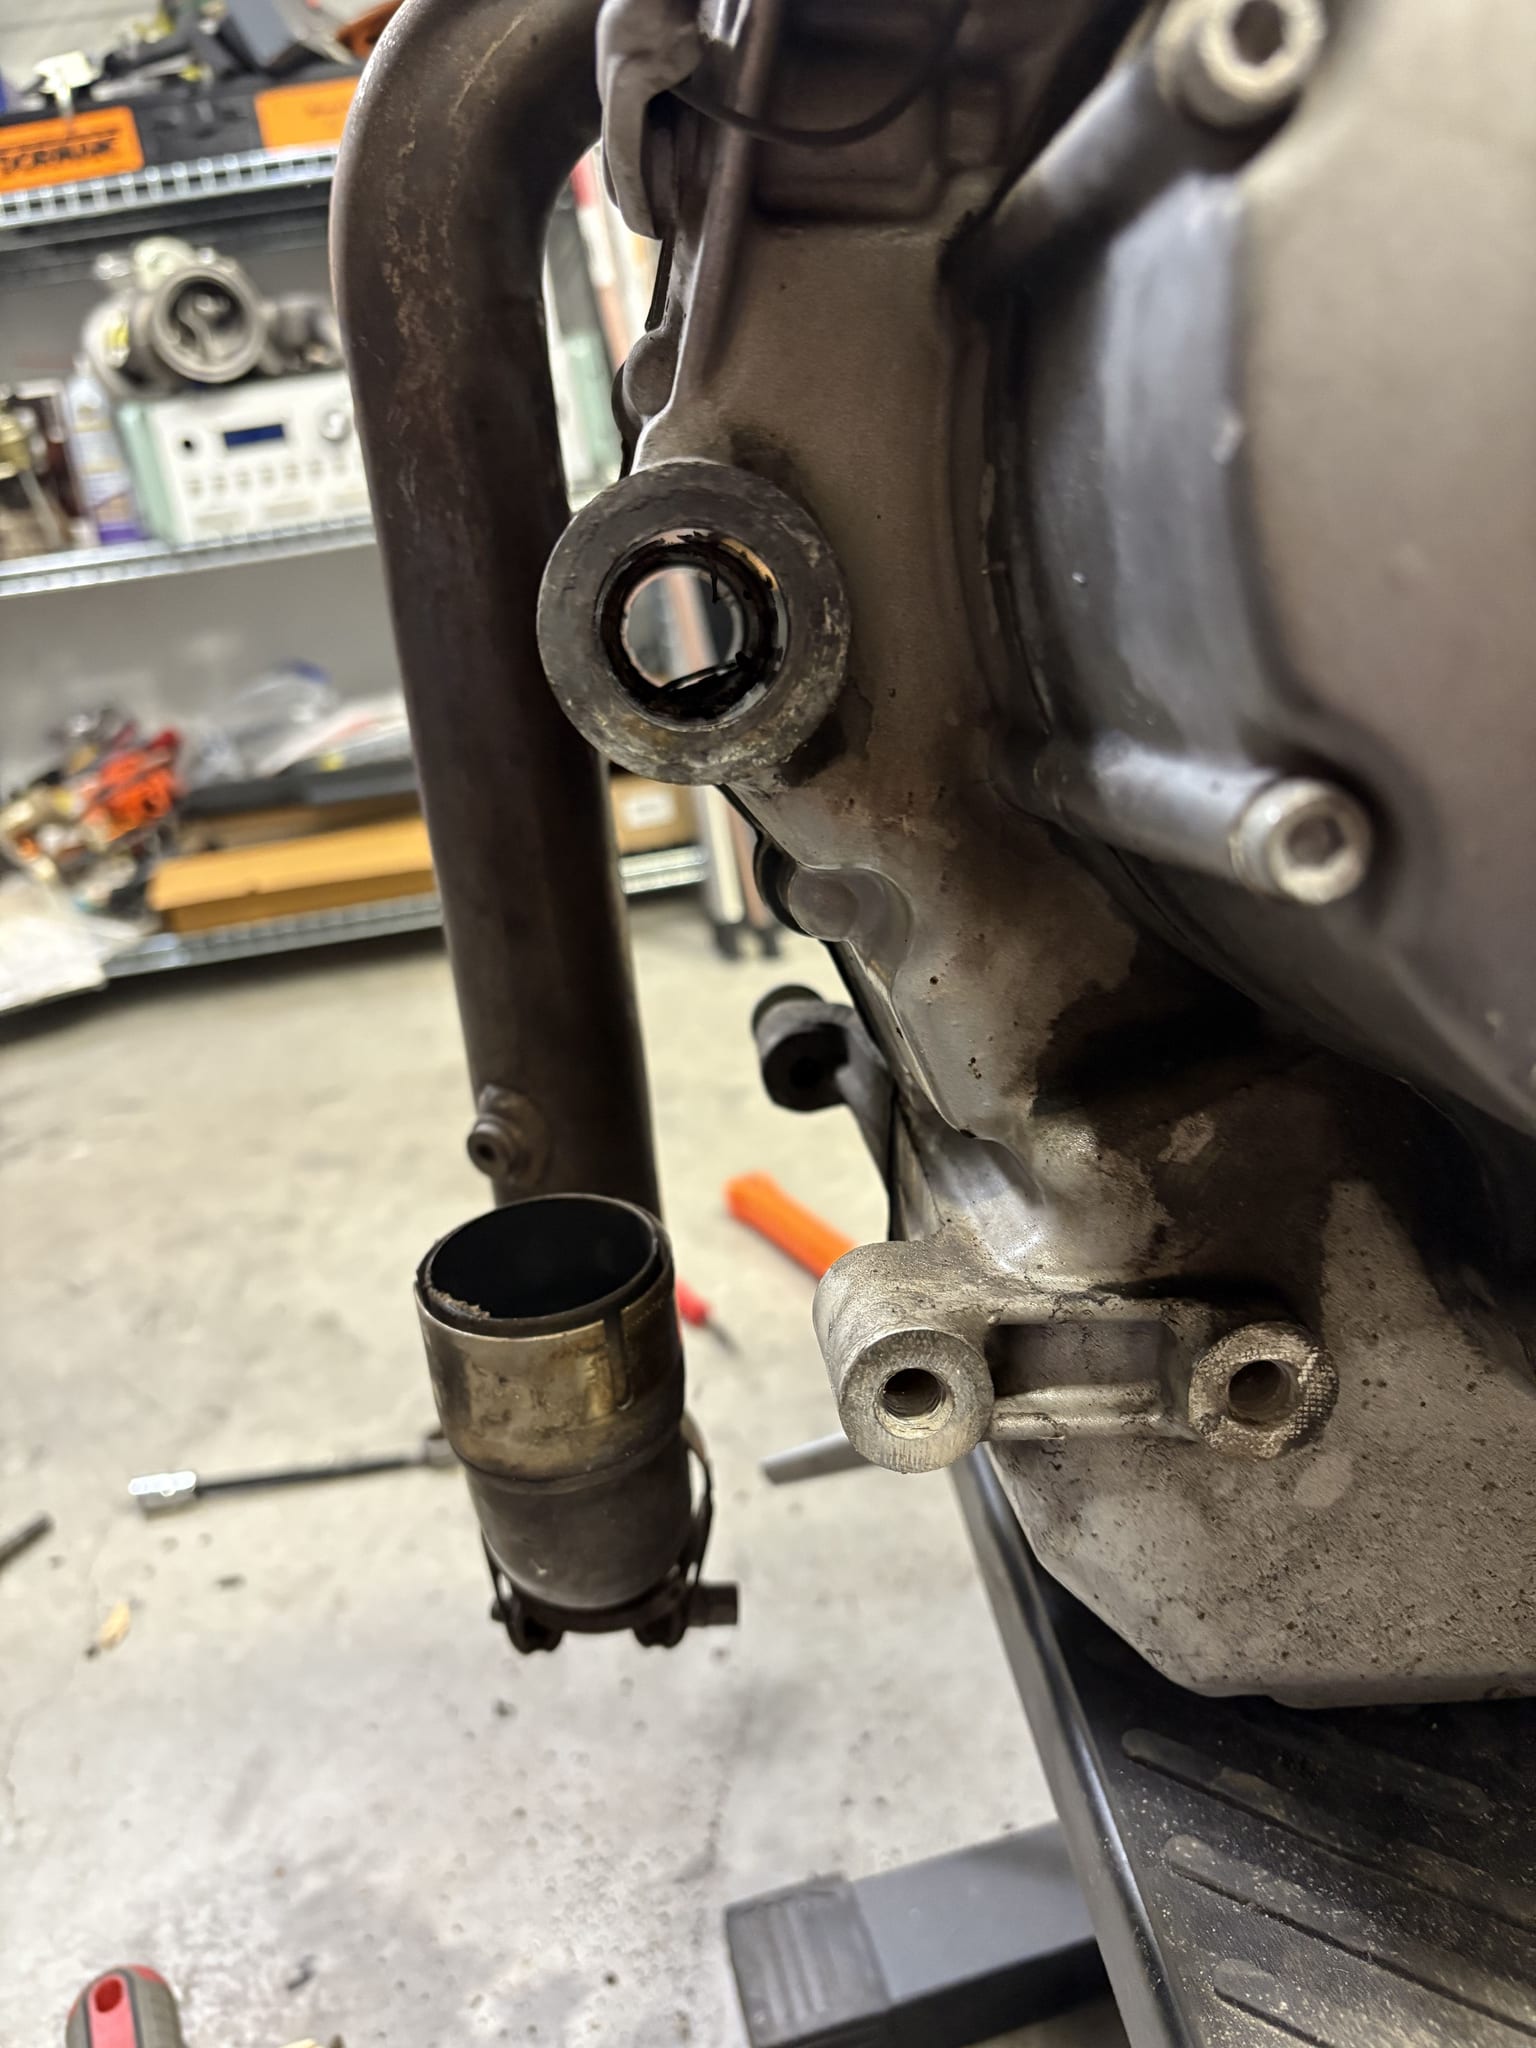
I couldn’t find a swingarm wide enough for the engine’s swingarm pivot mounts. After a while I realized I could modify the engine itself to make a narrower swingarm fit. On the Monster the swingarm pivots on the engine case, and the casting had two nubs sticking out of its sides. I cut them off with a hacksaw and gained an extra inch of room.
After more messaging and measuring, I found that a KTM 690 Enduro swingarm was almost exactly 1 inch narrower than the Ducati’s. It also has its pivot bearings built into the arm, which was very convenient: cutting the nubs off the engine had removed the spot where the Ducati’s swingarm pivot bearings used to sit. I did have to machine an aluminum spacer that fits inside the engine case and sets the spacing between the case and the swingarm pivot axle.
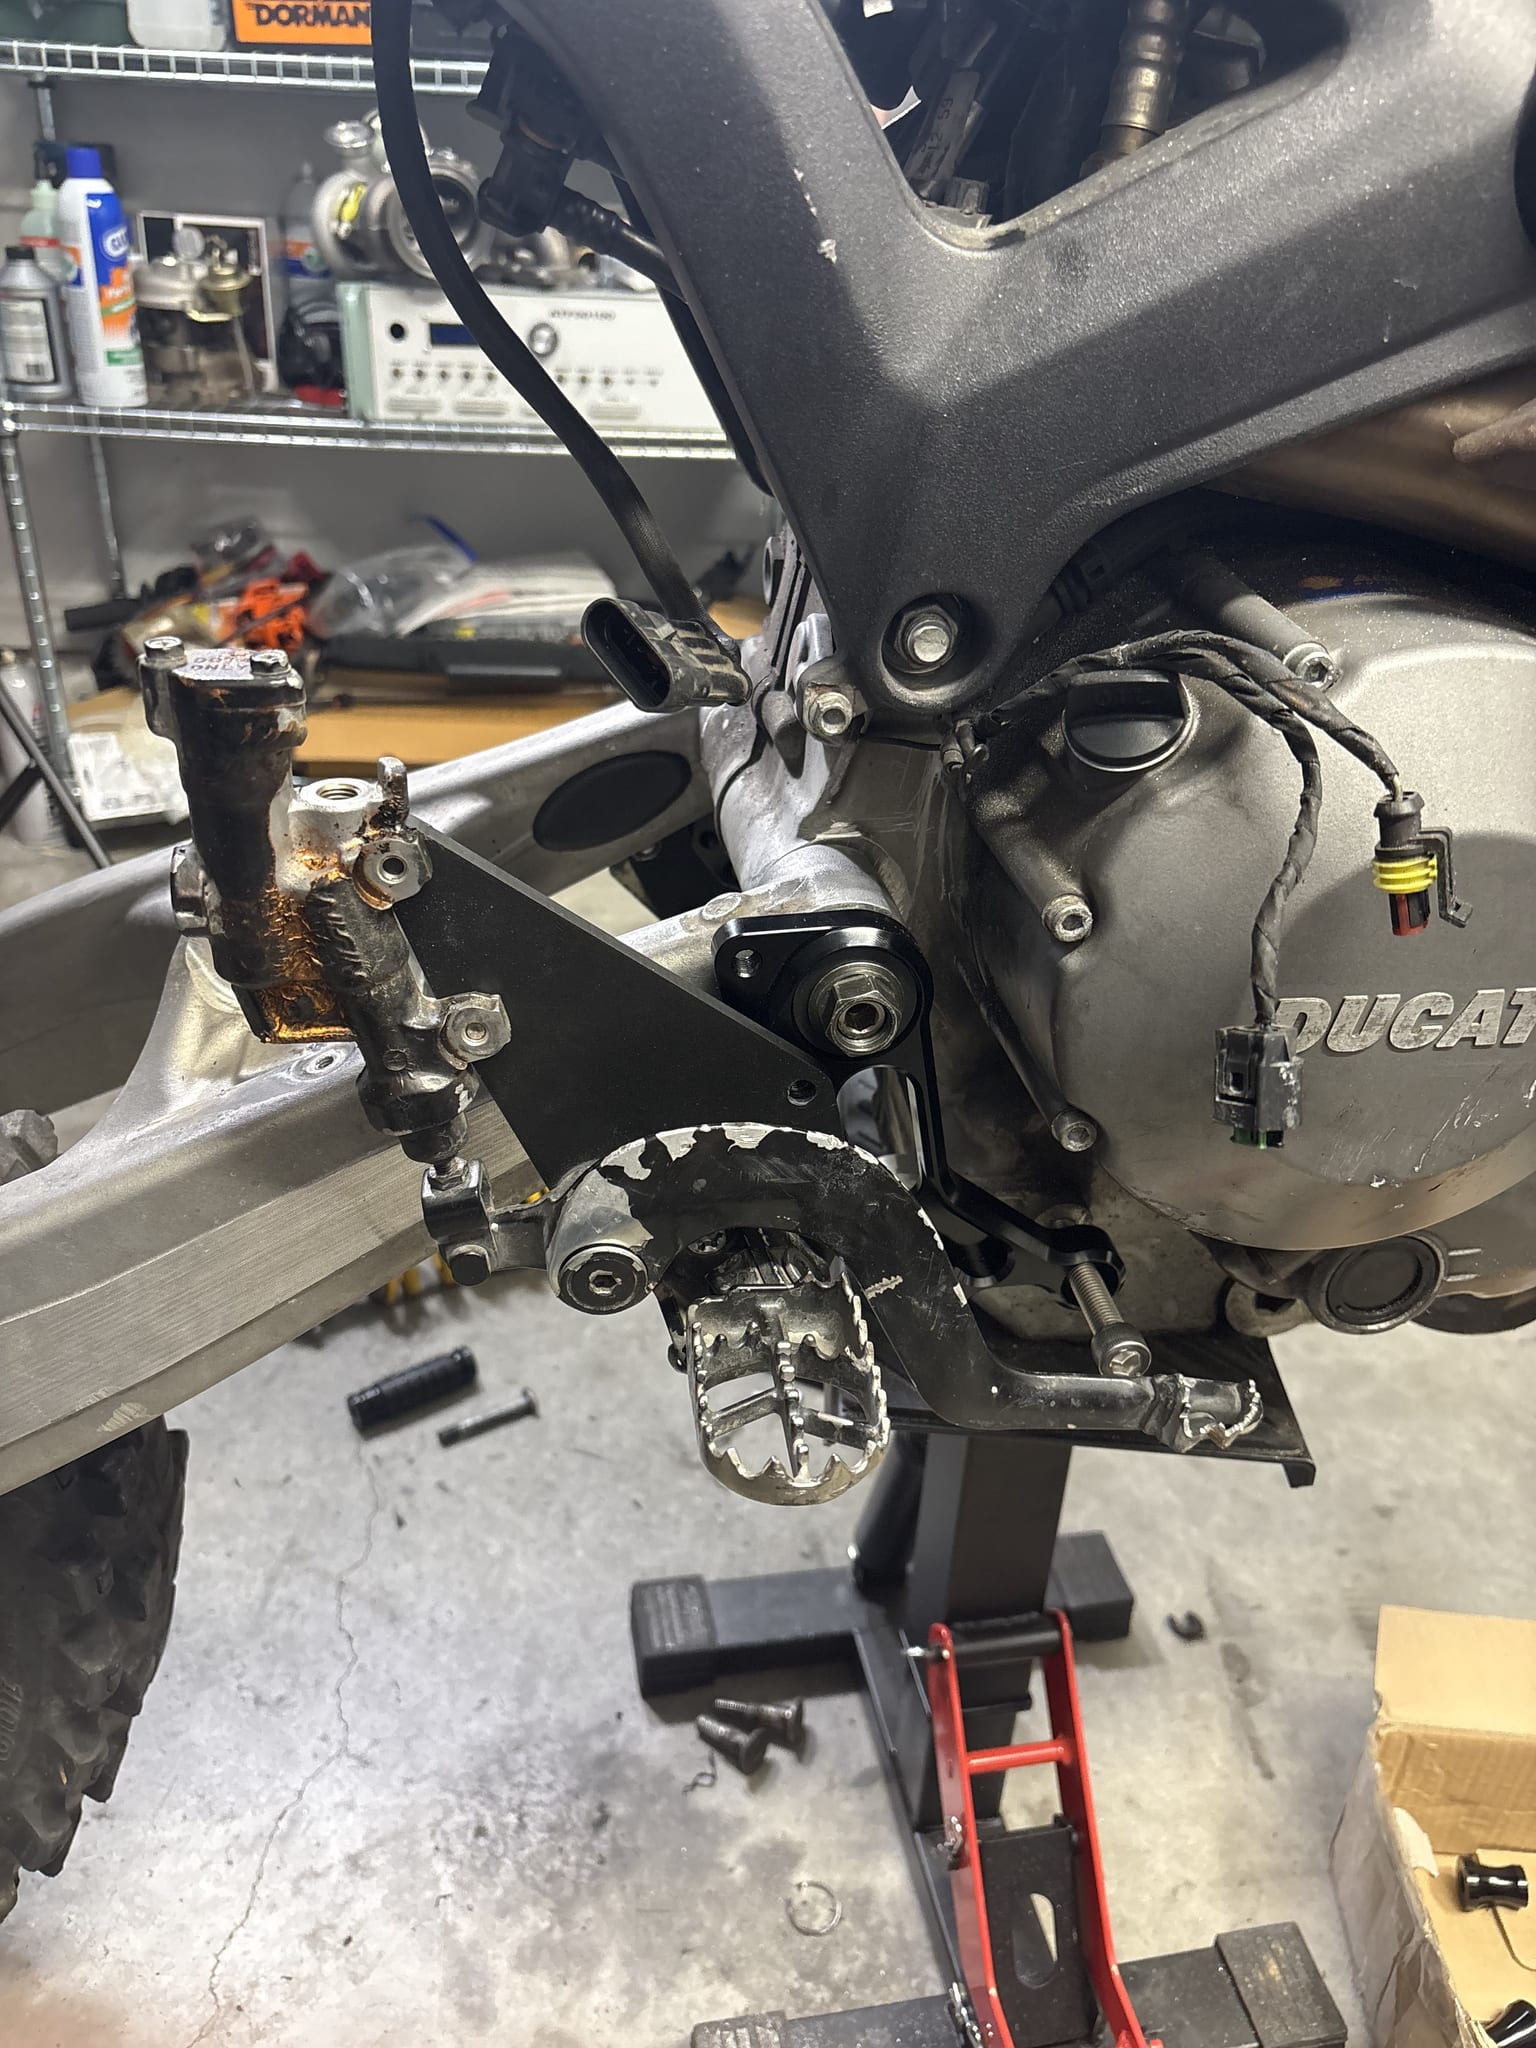
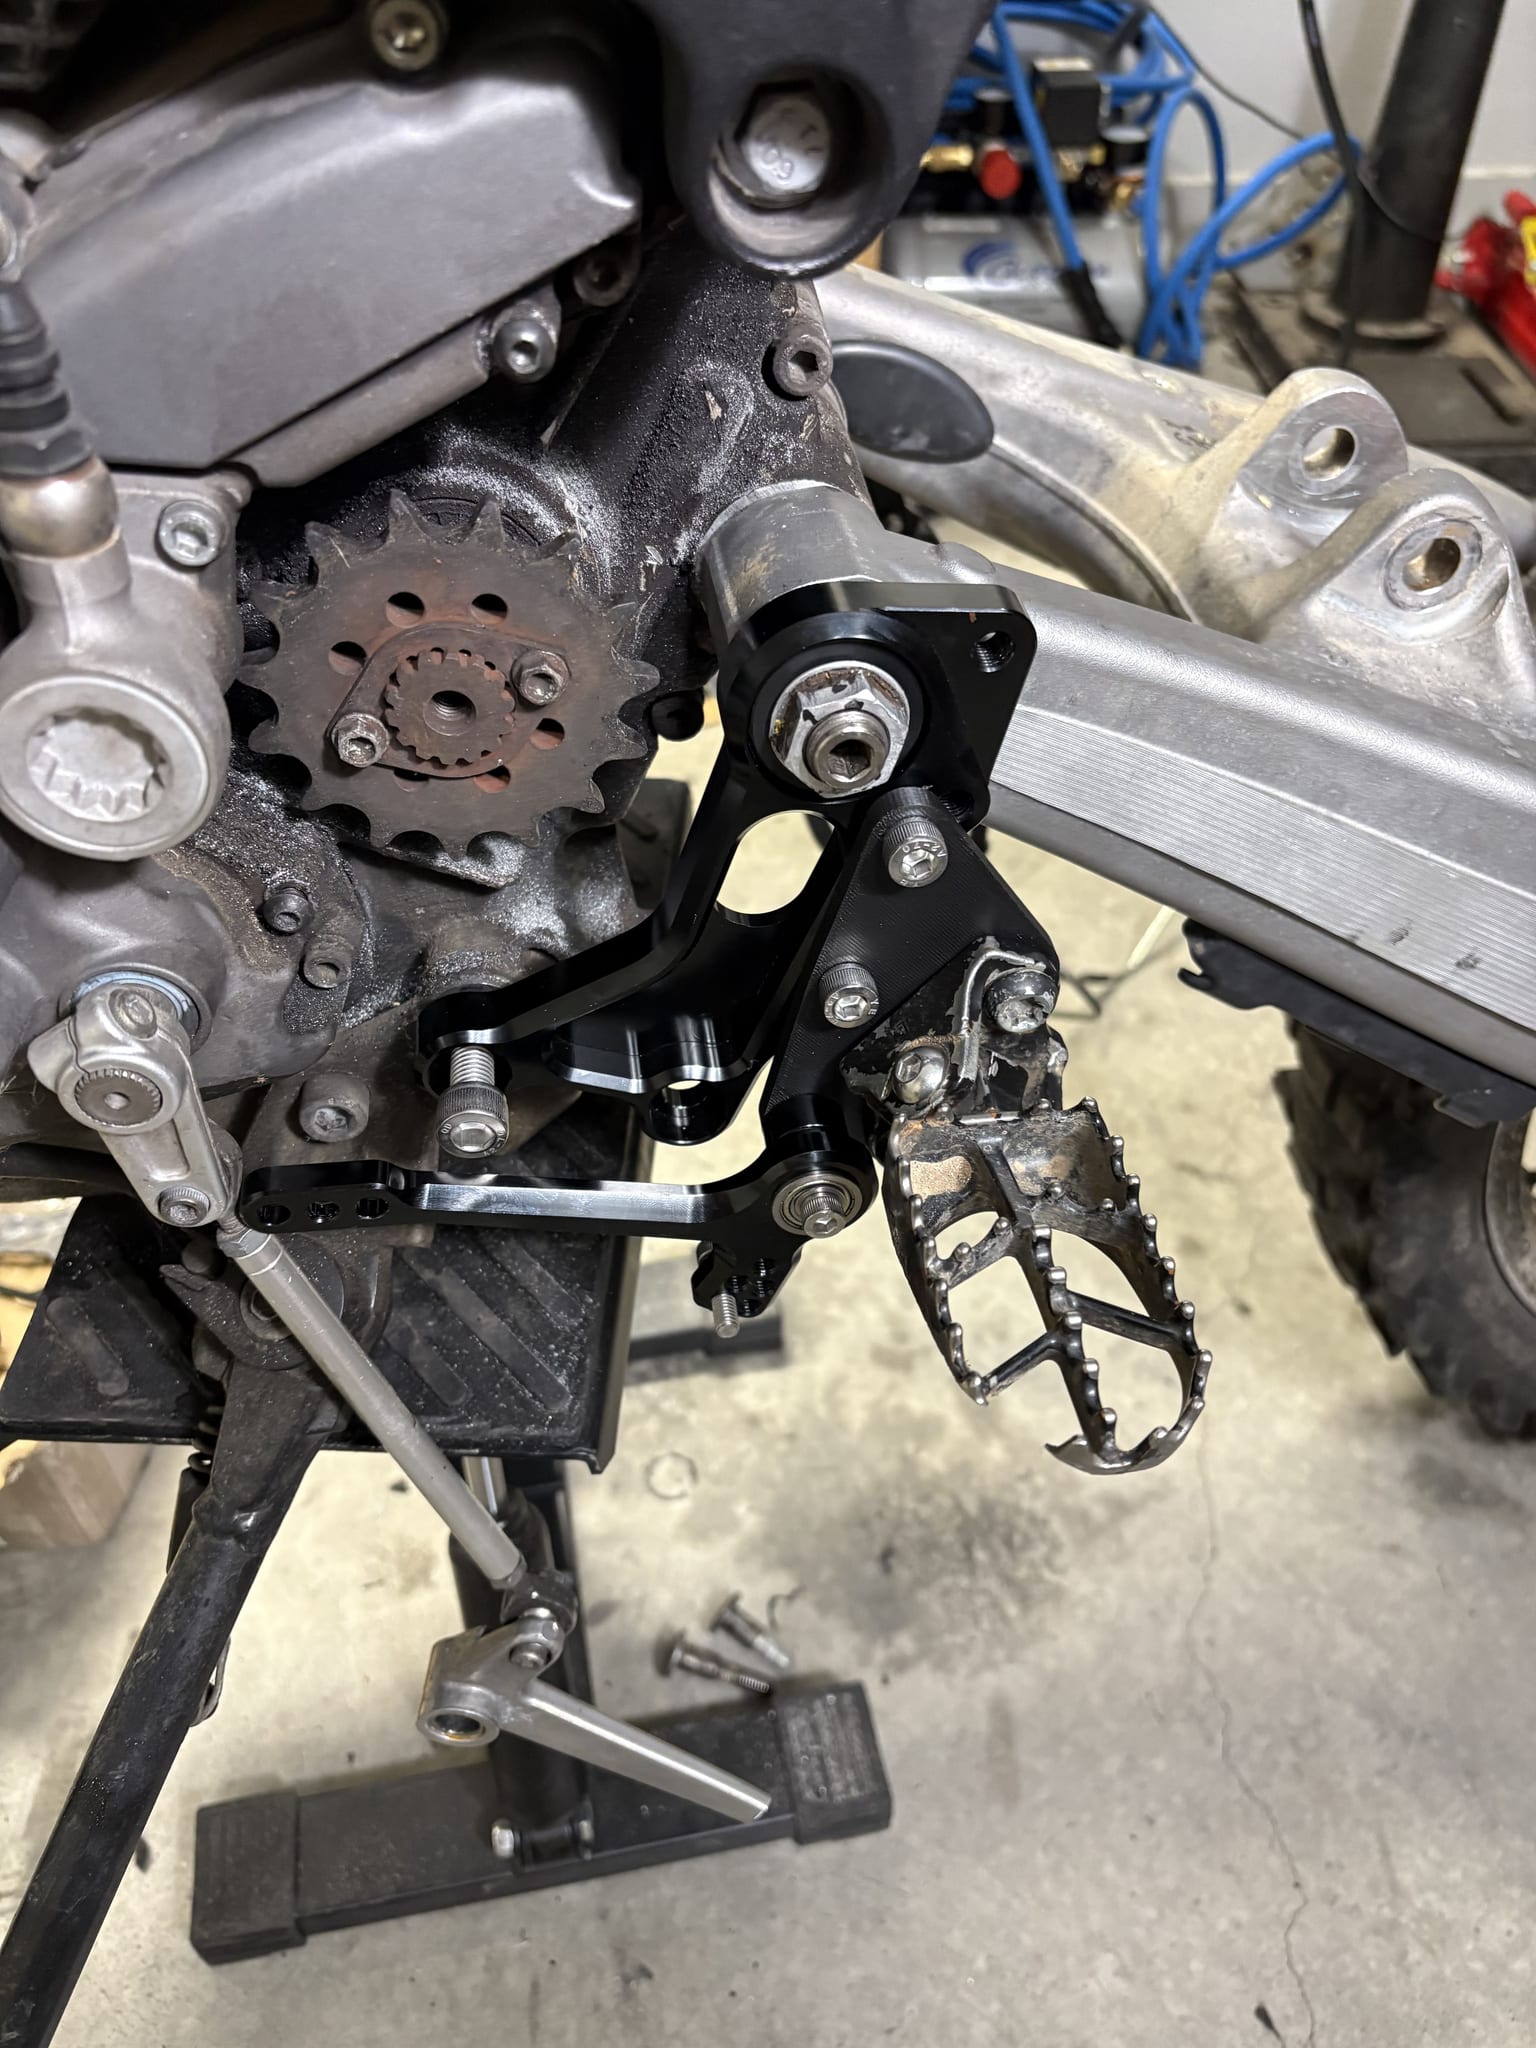
That got the swingarm swinging, but it wasn’t finished. The engine mount alone isn’t strong enough to carry the swingarm of a heavy off-road motorcycle. I spent a while working out how to tie the pivot axle into the rest of the frame, and eventually found a set of cheap CNC rearsets for the Ducati that were already designed to bolt onto the footpeg mounting bolts and the swingarm pivot axle. Now the axle is supported both inside the pivot and from the outside, which makes it much stronger, especially against twisting forces.
Footpegs
Those rearsets were designed to put the footpegs in a higher, more aggressive sportbike position, again the complete opposite of what you want in the dirt. The best part about them is that they have a ton of mounting holes so you can really dial in where your pegs sit, and all those holes were perfect for designing my own footpeg adapter plates.
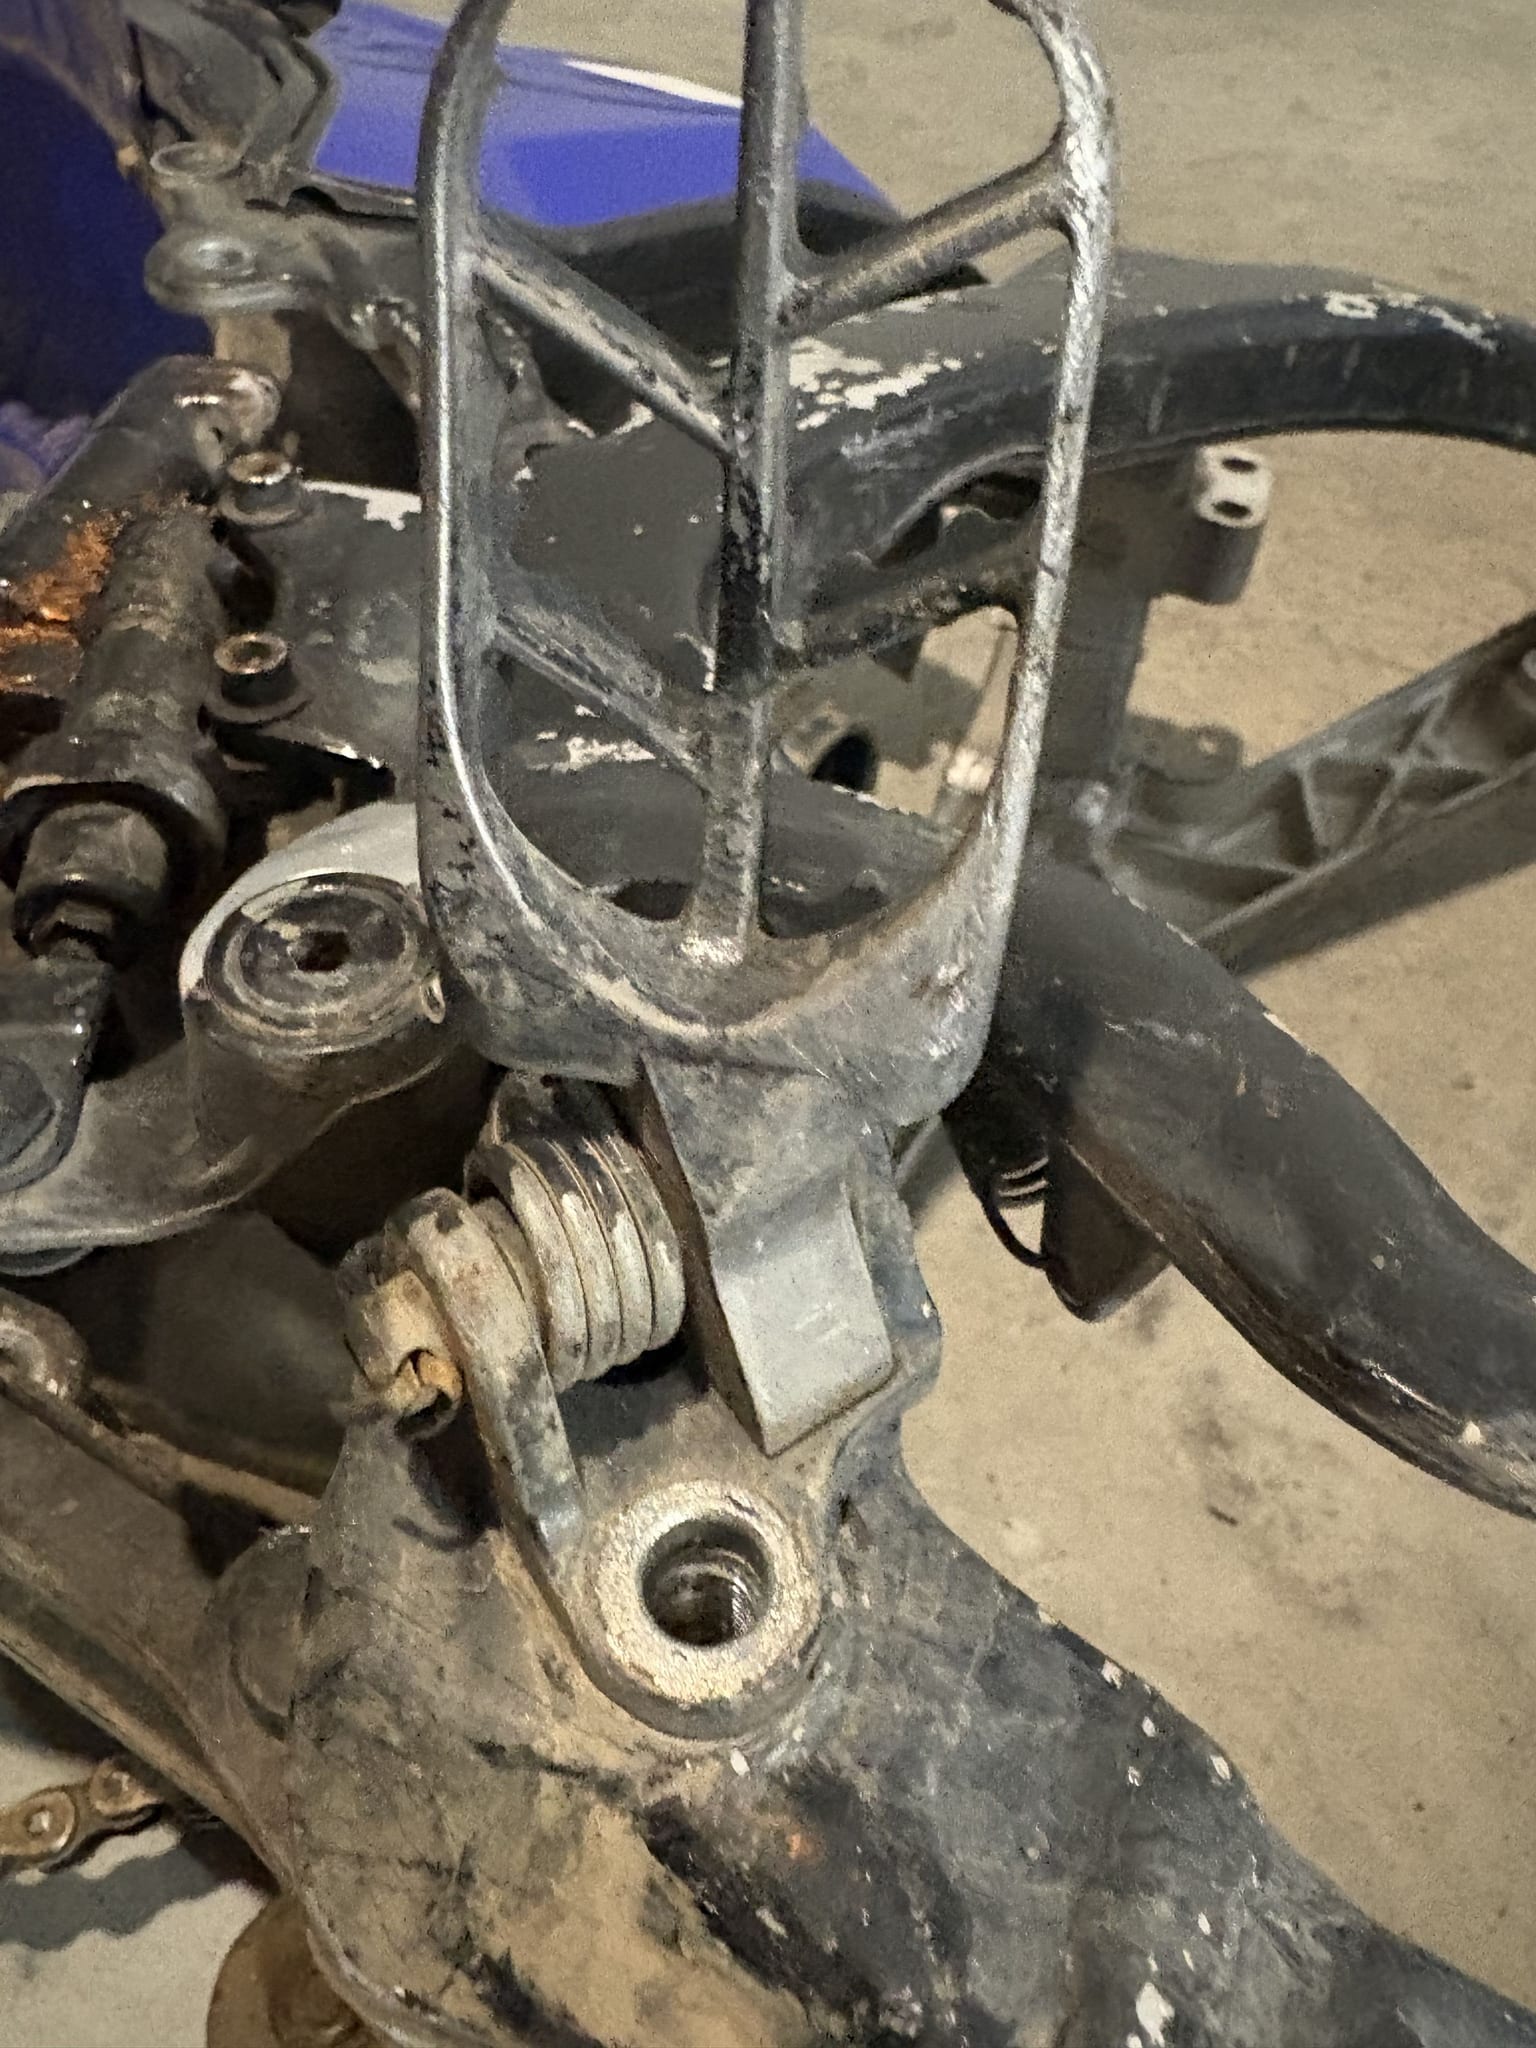
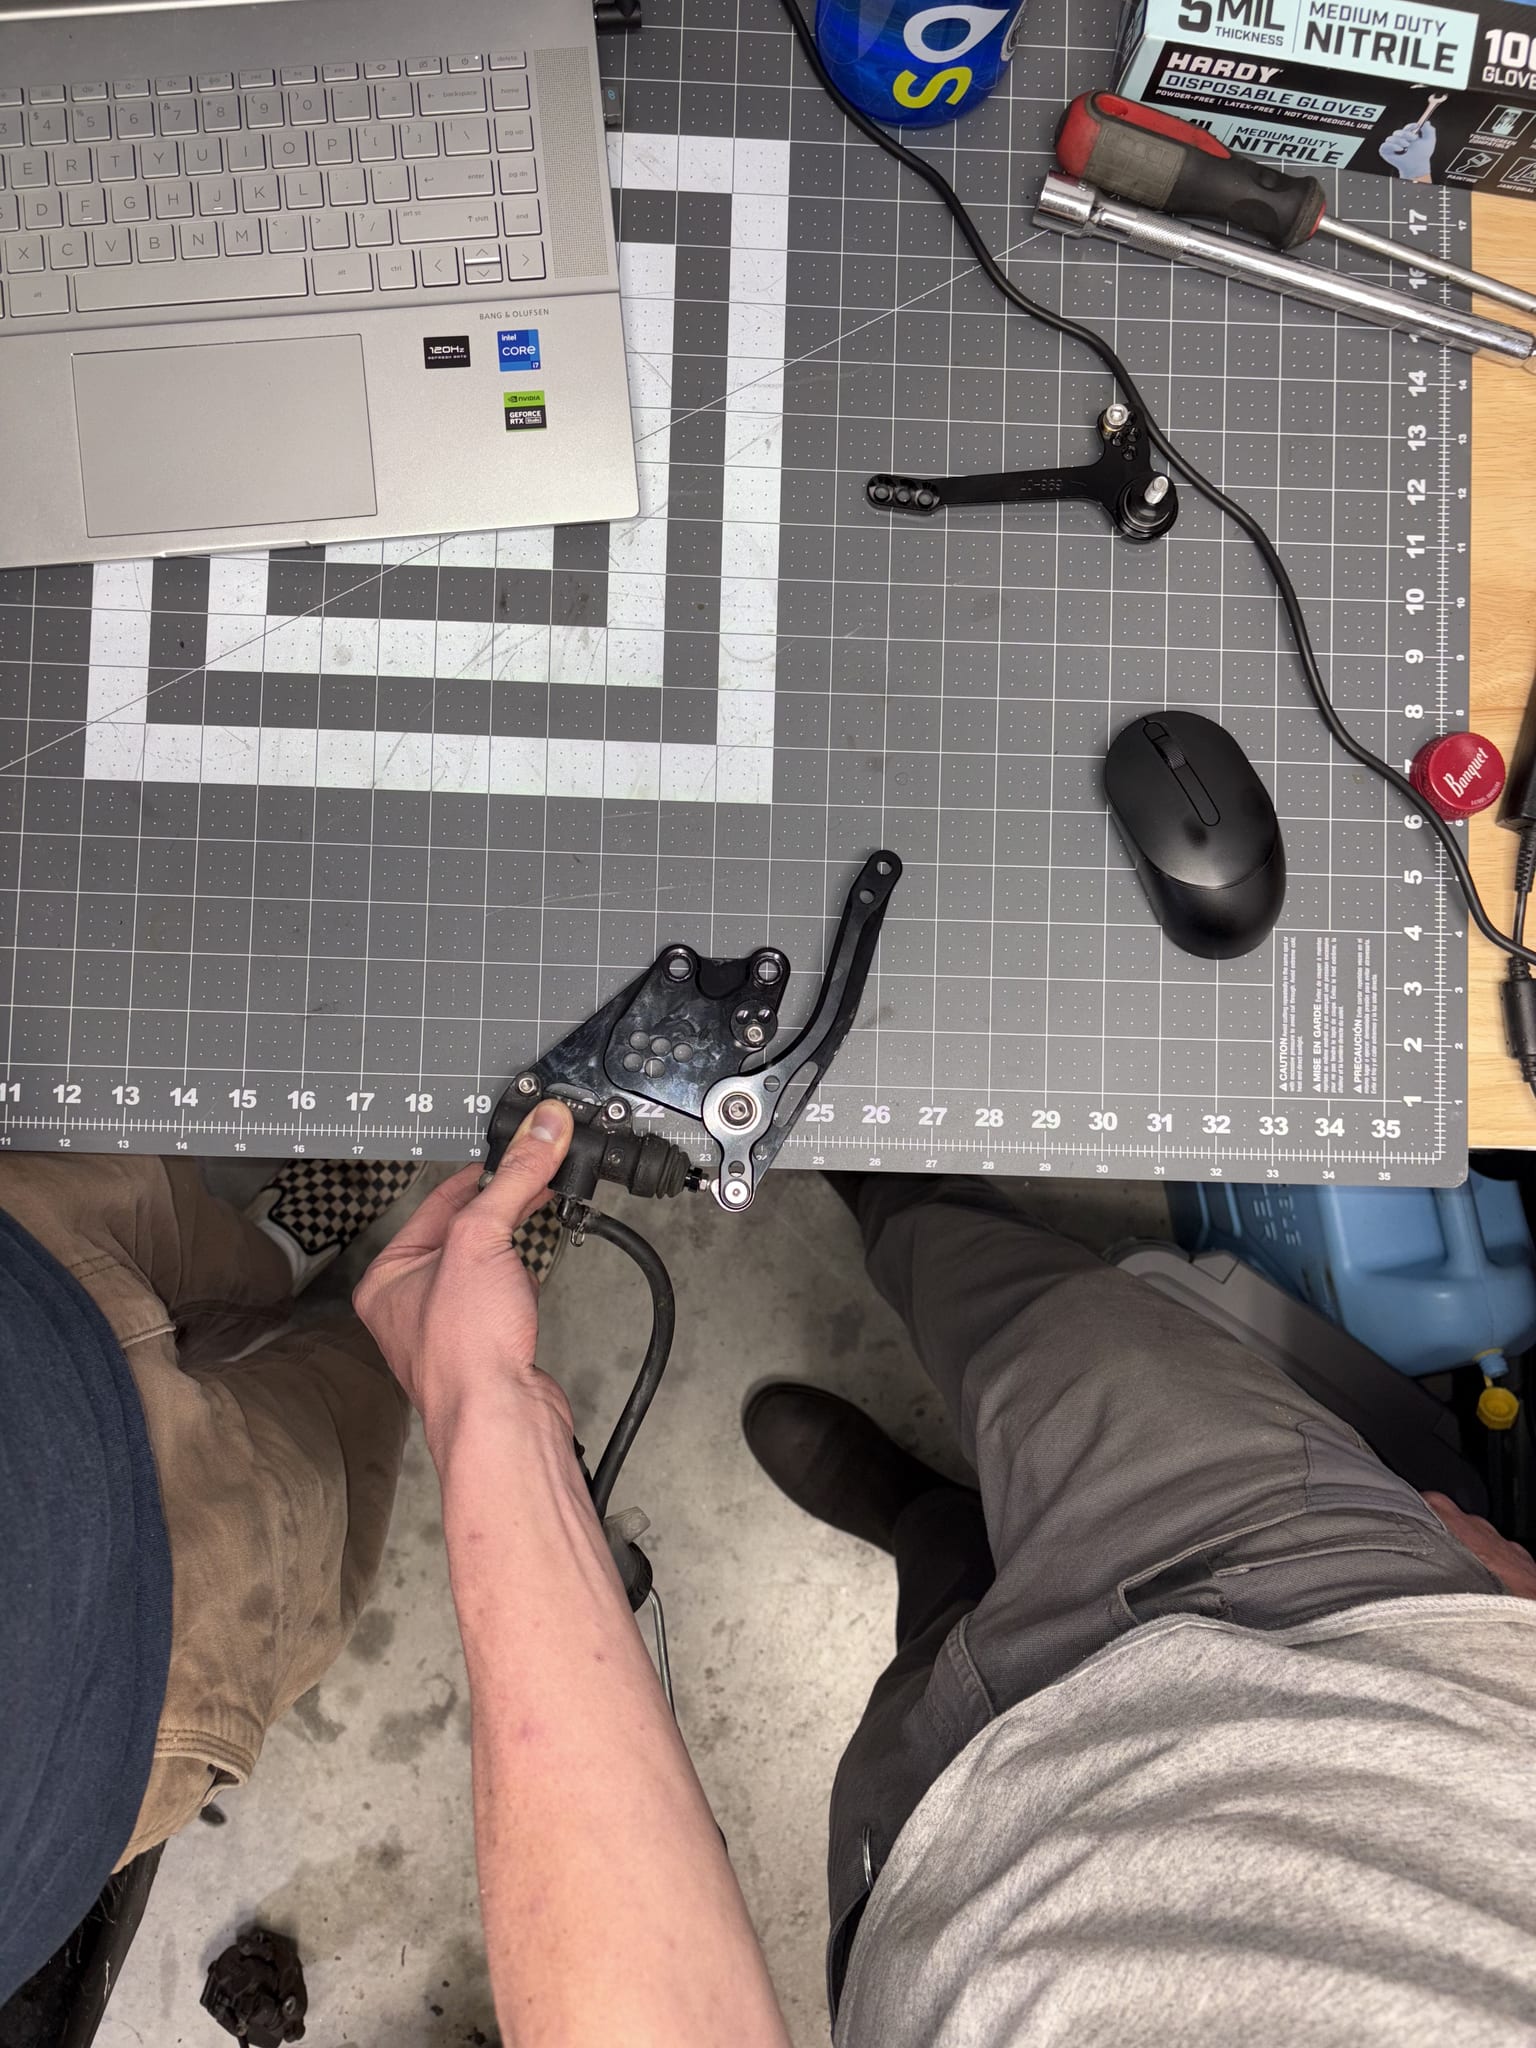
I pulled the footpegs and the rear brake master cylinder off the YZ450F and held them roughly where the pegs should go. From there I took some pictures, CAD’d up an adapter plate, 3D printed it and tested it. Then I 3D printed and tested it again. And again. After a few revisions, and after breaking a couple of the printed mock-ups by putting my full weight on them, I ordered the final plates from SendCutSend: laser cut, tapped and powder coated.
The rear shock
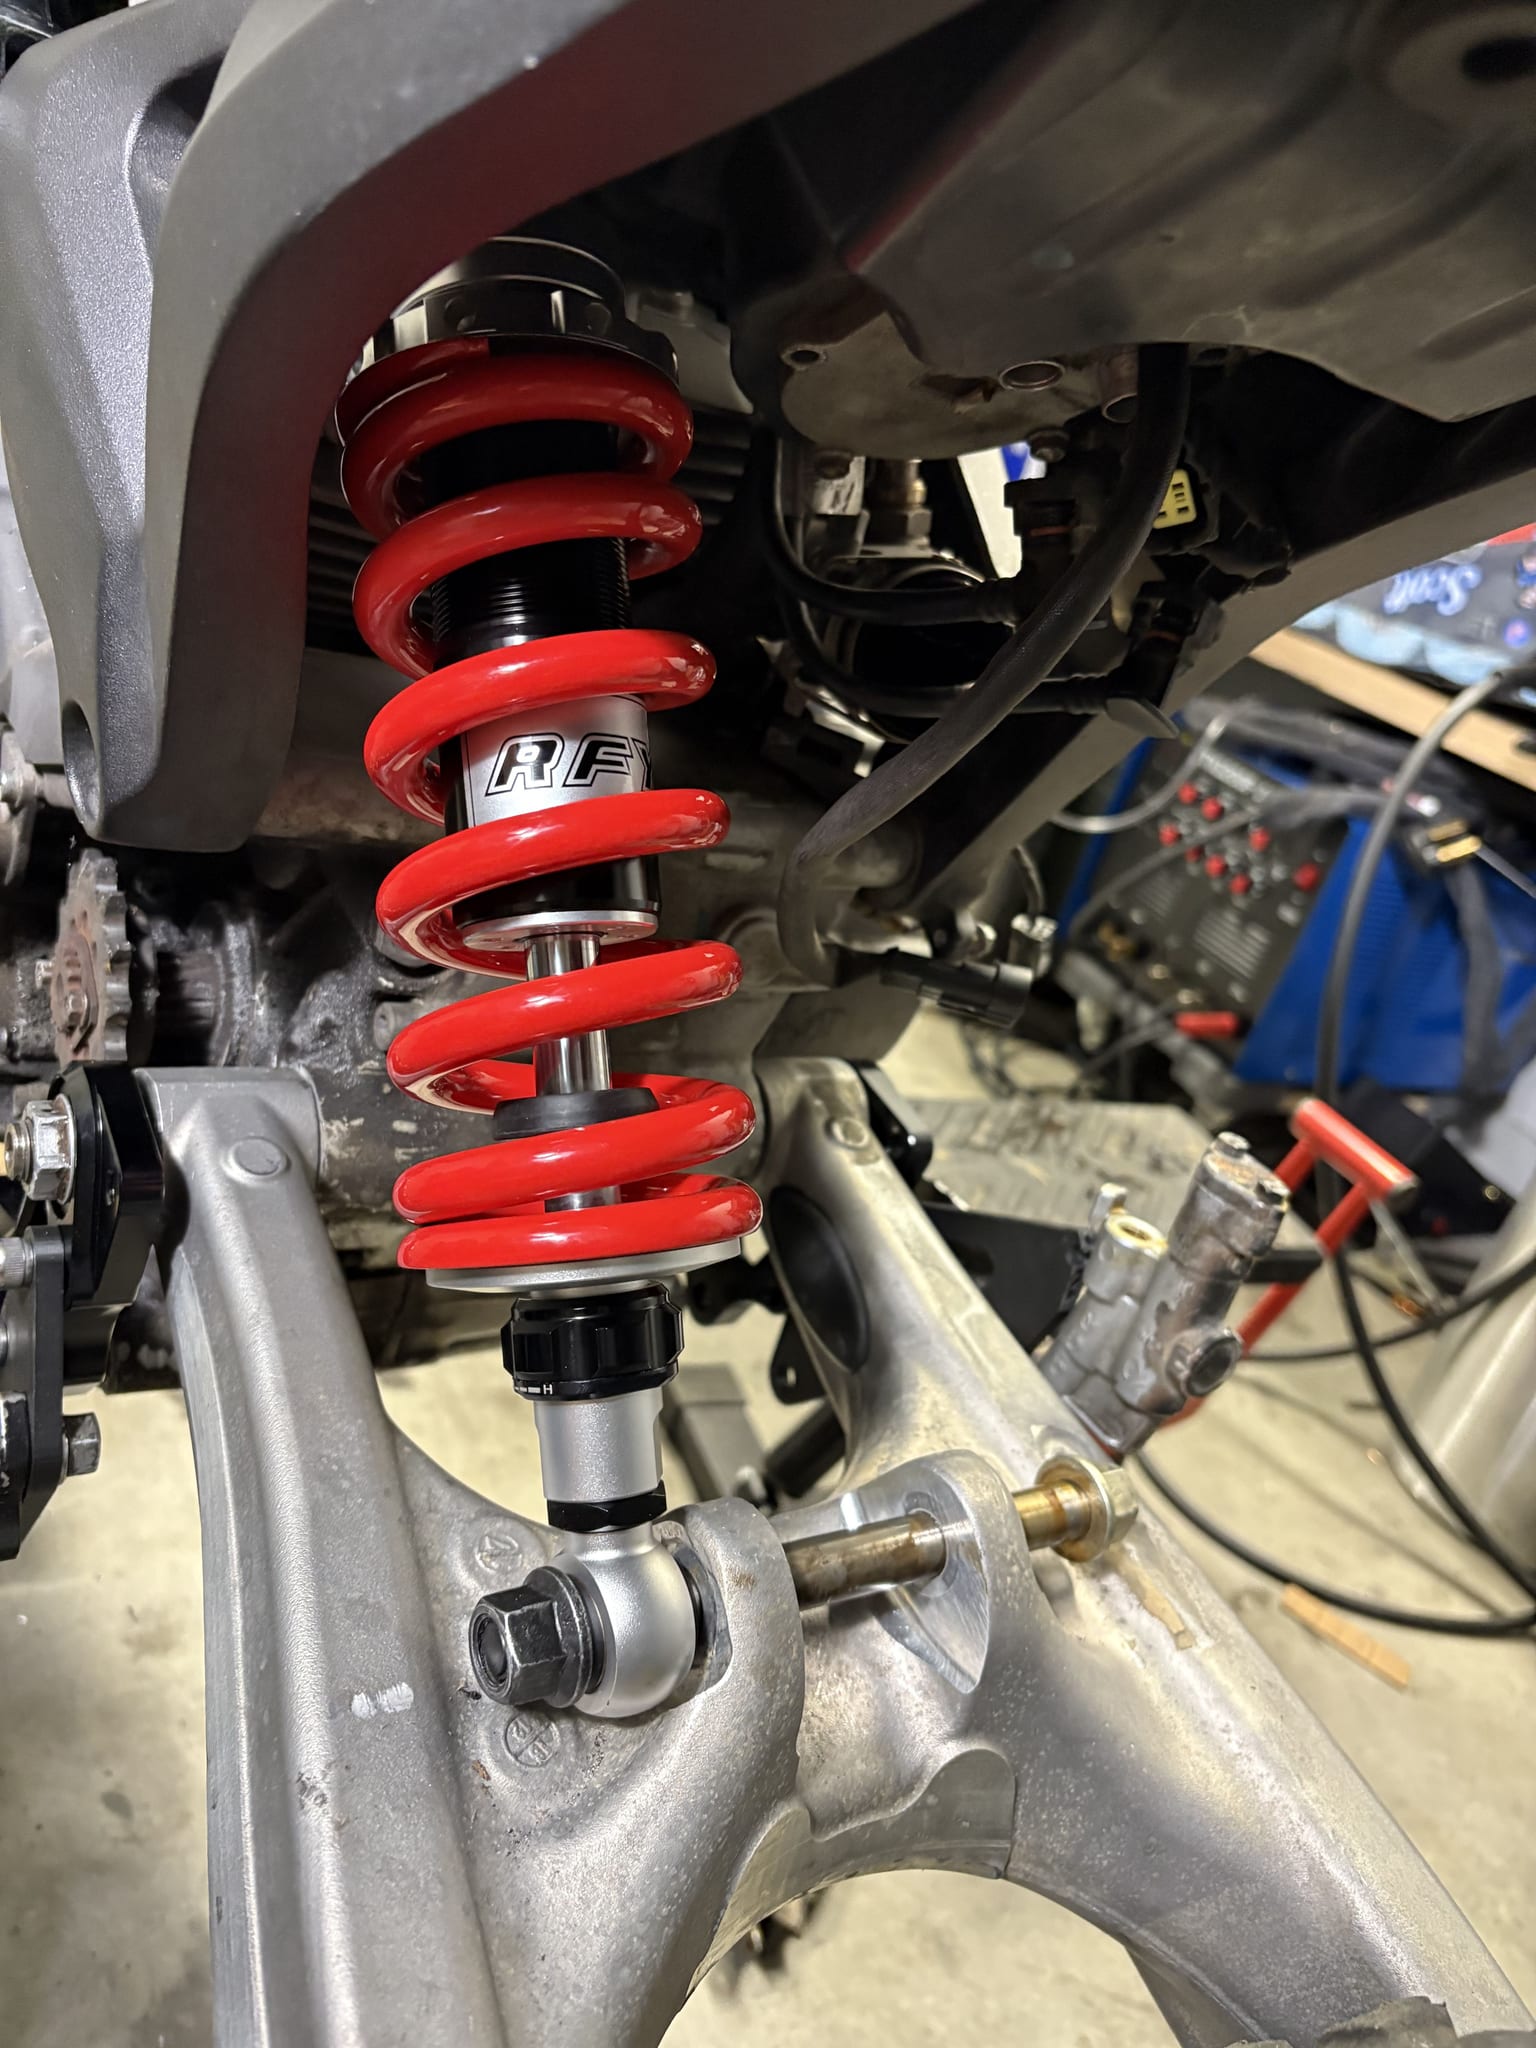
Next was the rear shock, and this was one of the weirdest challenges of the whole build. I used a dirt bike stand to lift the bike to the seat height I wanted, then measured eye to eye from the Ducati’s upper shock mount to the shock mount on the KTM 690 swingarm. Once again I spent weeks messaging eBay sellers, asking them to measure the shocks from random off-road motorcycles, and asking ChatGPT to hunt for any shock of the right length.
After a lot of searching, I found the wrong shock: an aftermarket shock for a Honda Superhawk, a bike I actually owned years ago. It is fully adjustable for rebound, compression and preload, and the best part is that it has 10 mm of length adjustment, so I could raise or lower the bike if my first measurement was off. That came in handy later, because I was never sure what the ride height should be.
The downside is that it was built for a sportbike, and because my upside-down swingarm has no suspension linkage, the spring rate is now linear, which is less desirable off-road. The upsides are that it was the right length, had the right eye bolt sizes and the right weight rating, and has enough adjustability to be pretty decent off-road. I know some people will scoff at this, but it really was the best I could find, and it has absolutely surprised me with how well it performs.
The shock bolted straight up to the Ducati, but I wasn’t so lucky at the swingarm. The Monster 696 uses a shock offset to the left side of the bike, while the KTM 690 swingarm expects a centered shock (or, more accurately, since mine is upside down, a centered linkage). I mounted the shock outside the linkage mounting points on the left side of the swingarm and welded in a second support so the lower shock mount is properly tied into the swingarm.
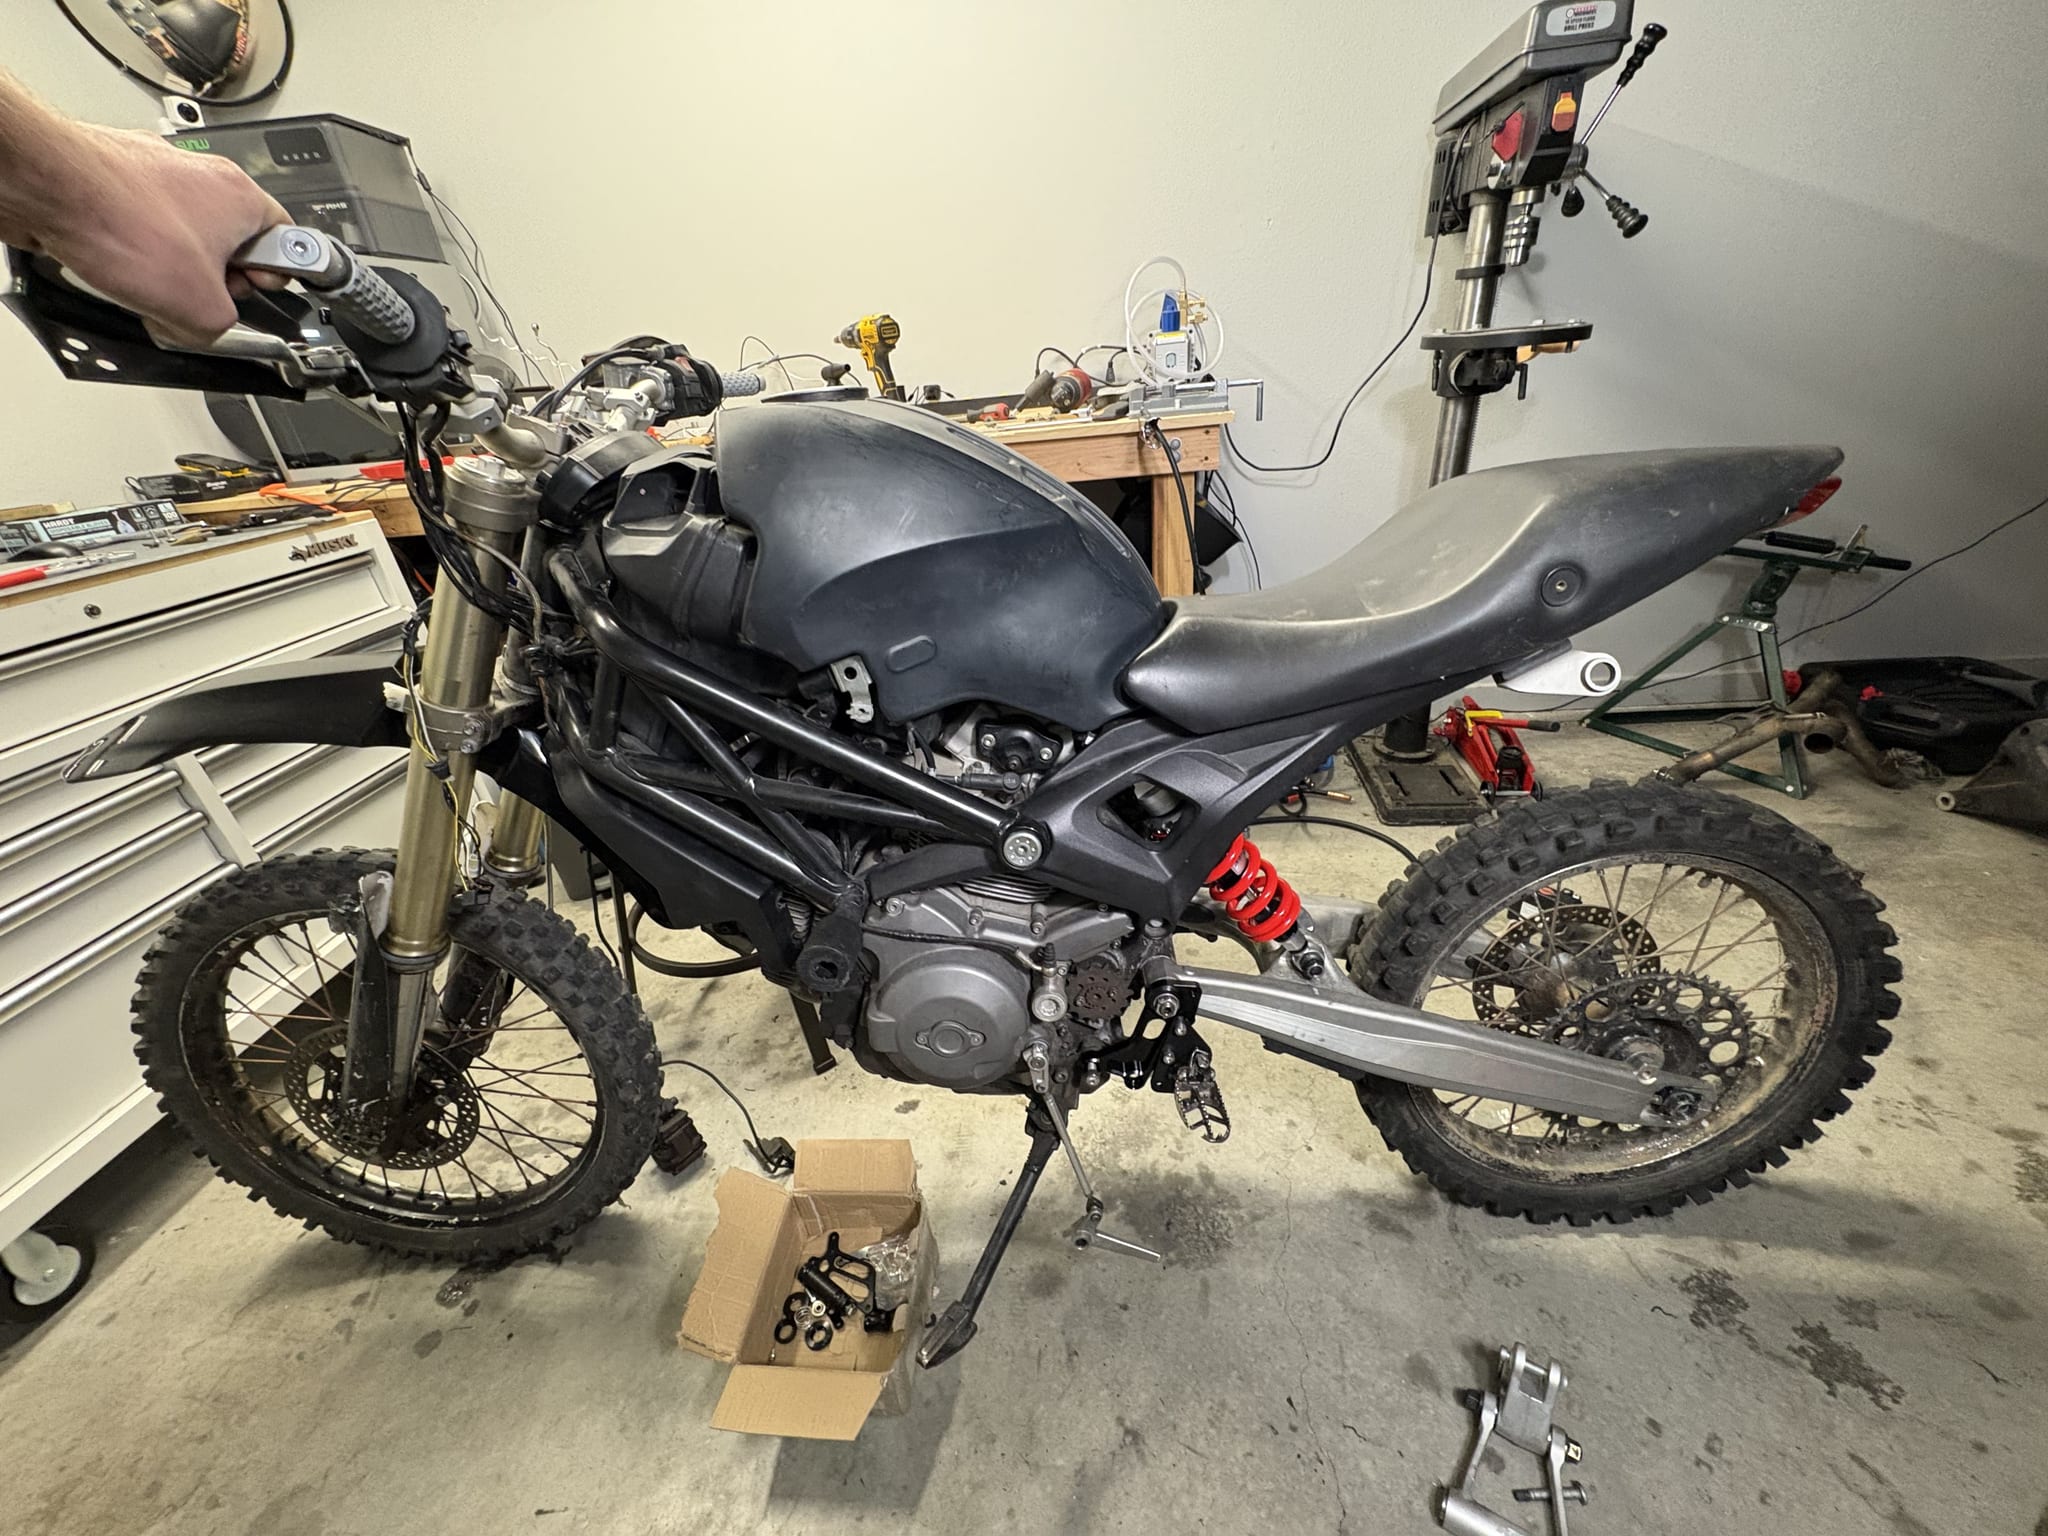
This was the first time the bike stood on two wheels, original Ducati gas tank and all. It didn’t run yet, but it was already obvious this thing was going to be a monster.
Exhaust
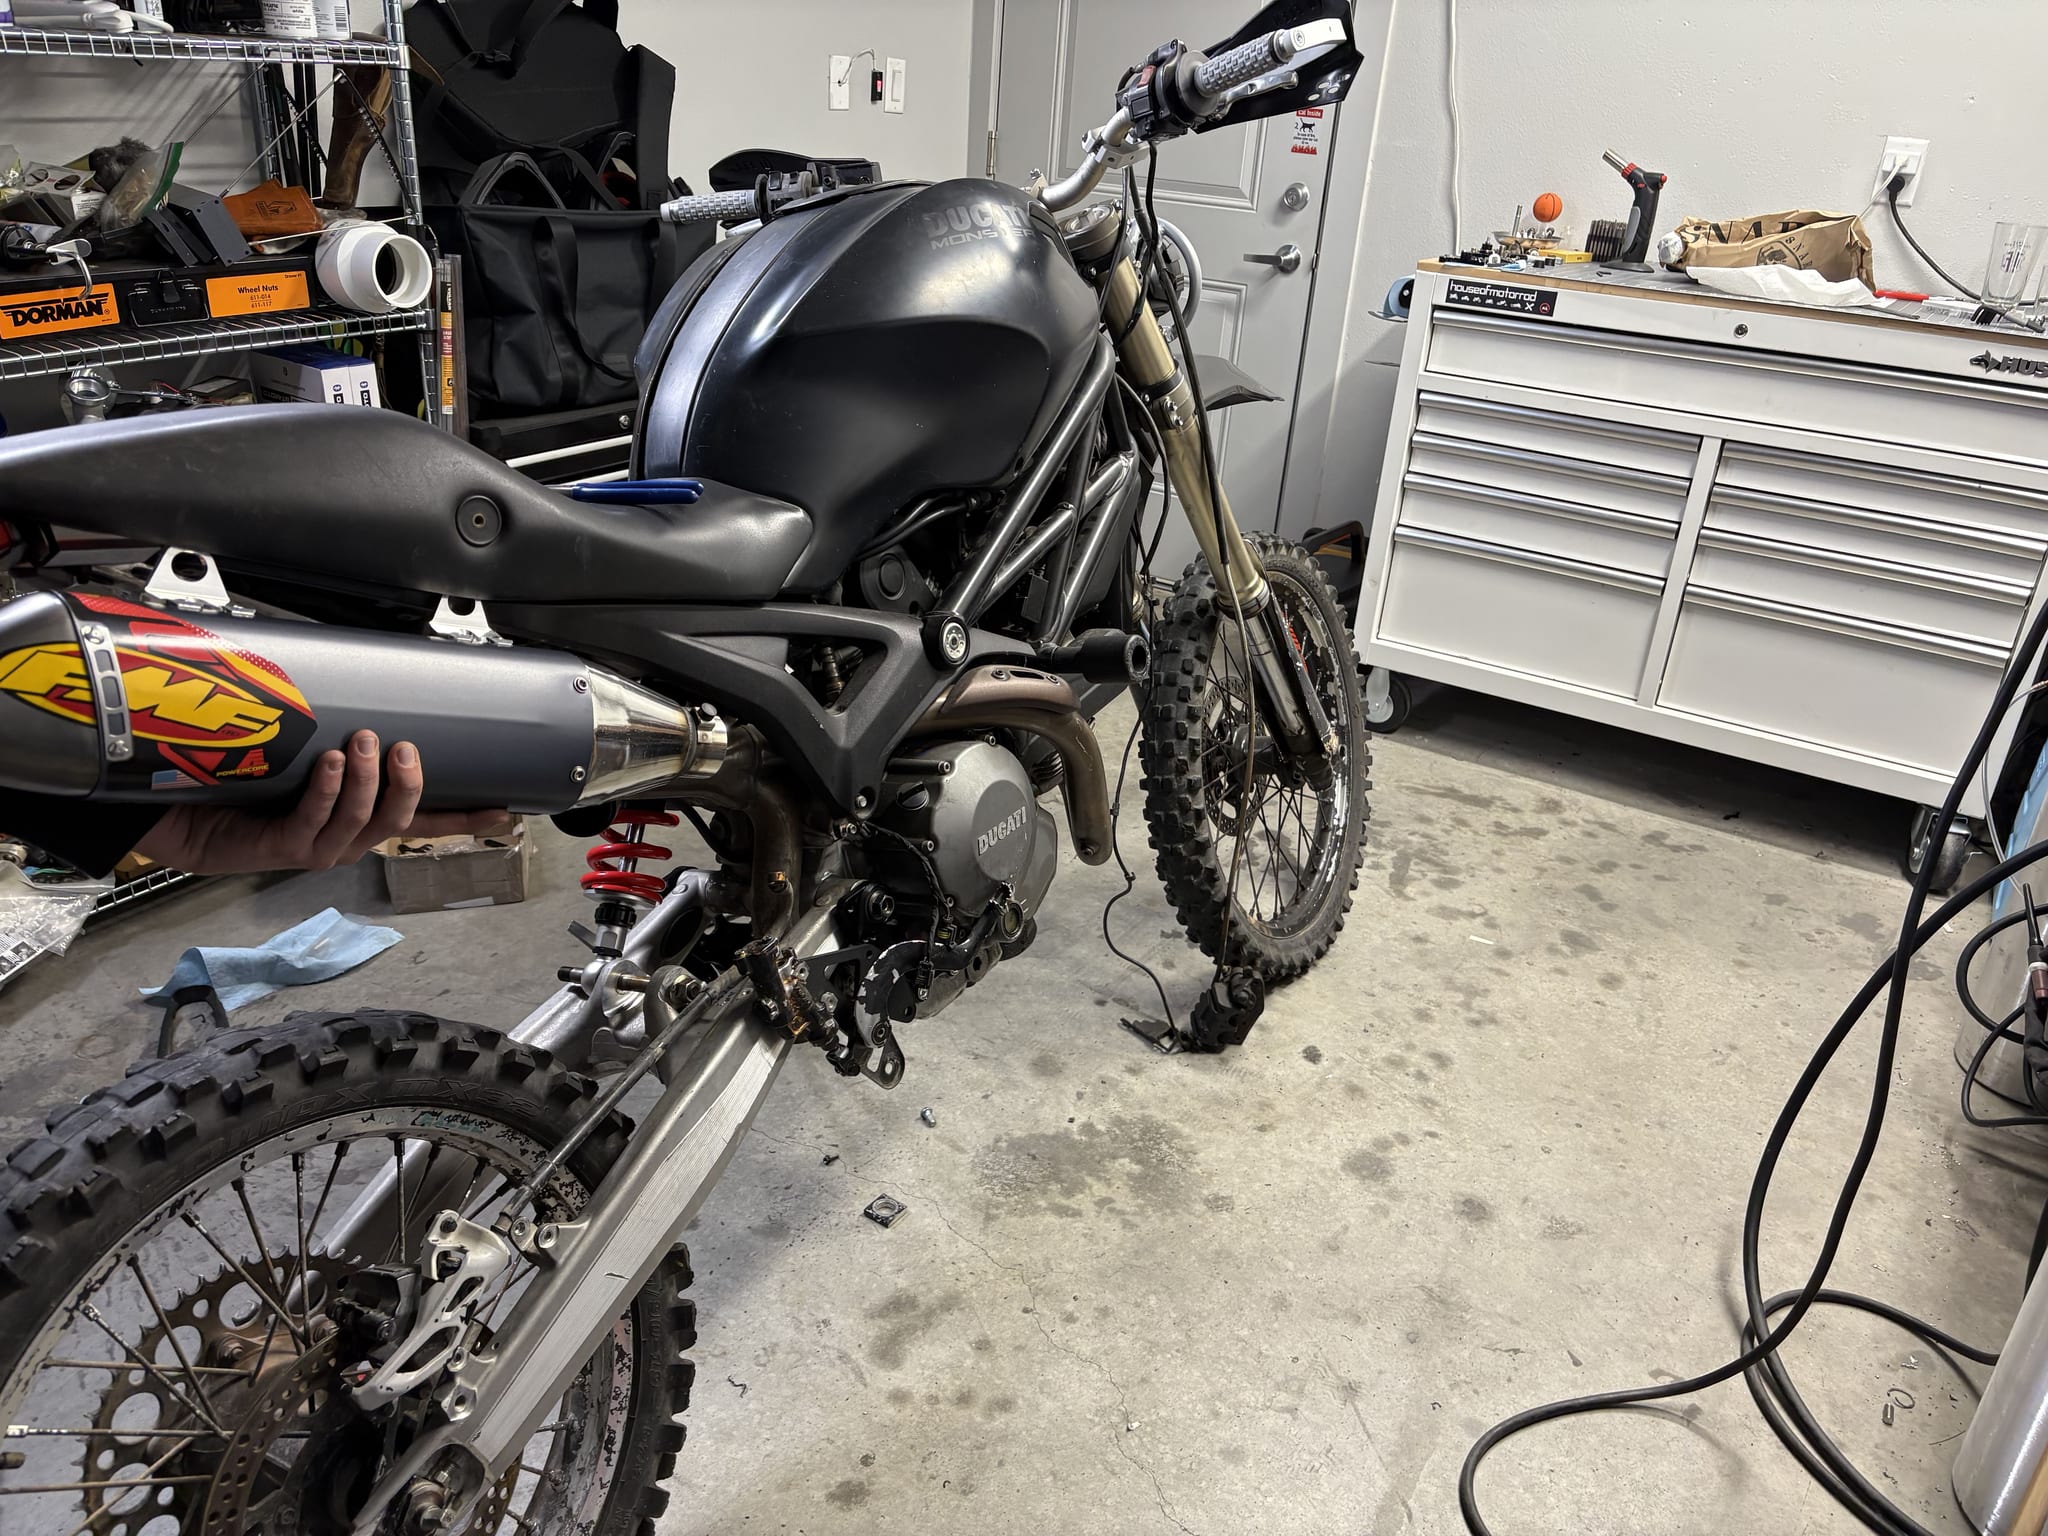
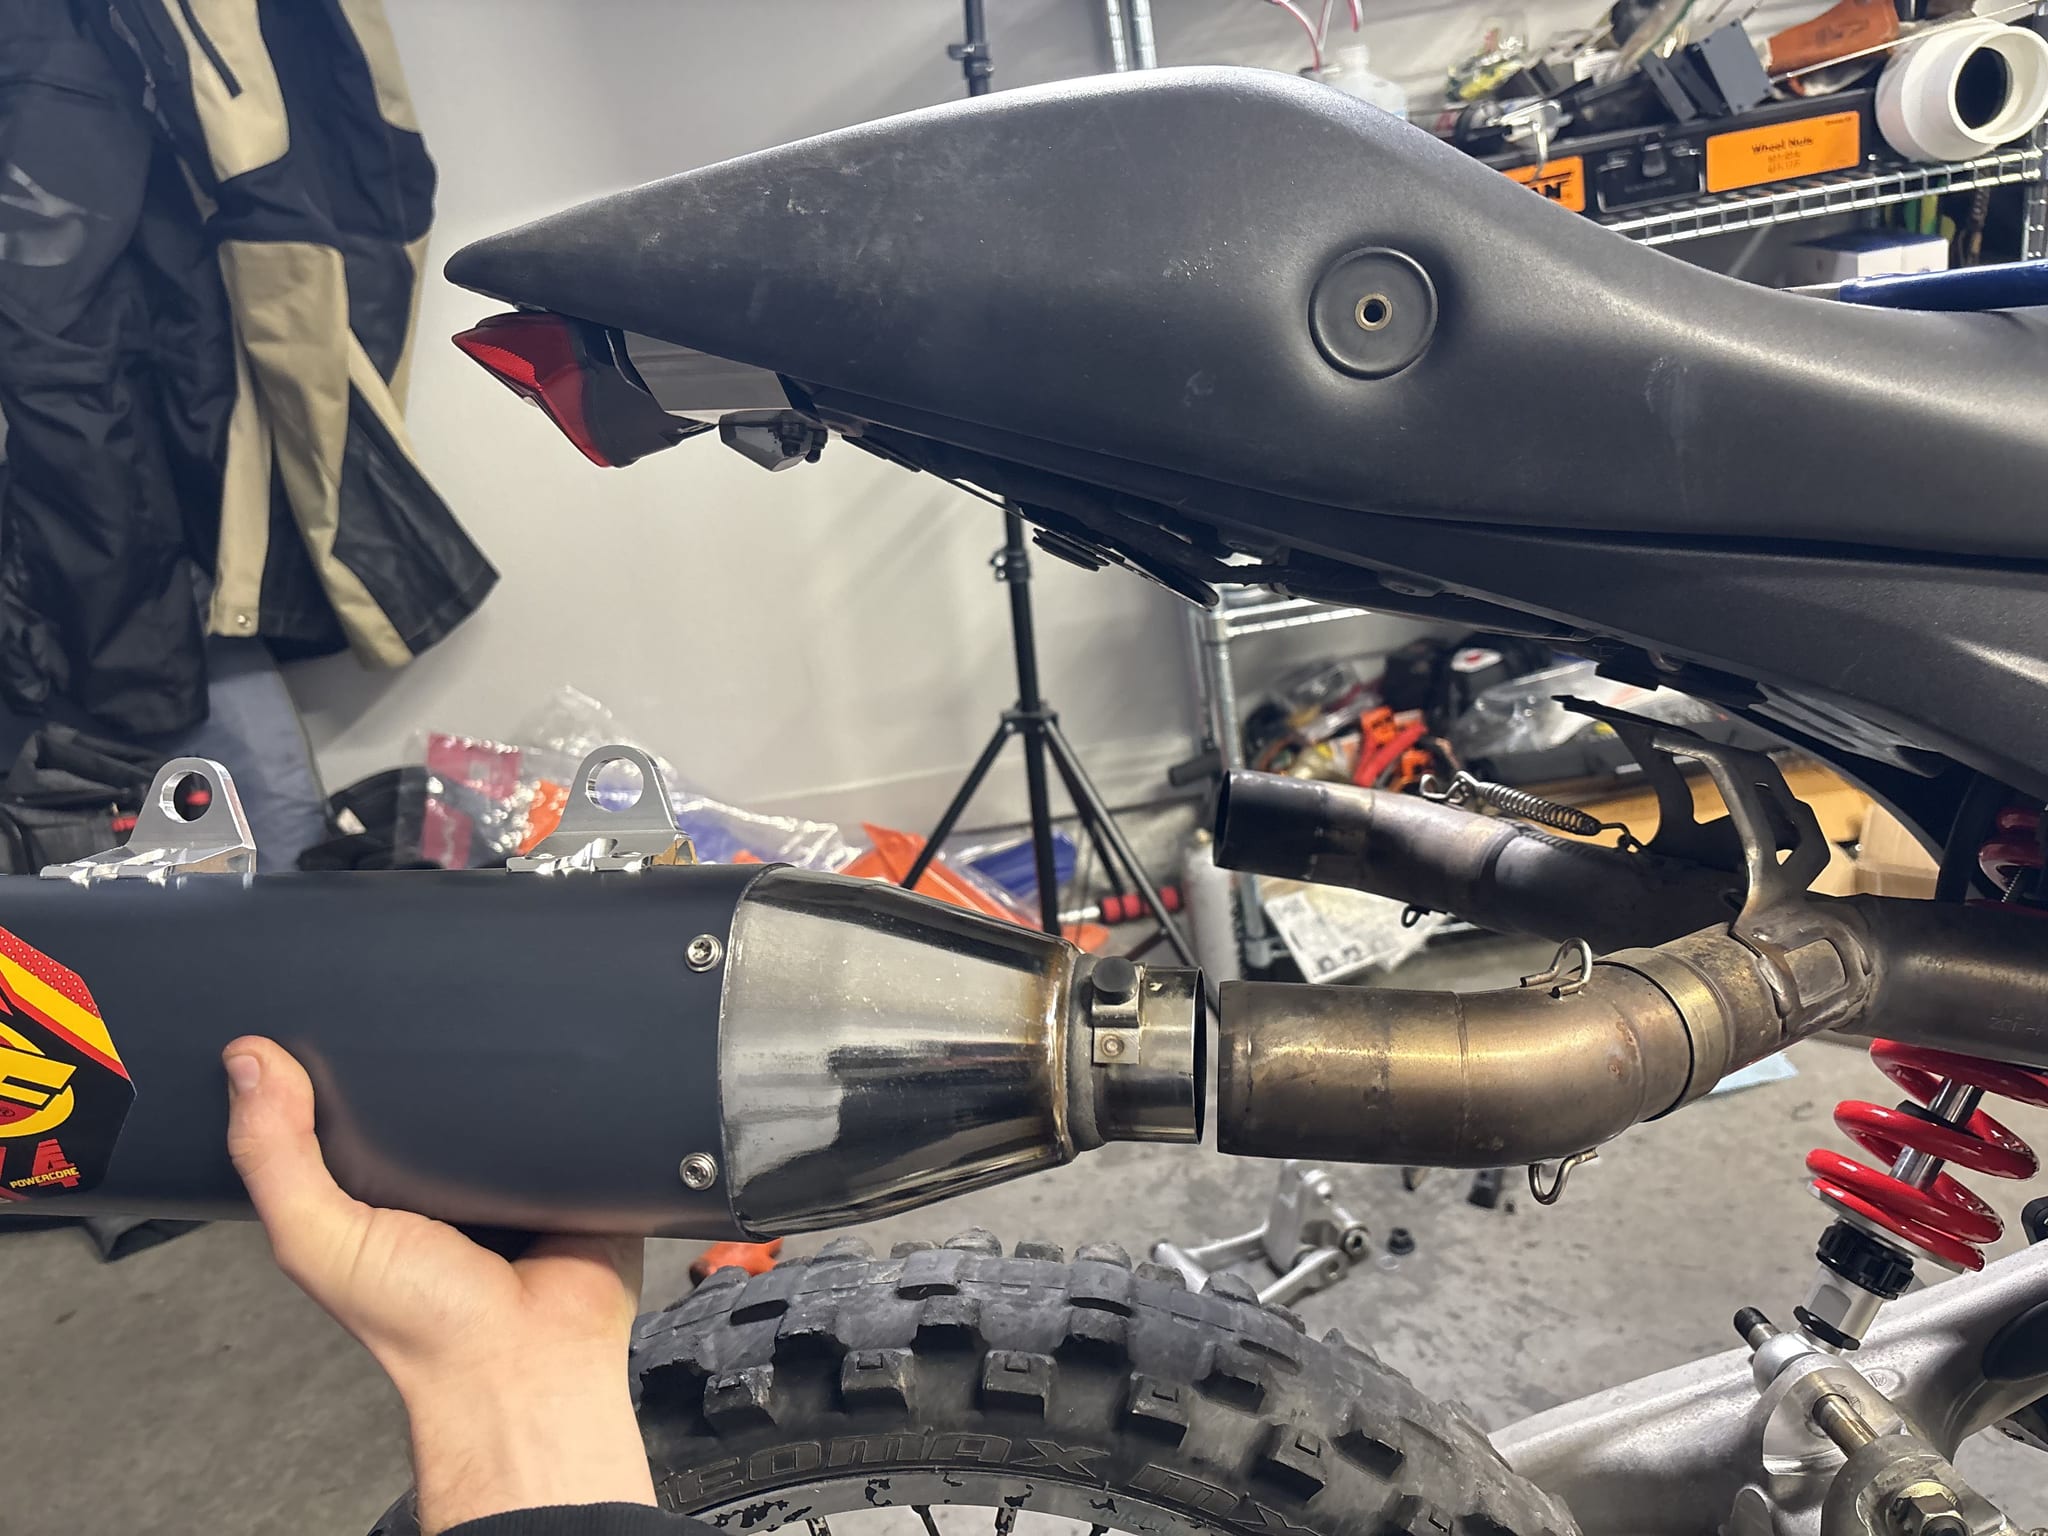
Next up was the exhaust. I knew I wanted a proper FMF dirt bike muffler, but I didn’t know whether I would need one or two. I bought two and did a rough test fit. It didn’t look good and would have taken a lot more fabrication, so I sold the spare and went with a single muffler.
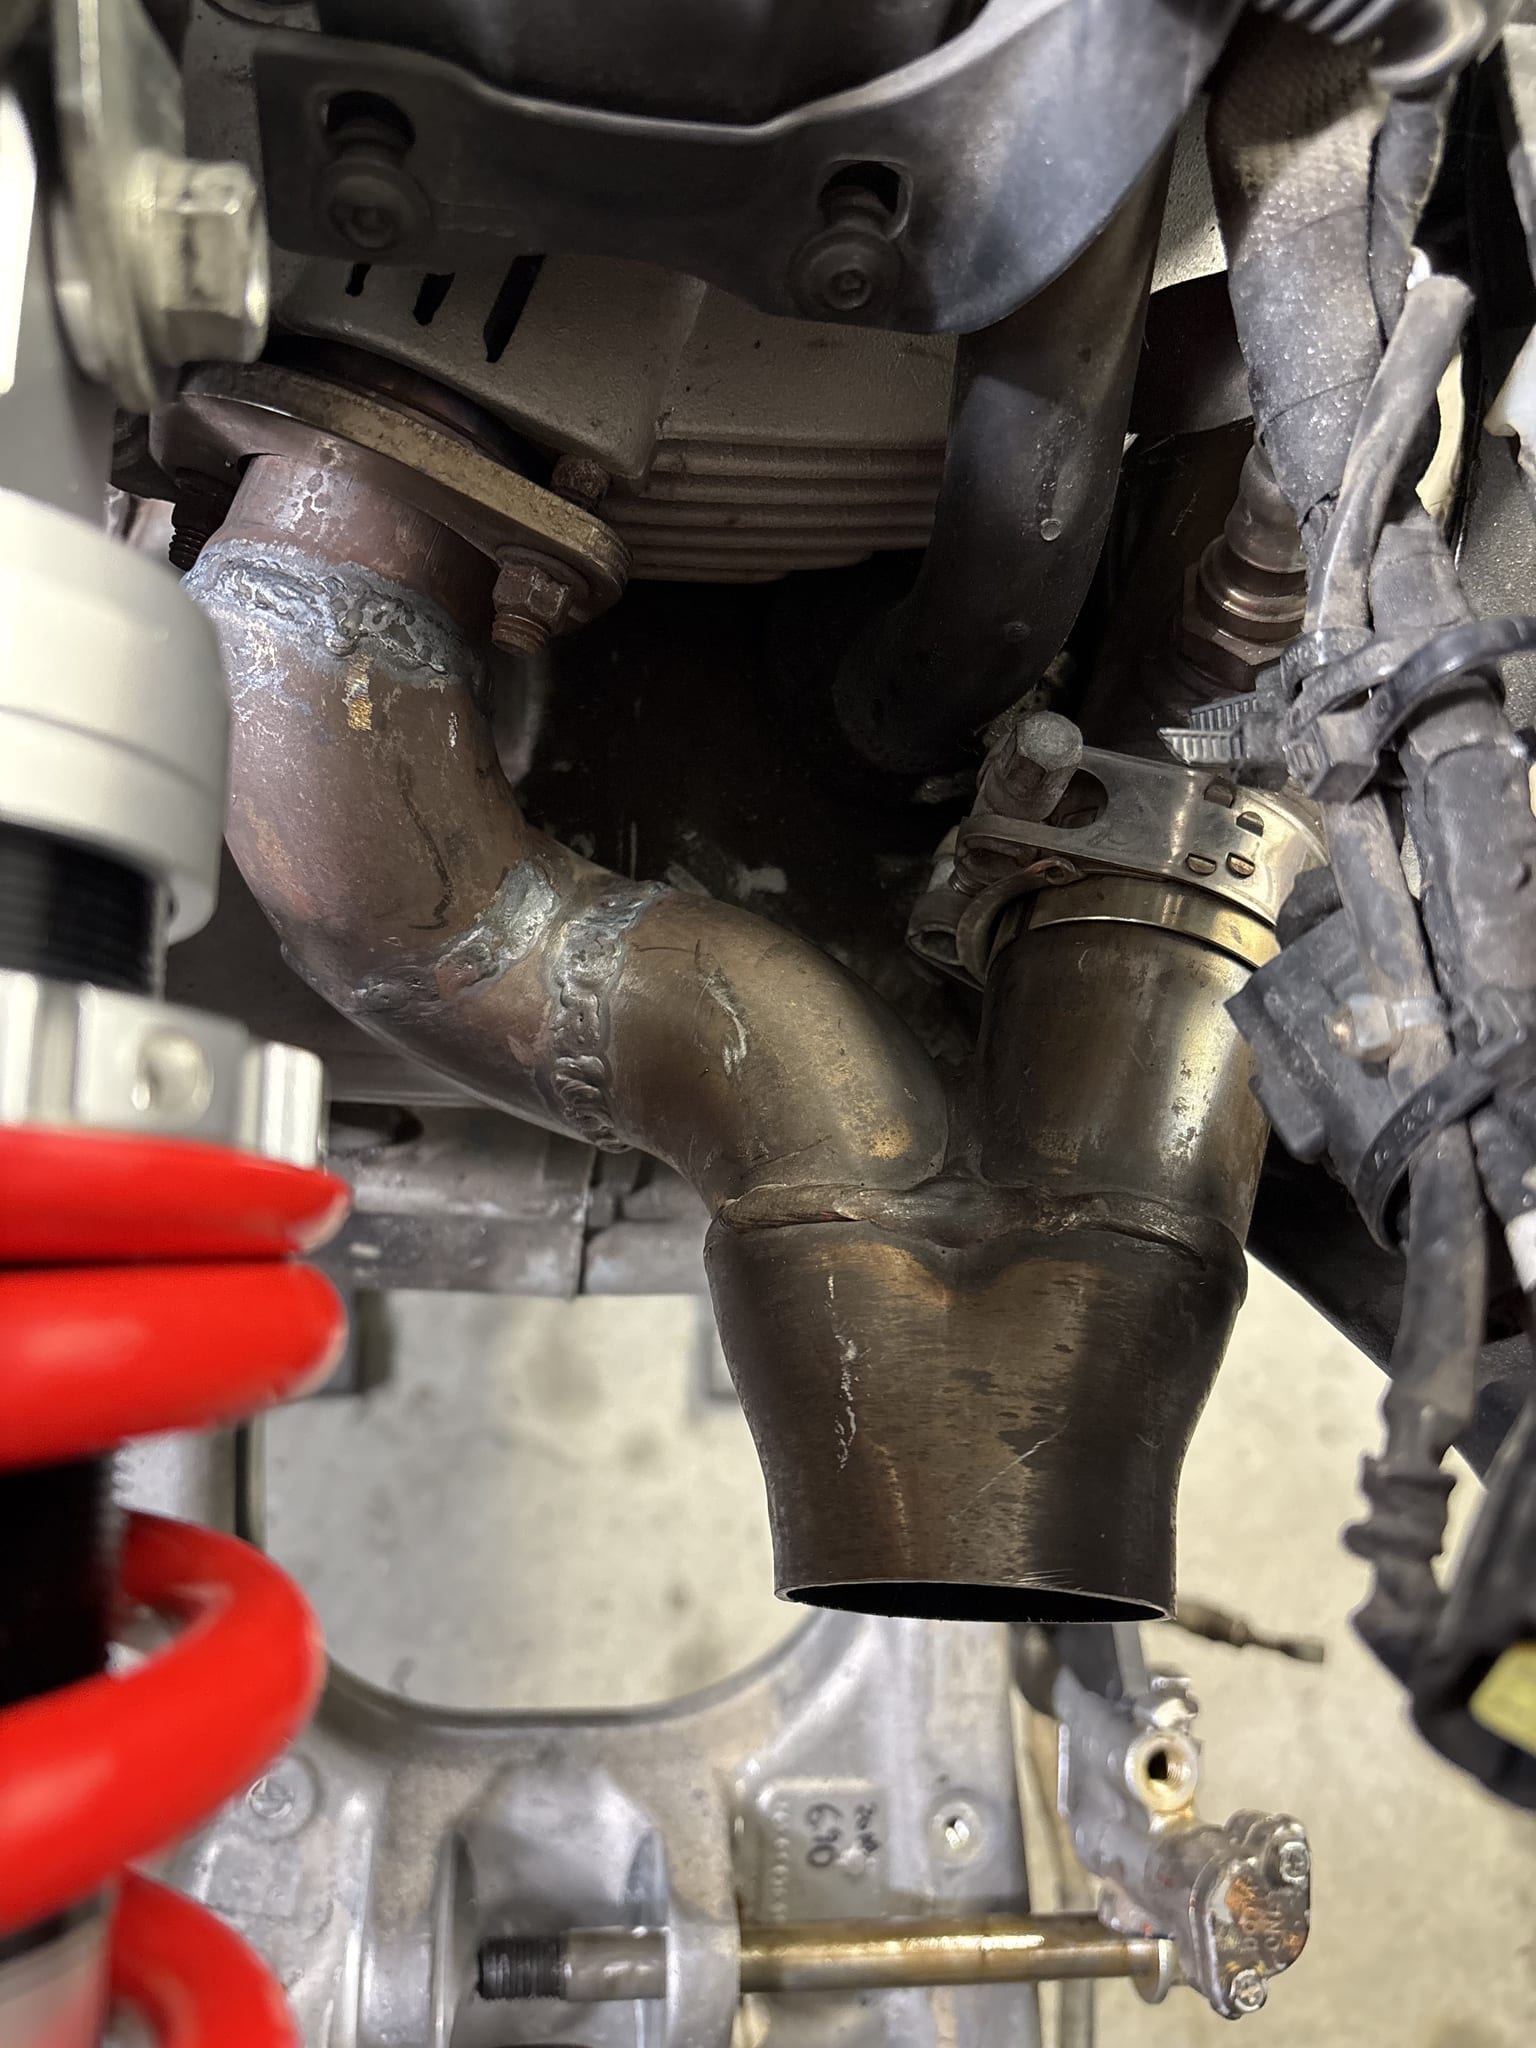
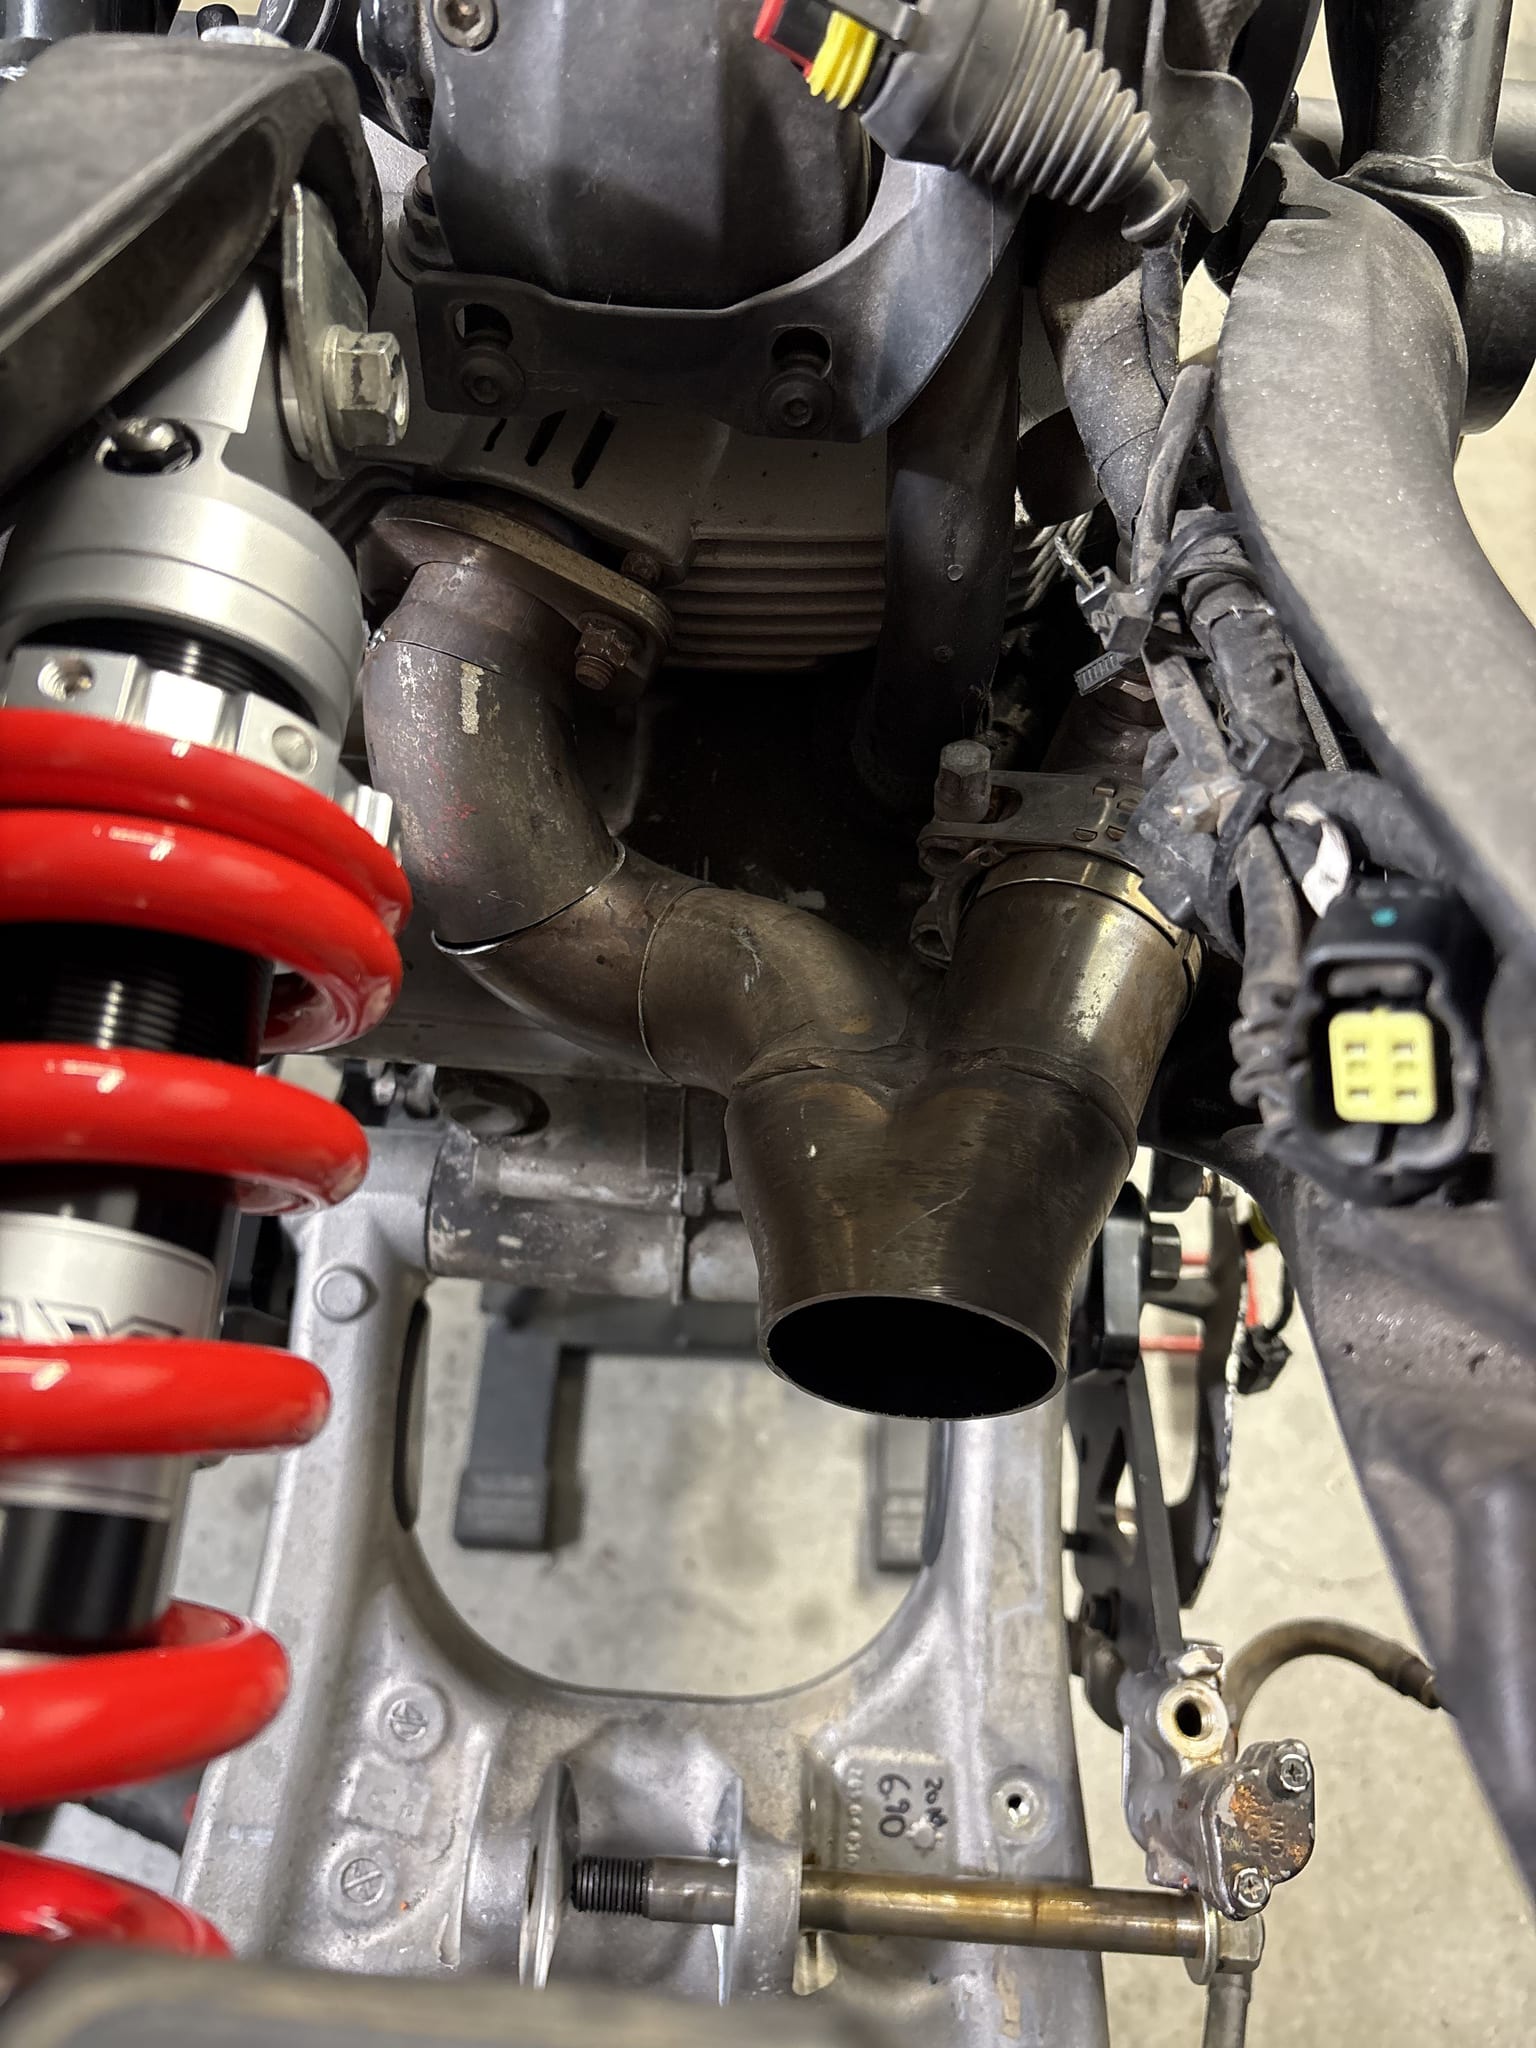
I cut up the original Ducati exhaust and welded it back together without the equal-length headers, because the rear cylinder’s header no longer fit through the swingarm the way it did with the Ducati swingarm. That makes the rear header incredibly short, about 9 inches before the 2-into-1 collector, but it was one more compromise I had to make to build this bike.
The first test ride
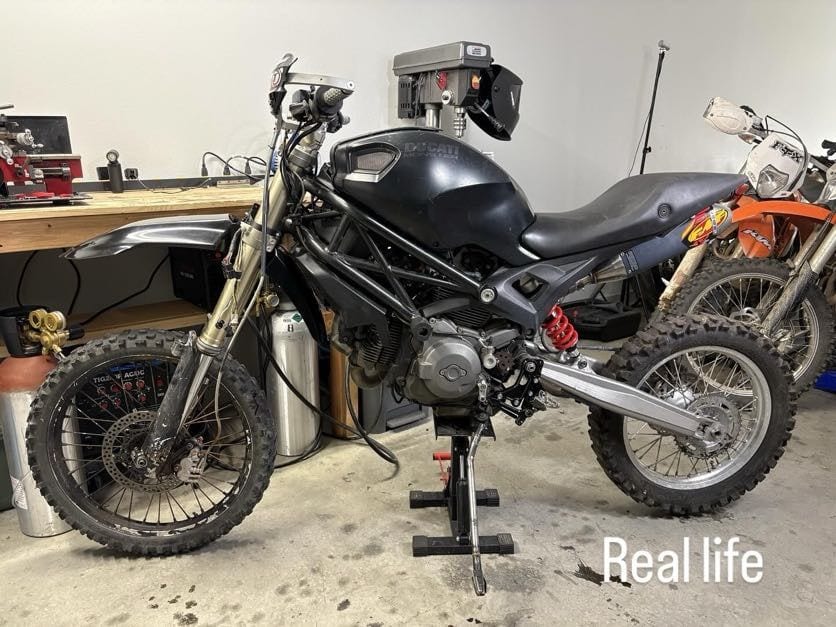
Now I could finally take it for its first test ride, and it was genuinely a monster. It was so top-heavy, tall and cumbersome that it was terribly unwieldy to ride. The Ducati seat slopes down, and the massive hump of the Ducati gas tank pushed me back into a pit that I couldn’t move out of. If you have ever ridden a dirt bike, you know the seats are long and flat so you can shift your weight around. The Ducati seat is designed to hold you in place, which is exactly what you want on the road and exactly what you don’t want in the dirt.
I had known for a long time that I wanted this thing to actually look like a dirt bike, but I was always scared of how much work it would take. Riding it like this is what finally convinced me.
Making it a dirt bike
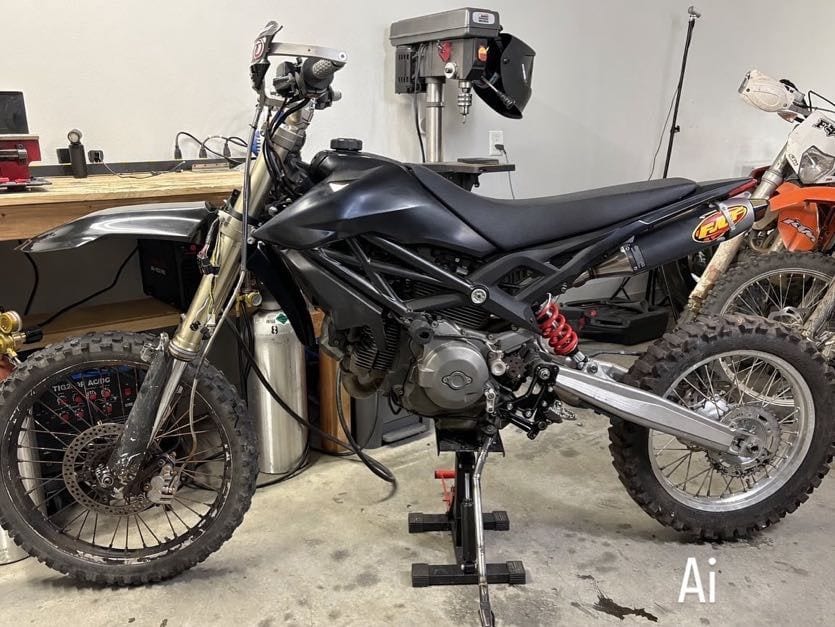
I started by removing the gas tank, then the airbox, and finally the seat. That alone made the bike feel tiny compared to the Hunchback of Notre Dame look it had before. Seeing it stripped down like this, I finally felt it could be a real off-road weapon.
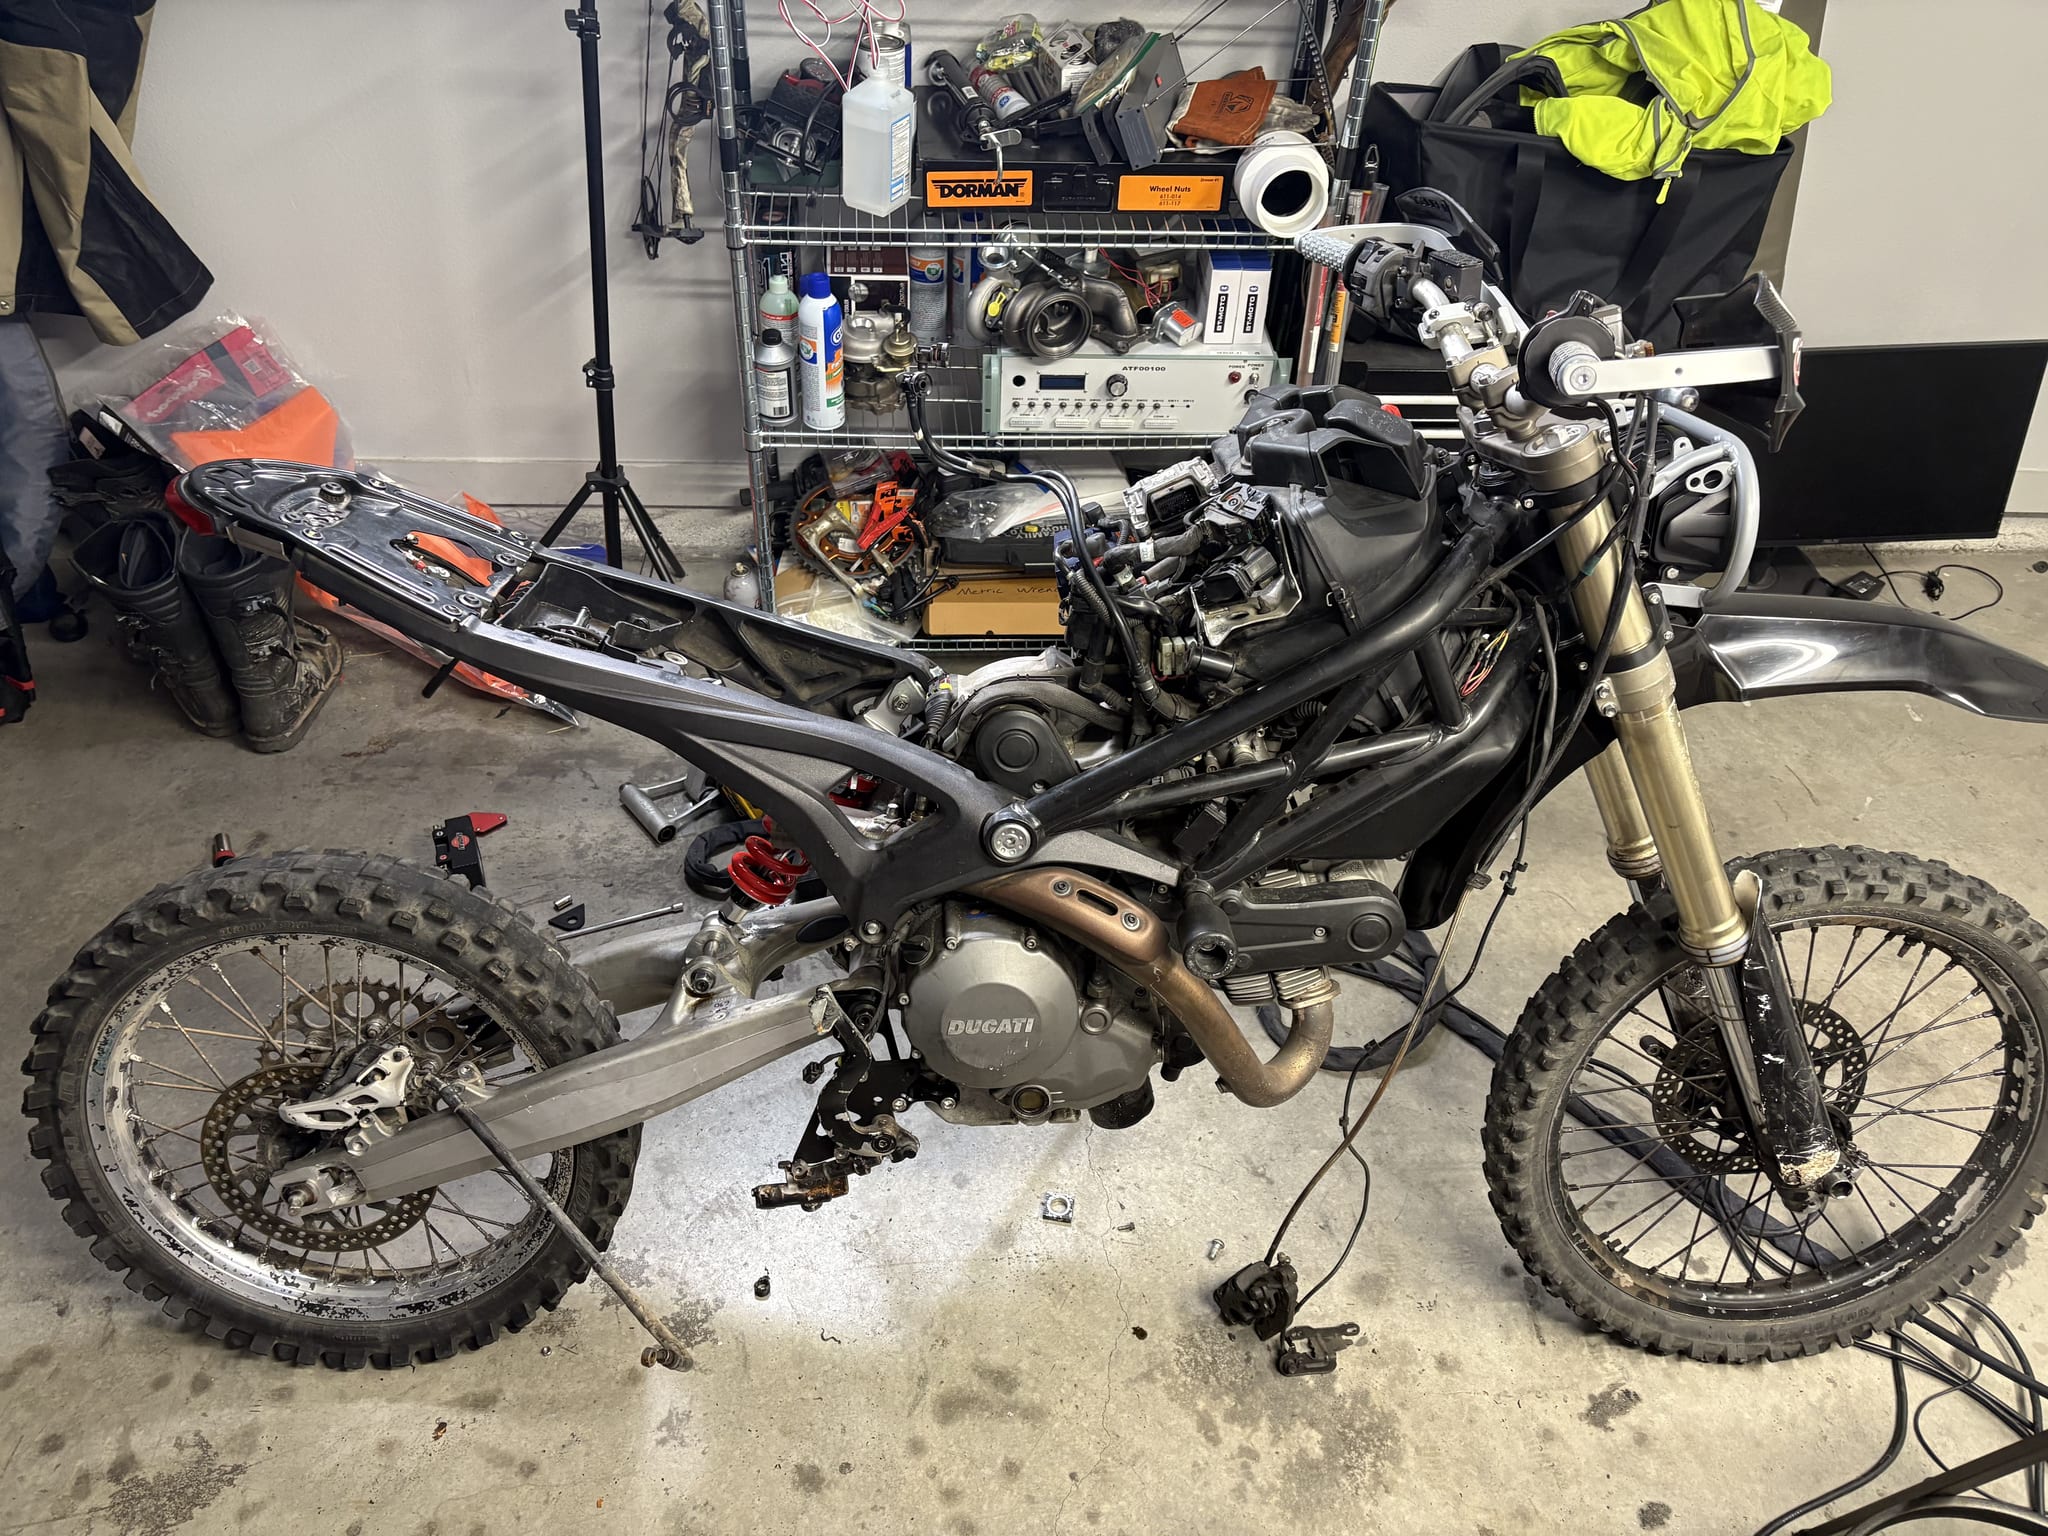
I solved problems from the bottom up. The easiest was air: I fitted pod filters with short extensions to the throttle bodies. Yes, I oiled the pod filters. No, I don’t clean them often enough. They are a pain to get to.
Next up was fuel. I tried my trusty message-everyone-on-eBay method that had worked so many times before, and this time it didn’t. The problem is that the Ducati frame is super wide, way wider than any dirt bike’s, so the gas tank and front plastics had to somehow fit around and on top of it while still looking good. I ordered and returned a few tanks and asked a couple of friends who work at motorcycle shops to help me find something, and I just couldn’t do it. Until I finally tried the 2006 YZ450F tank I already had lying around. I honestly didn’t think it would work.
The 2006 YZ450F has a backbone frame, meaning the gas tank sits on top of a single spine, a lot like a bicycle frame. Most modern dirt bikes use a twin-spar frame, where the tank sits down between the two upper frame rails.
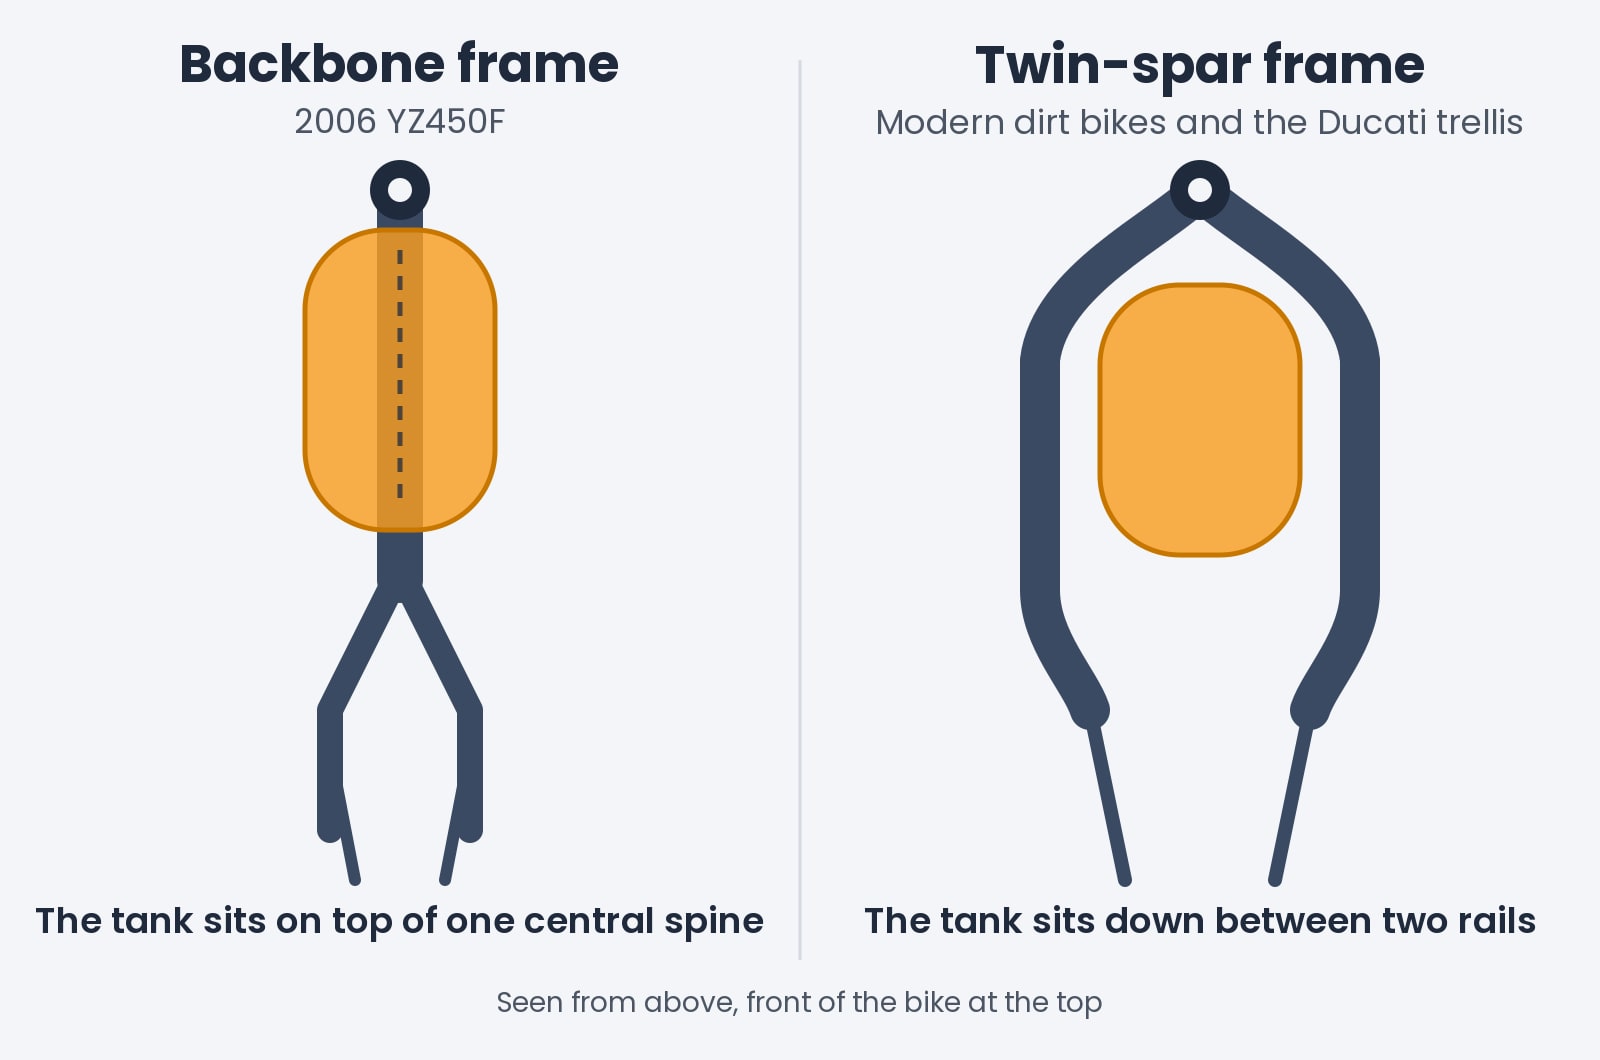
I had assumed the tank should sit inside the Ducati frame the same way it sits inside a twin-spar dirt bike frame, since the Ducati is built much the same way, just far wider. That was a huge mistake. I set the YZ450F tank on top of the Ducati’s open chest, bolted up the original blue plastics, and tied them together at the bottom with a piece of string to stretch them around the Ducati’s frame. It was… not perfect, but pretty damn good.
One of the best parts about the YZ tank is that the channel where the YZ frame is supposed to sit lines up perfectly with where my air filters are.
Fuel
I welded up, painted and mounted some brackets to secure the tank. But here is where the real problem with that tank started. The YZ450F tank was made for a carbureted bike, which means fuel is gravity fed from the tank to the engine. The Ducati engine, on the other hand, is fuel injected, and there is no easy way to fit a fuel pump inside the tiny YZ tank.
I originally planned to use an external fuel pump and pressure regulator from Amazon, but that setup needs a return line to send excess fuel back to the tank, and I really didn’t want to drill a hole in it. On top of that, every pump I could find was sized for a car, which is way too much flow; pumping that much fuel can heat it up and cause problems.
After hours of scouring old forum posts, I stumbled on a single mention, from about ten years ago, of someone converting a carbureted bike to fuel injection. He had used a Honda TRX500 fuel pump. What makes this pump special is that the ATV it comes from has a gravity-fed main tank that feeds a small “swirl pot” with its own fuel pump inside. That’s right: this pump comes already installed in a tiny fuel tank that is designed to be gravity fed by a bigger one. Literally perfect for what I needed.
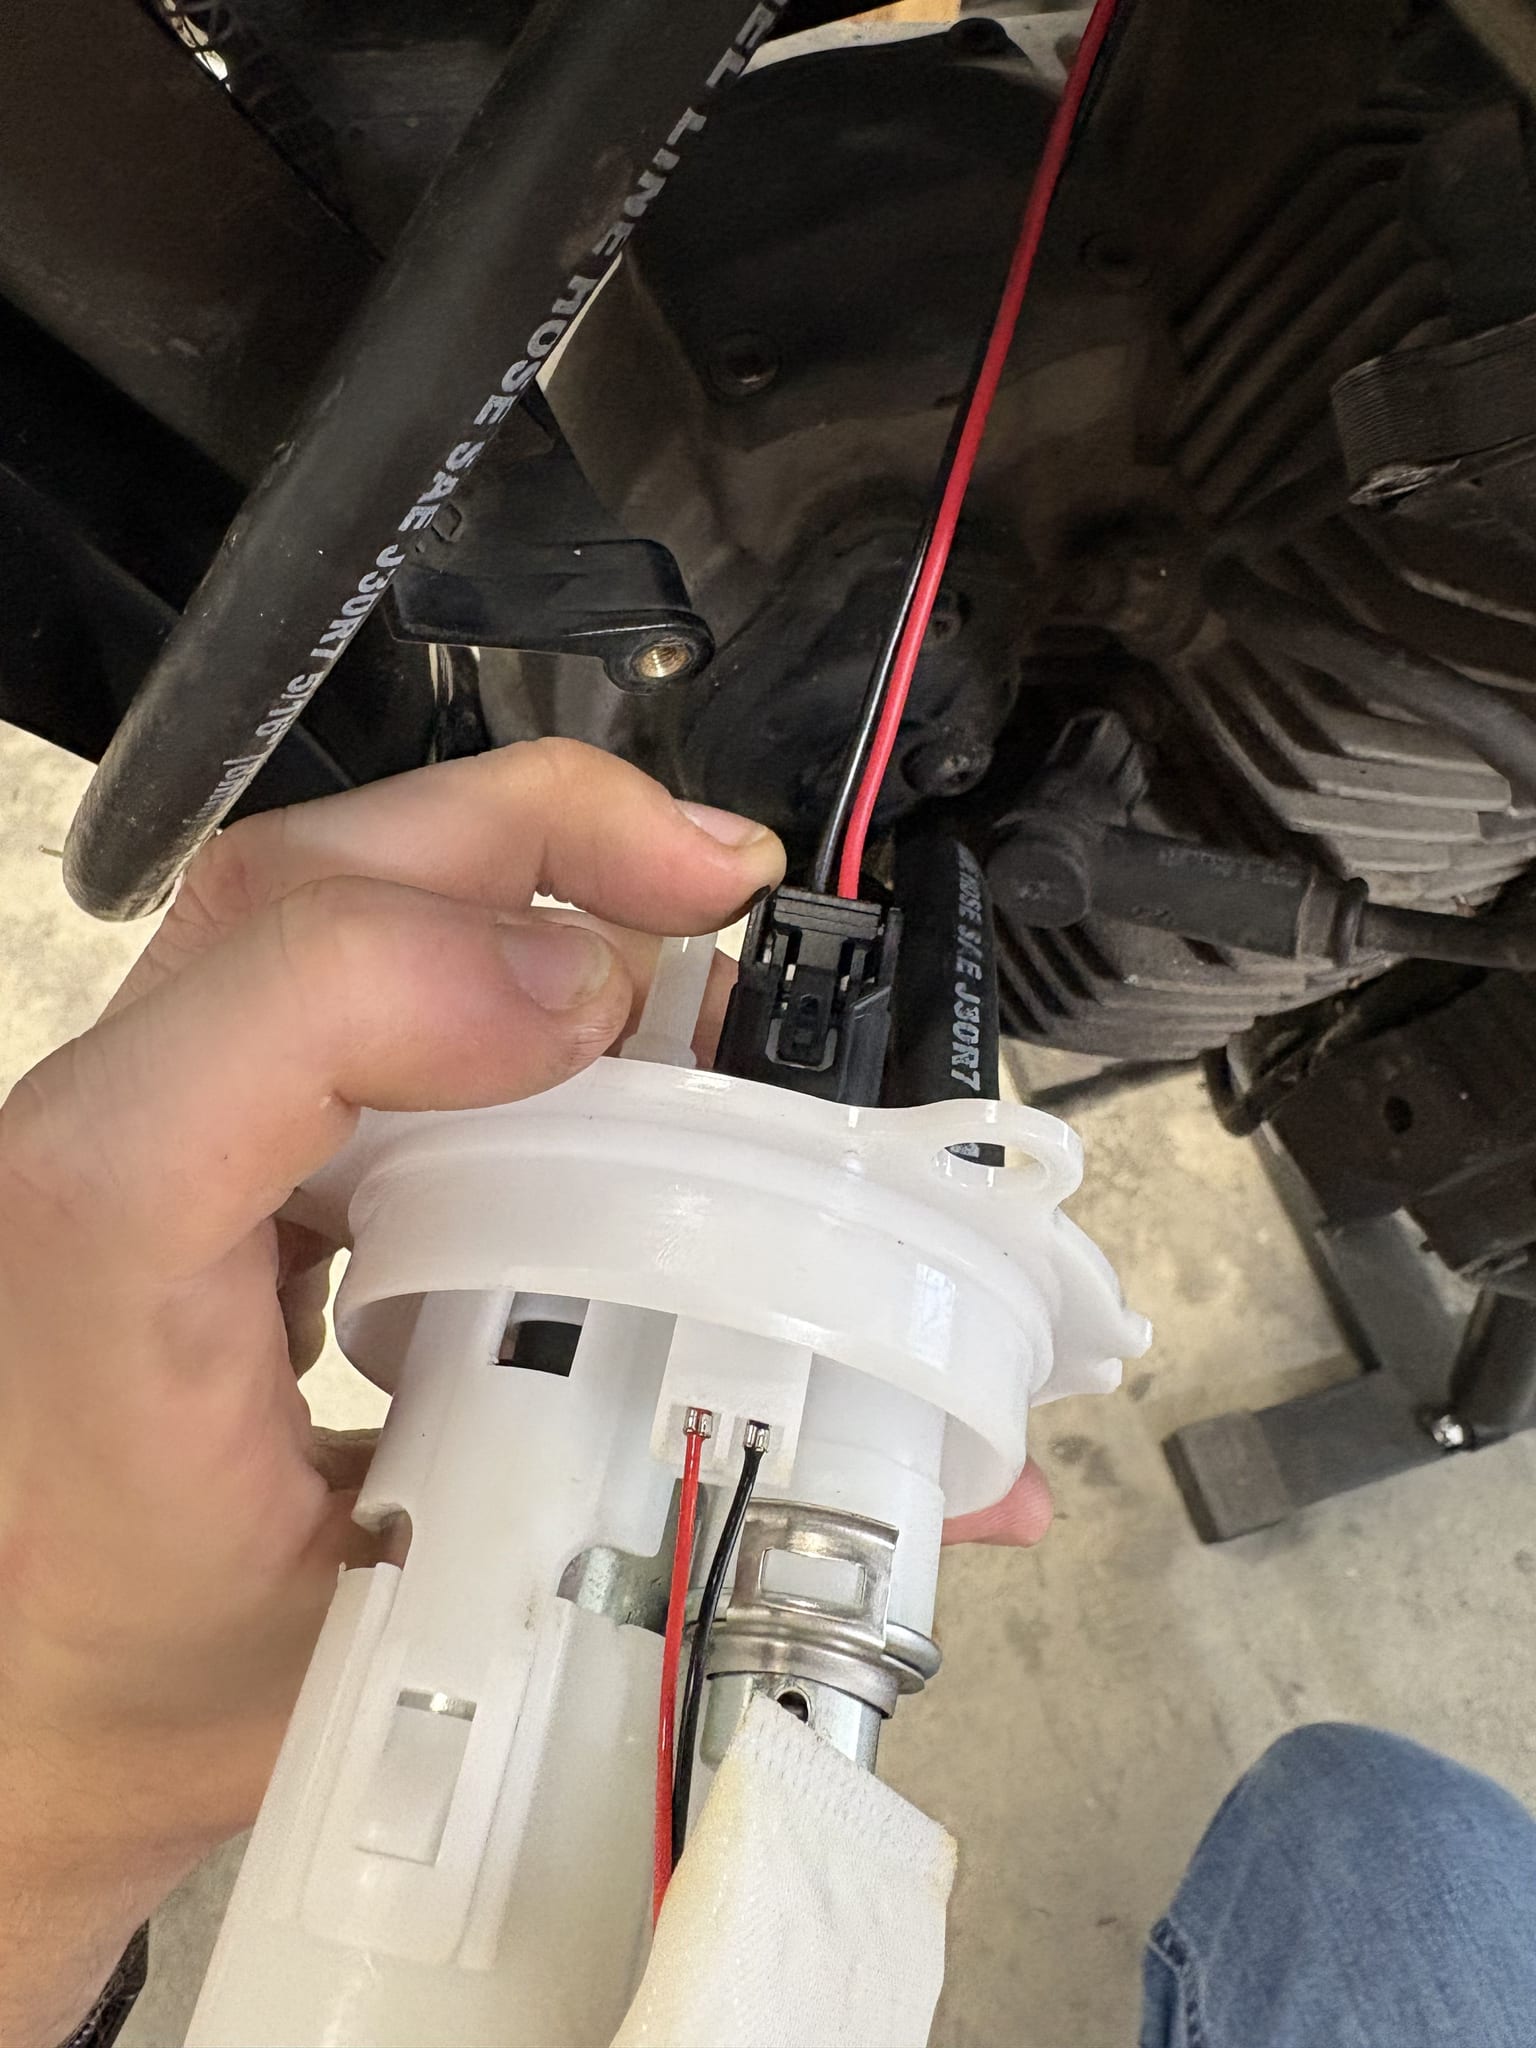
The pump came with a 3.5 bar fuel pressure regulator, while the Ducati’s is 3.2 bar. I rode around like this for a while testing the bike, and the muffler got incredibly sooty. I had hoped that since the muffler and intake flowed so much better, I would get away with the extra fuel. I didn’t. Luckily the TRX pump has another feature that makes it amazing for custom builds: it uses bog-standard fuel pressure regulators, the same ones used in Honda cars. I found a 3.2 bar regulator for a Honda Civic, it popped right in, and the bike felt like it had doubled its horsepower.
Everything else
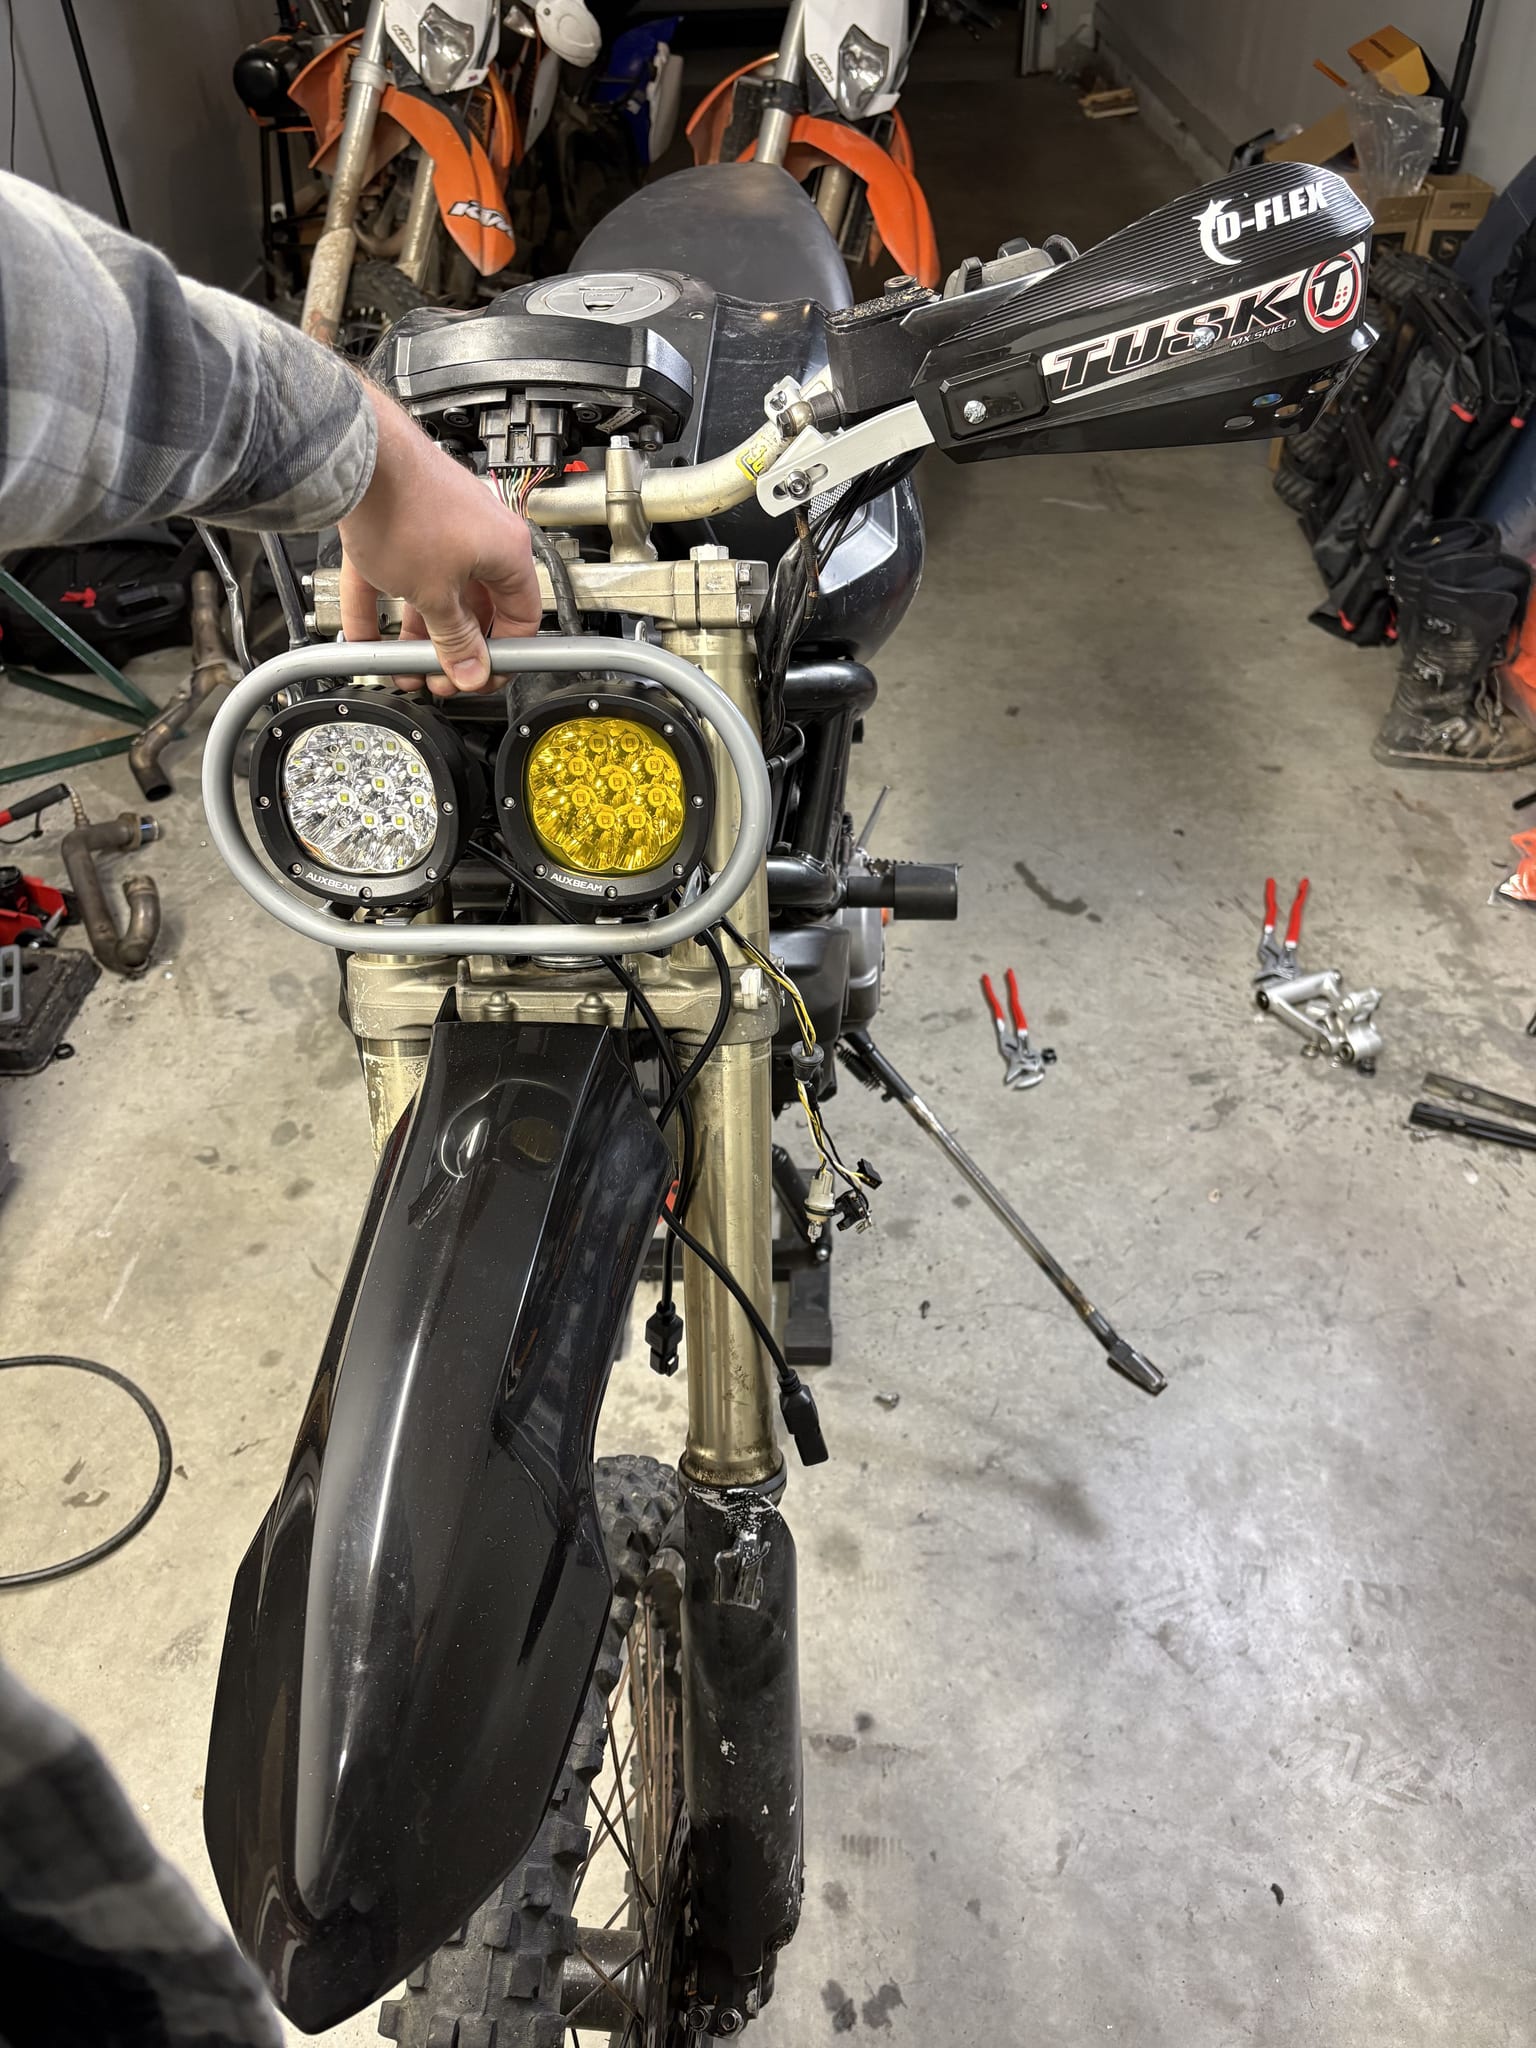
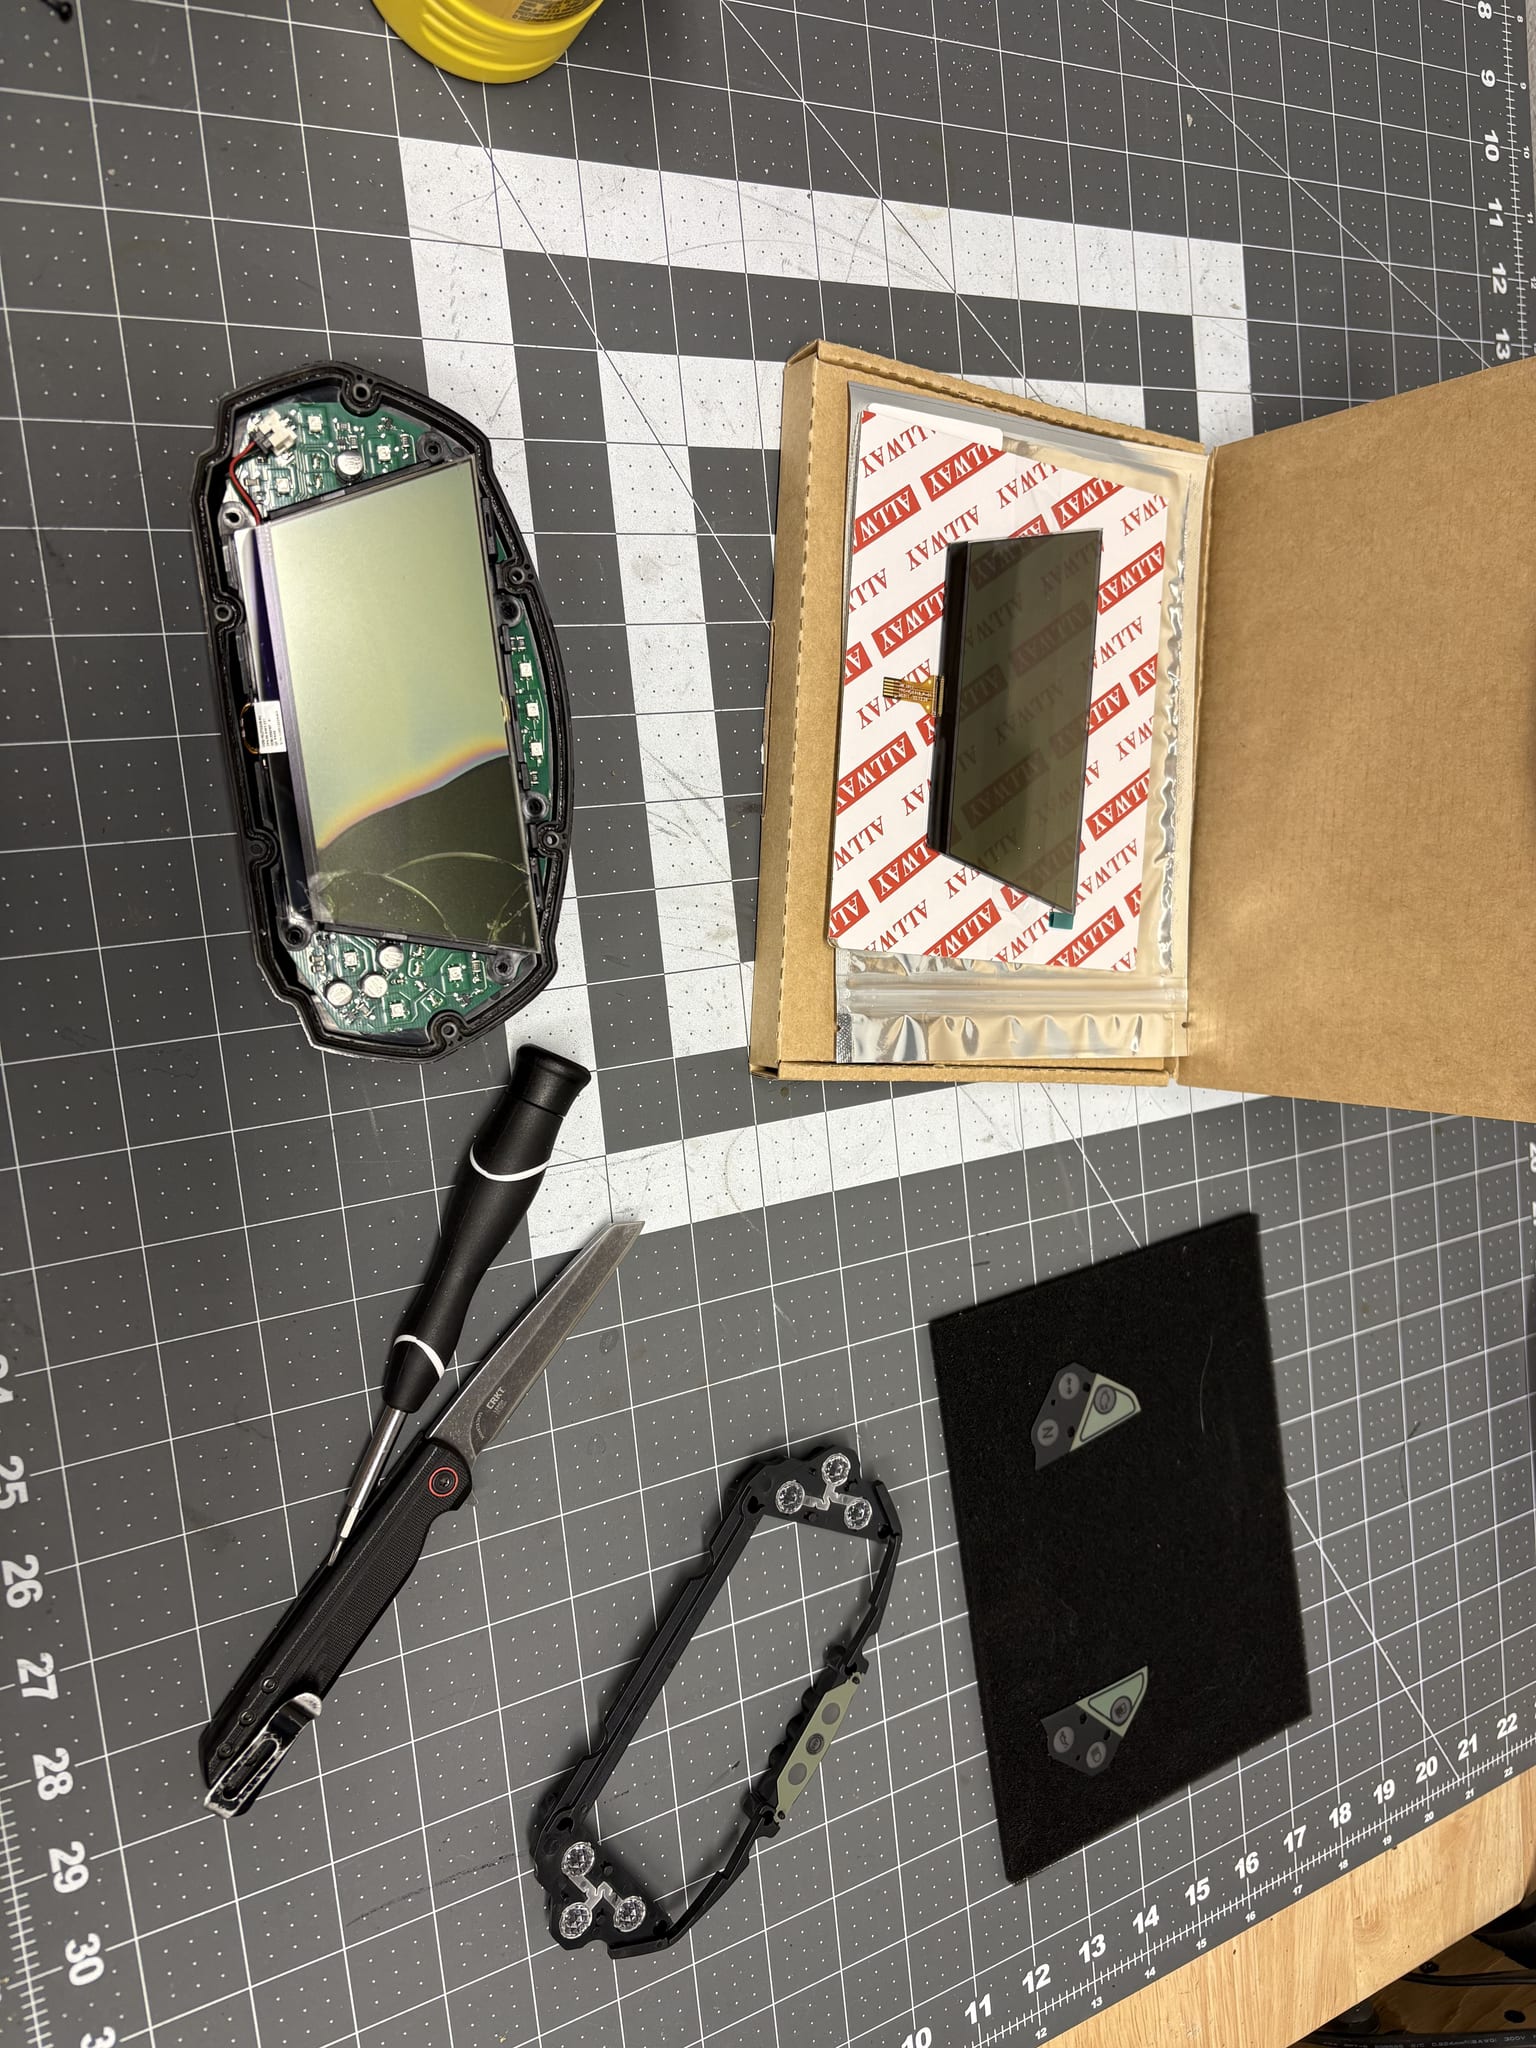
That was basically the whole build. Along the way I also welded up a headlight bracket, made a custom amber headlight, rebuilt a broken display, made tons of brackets for the plastics and the seat, stripped all the spray paint off the YZ450F parts, got incredibly frustrated many, many times, and got hurt a couple of times. But overall the project went way better than I ever expected. Some things went together almost too easily, like the front forks onto the frame, and the gas tank.
Build sheet
- Engine and frame: 2012 Ducati Monster 696, bought crashed for $1,200
- Forks and triple tree: 2006 Yamaha YZ450F, on a machined, flanged steering spacer
- Swingarm: KTM 690 Enduro, mounted upside down, with the engine’s pivot nubs cut off and a machined pivot spacer
- Rear shock: aftermarket Honda Superhawk shock, offset to the left with a welded lower mount
- Footpegs: YZ450F pegs and rear brake master on CNC Ducati rearsets, with SendCutSend adapter plates
- Fuel: 2006 YZ450F tank, Honda TRX500 swirl pot and pump, 3.2 bar Honda Civic regulator
- Intake and exhaust: pod filters; shortened Ducati 2-into-1 header into a single FMF muffler
- Body: YZ450F plastics and seat, custom white and amber headlight
Out on the trail